Reference
Curity Phantom Token Auth Policy
Authenticate requests with Phantom Tokens issued by Curity. The payload of the Phantom JWT token, if successfully authenticated, with be on the request.user.data object accessible to the runtime.
Configuration
The configuration shows how to configure the policy in the 'policies.json' document.
{
  "name": "my-curity-phantom-token-inbound-policy",
  "policyType": "curity-phantom-token-inbound",
  "handler": {
    "export": "CurityPhantomTokenInboundPolicy",
    "module": "$import(@zuplo/runtime)",
    "options": {
      "cacheDurationSeconds": 600
    }
  }
}
Policy Configuration
name<string> - The name of your policy instance. This is used as a reference in your routes.policyType<string> - The identifier of the policy. This is used by the Zuplo UI. Value should becurity-phantom-token-inbound.handler.export<string> - The name of the exported type. Value should beCurityPhantomTokenInboundPolicy.handler.module<string> - The module containing the policy. Value should be$import(@zuplo/runtime).handler.options<object> - The options for this policy. See Policy Options below.
Policy Options
The options for this policy are specified below. All properties are optional unless specifically marked as required.
clientId<string> (Required) -The client ID of the Curity application.clientSecret<string> (Required) -The client secret of the Curity application.introspectionUrl<string> (Required) -The introspection URL of the Curity application.cacheDurationSeconds<number> -The duration in seconds to cache the introspected response.Defaults to600.
Using the Policy
Adding the Curity Phantom Token Pattern to your route is trivial. Before getting started, make sure that you have an instance of the Curity Identity Server up and running.
Setup the Curity Identity Server#
Getting the Curity Identity Server up and running is quick. Follow the Getting Started Guide to install and configure the server.
Introspection#
In addition to the instructions outlined in the Getting Started Guide a client that enable introspection is needed. Typical recommendation for this is to create a new separate client that only enables the introspection capability.
Exposing the Runtime#
Depending on where the Curity Identity Server is deployed you might have to expose the runtime node using a reverse proxy. One option is to use ngrok but other solutions could also be used.
OAuth Tools#
With the server up and running and available you can use OAuth Tools to test the configuration and make sure that you are able to obtain a token. If an opaque token is possible to obtain you are good to continue.
Set Environment Variables#
Before adding the policy, there are a few environment variables that will need to be set that will be used in the Curity Phantom Token Policy.
-
In the Zuplo Portal open the Environment Variables section in the Settings tab.
-
Click Add new Variable and enter the name
INTROSPECTION_URLin the name field. Set the value to URL endpoint of the Curity Identity Server that handles introspection. Ex.https://idsvr.example.com/oauth/v2/oauth-introspect -
Click Add new Variable again and enter the name
CLIENT_IDin the name field. Set the value to ID of the client that you added the introspection capability to. -
Click Add new Variable again and enter the name
CLIENT_SECRETin the name field. Set the value to the secret of the client that you added the introspection capability to. Make sure to enableis Secret?.
Add the Curity Phantom Token Policy#
The next step is to add the Curity Phantom Token Auth policy to a route in your project.
The next step is to add the Curity Phantom Token Auth policy to a route in your project.
-
In the Zuplo Portal open the Route Designer in the Files tab then click routes.oas.json.
-
Select or create a route that you want to authenticate with the Curity Phantom Token Pattern. Expand the Policies section and click Add Policy. Search for and select the Curity Phantom Token Auth policy.
-
Add the following to options:
    "clientId": "$env(CLIENT_ID)",
    "clientSecret": "$env(CLIENT_SECRET)",
    "introspectionUrl": "$env(INTROSPECTION_URL)",
The policy configuration should now look like this:
-
Click OK to save the policy.
-
Click Save All to save all the configurations.
Test the Policy#
Head over to OAuth Tools to test the policy.
-
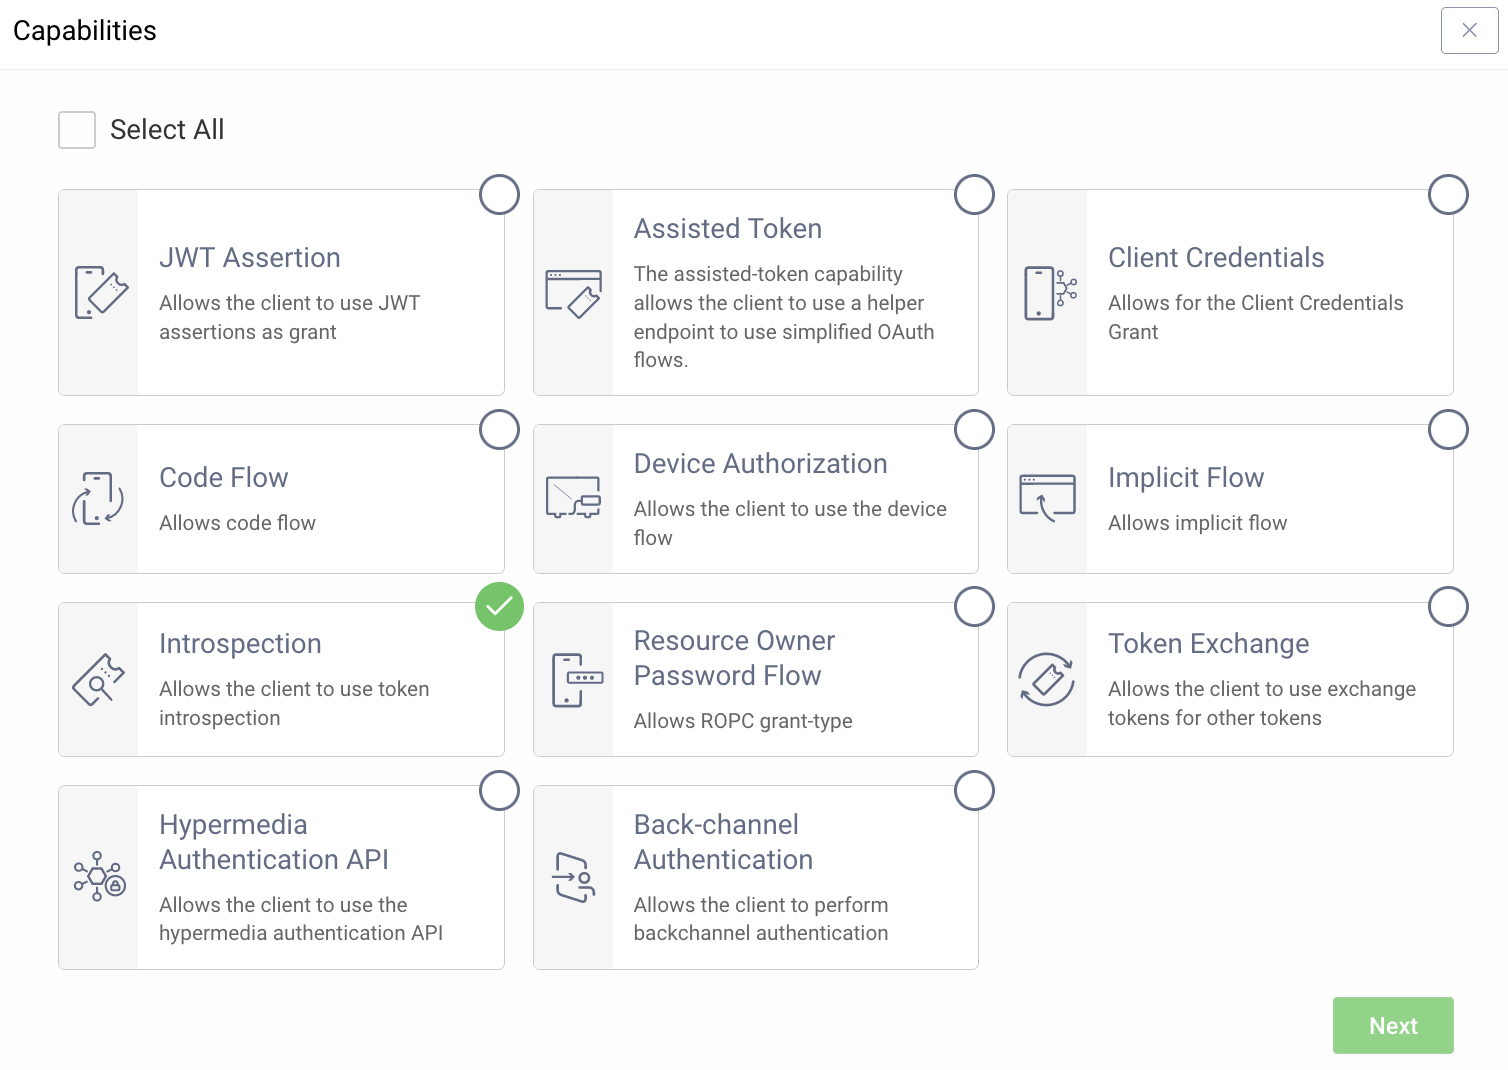
Run a flow to obtain an opaque token (typically Code Flow)
-
Configure an External API flow and add your Zuplo endpoint in the API Endpoint field. Set the request method and choose the opaque token obtained in step 1.
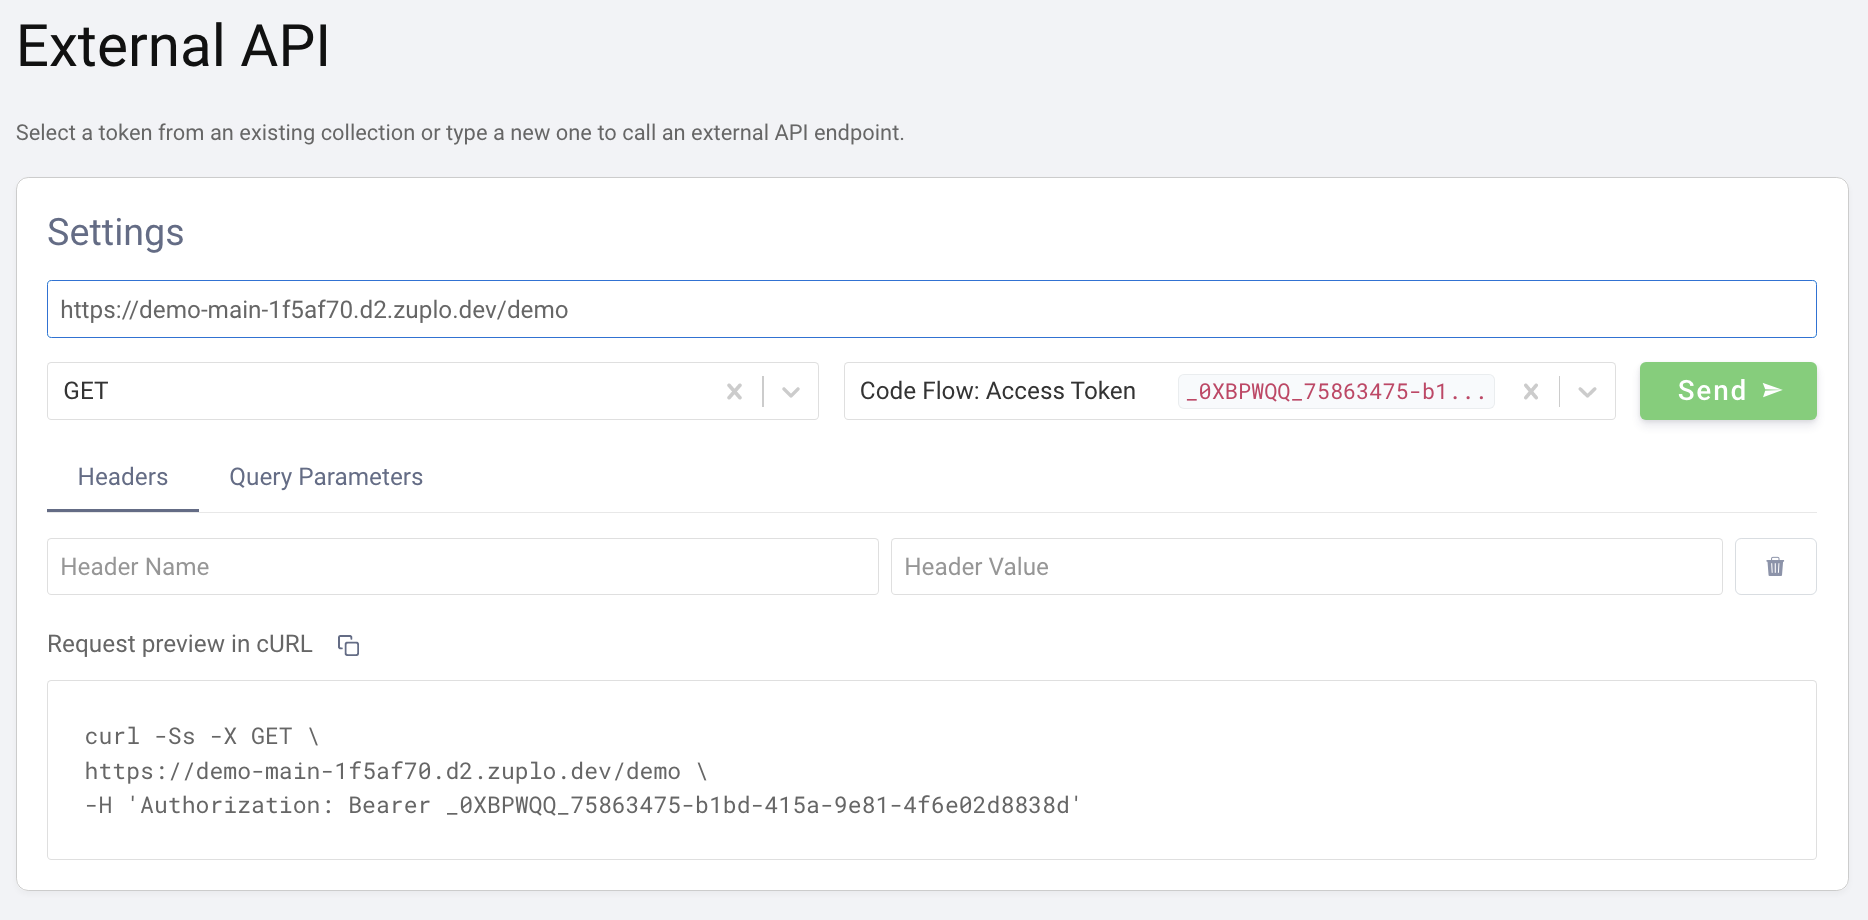
- Click Send. The panel on the right should now display the response from
the API. If the upstream API echoes back what is sent you will see that the
Authorizationheader now contains a JWT instead of the original opaque token that was sent in the request.
Conclusion#
You have now setup the Curity Phantom Token Pattern for Authentication. Your API Gateway now accepts an opaque access token in the Authorization header and will handle obtaining a corresponding signed JWT that will be passed on to the upstream API.
Read more about how policies work