

Add API key authentication - Editor
API Gateway tutorialLocal with an editorStep 3 of 5
Require an API key on your route and test that requests without a valid key return a 401 response.
Before you start: Use the project and route you created in the gateway setup step. Set up a basic gateway
Follow along using
In this guide we'll add API Key authentication to a route. You can do this for any Zuplo project but will need a route, consider completing Step 1 first.
API Key authentication is one of our most popular policies as implementing this authentication method is considered one of the easiest to use by developers but hard for API developers to get right. We also support JWT tokens and most other authentication methods.
What's a Policy?
Policies are modules that can intercept and transform an incoming request or outgoing response. Zuplo offers a wide range of policies built-in (including API key authentication) to save you time. You can check out the full list.
Let's get started.
-
Add the API Key Authentication Policy
Open the local Route Designer at http://localhost:9100. If your gateway isn't already running, start it from your project directory with
npm run dev.Select your route and click Add Policy on the incoming request policies section.
http://localhost:9100/?path=routes.oas.json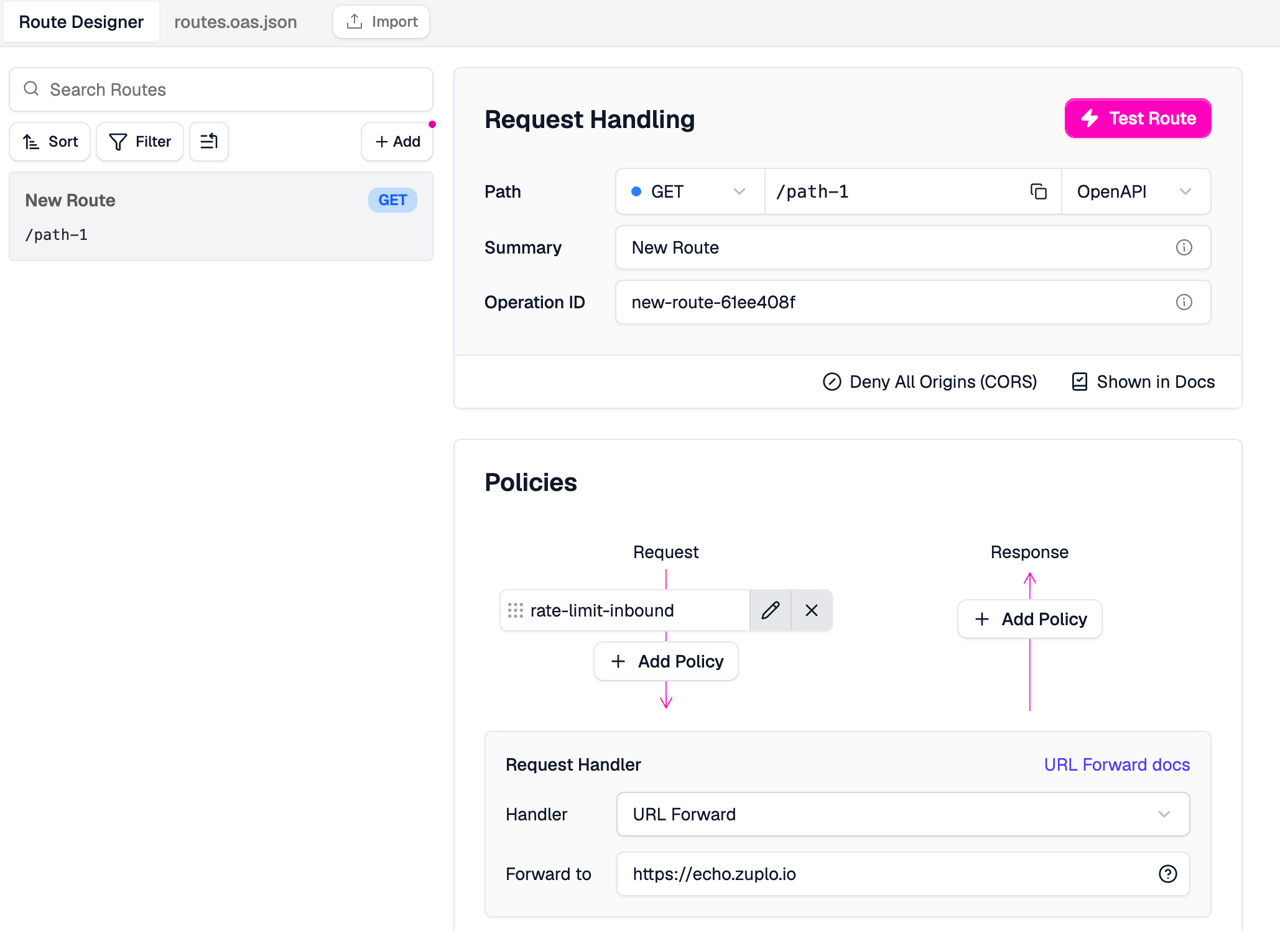
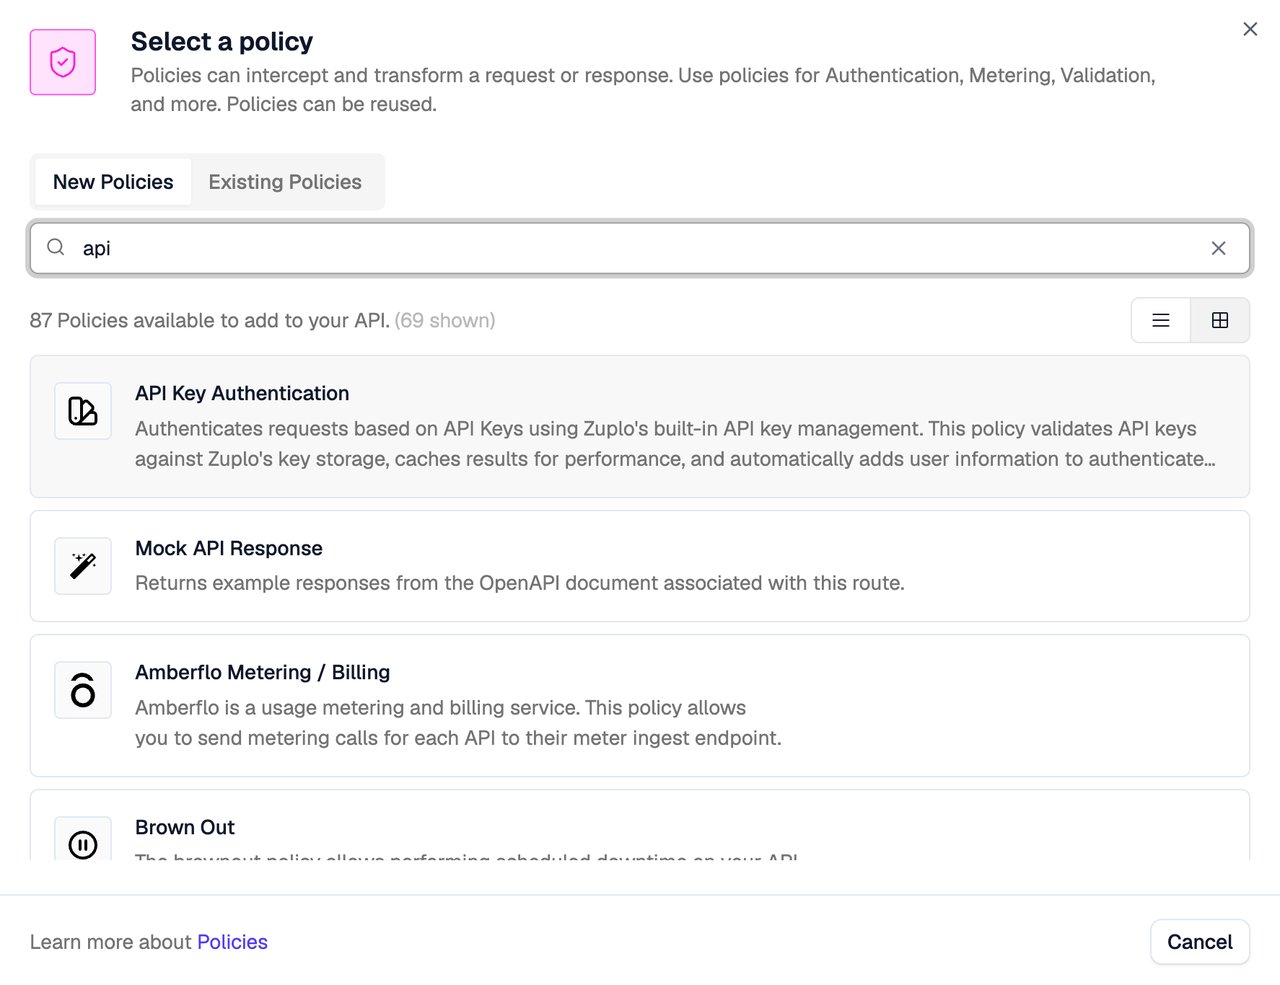
Search for the API key authentication policy, click on it, and then click Create Policy to accept the default policy JSON.
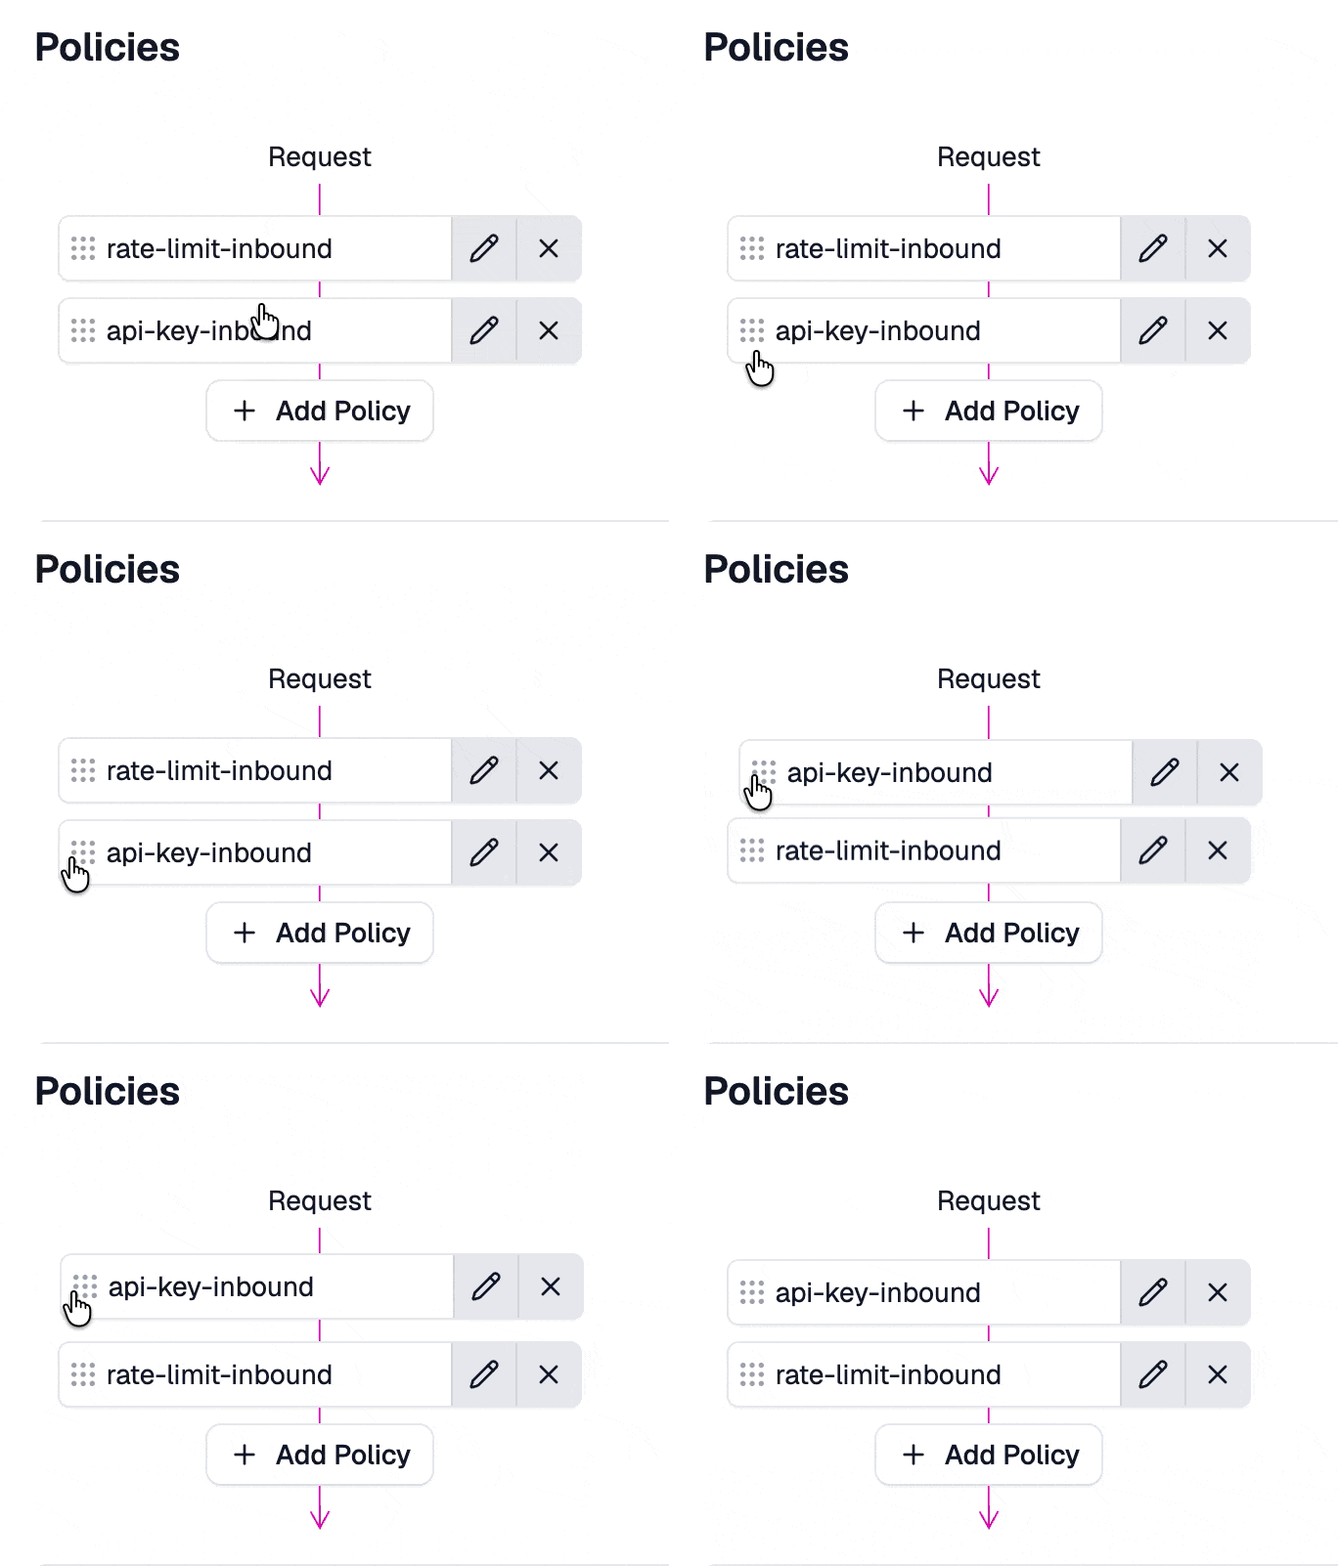
The API key authentication policy should usually be one of the first policies executed. If you came here from Step 2 then you will want to drag it above the rate limiting policy.
If you test your route, you should get a 401 Unauthorized response
Code -
Set up an API Key
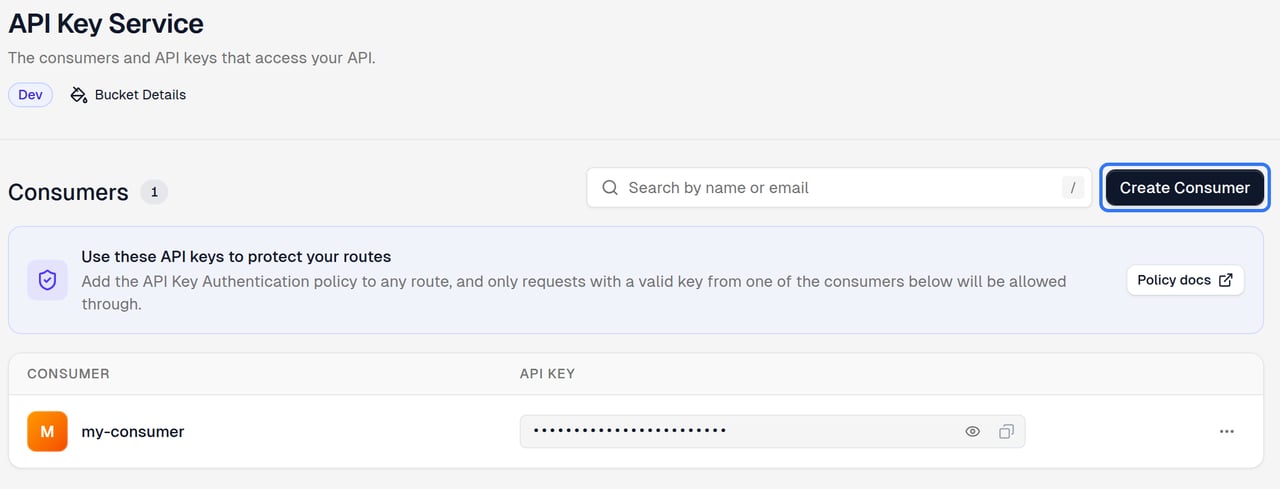
In order to call your API, you need to configure an API consumer. In the Zuplo Portal, open the Services tab for your project, then select API Keys → Consumers in the sidebar.
Be sure to select the appropriate environment with the Dev / Preview / Prod switcher at the top of the sidebar. You must select the environment type your local project is linked to. If you only have a single environment, select Prod. Later we will create new environments for preview.
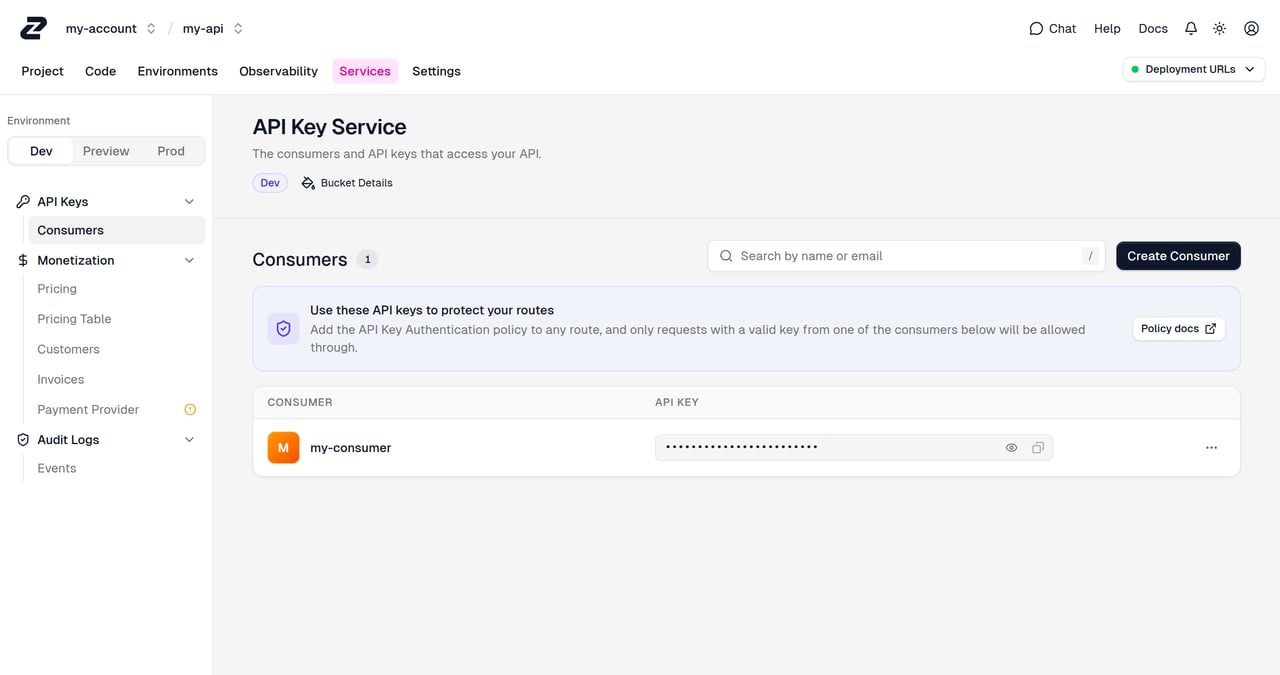
Then click Create Consumer.
Let's break down the configuration needed.
- Subject: Also known as
sub. This is a unique identifier of the API consumer. This is commonly the name of the user or organization consuming your API - Key managers: The email addresses of those who will be managing this API key.
- Metadata: JSON metadata that will be made available to the runtime when a key is used to authenticate. Common properties include the consumer's subscription plan, organization, etc.
Go ahead and fill in
test-consumerfor the Subject. Add your own email as a Key manager, and leave the metadata empty for now. Click Save consumer once you're done.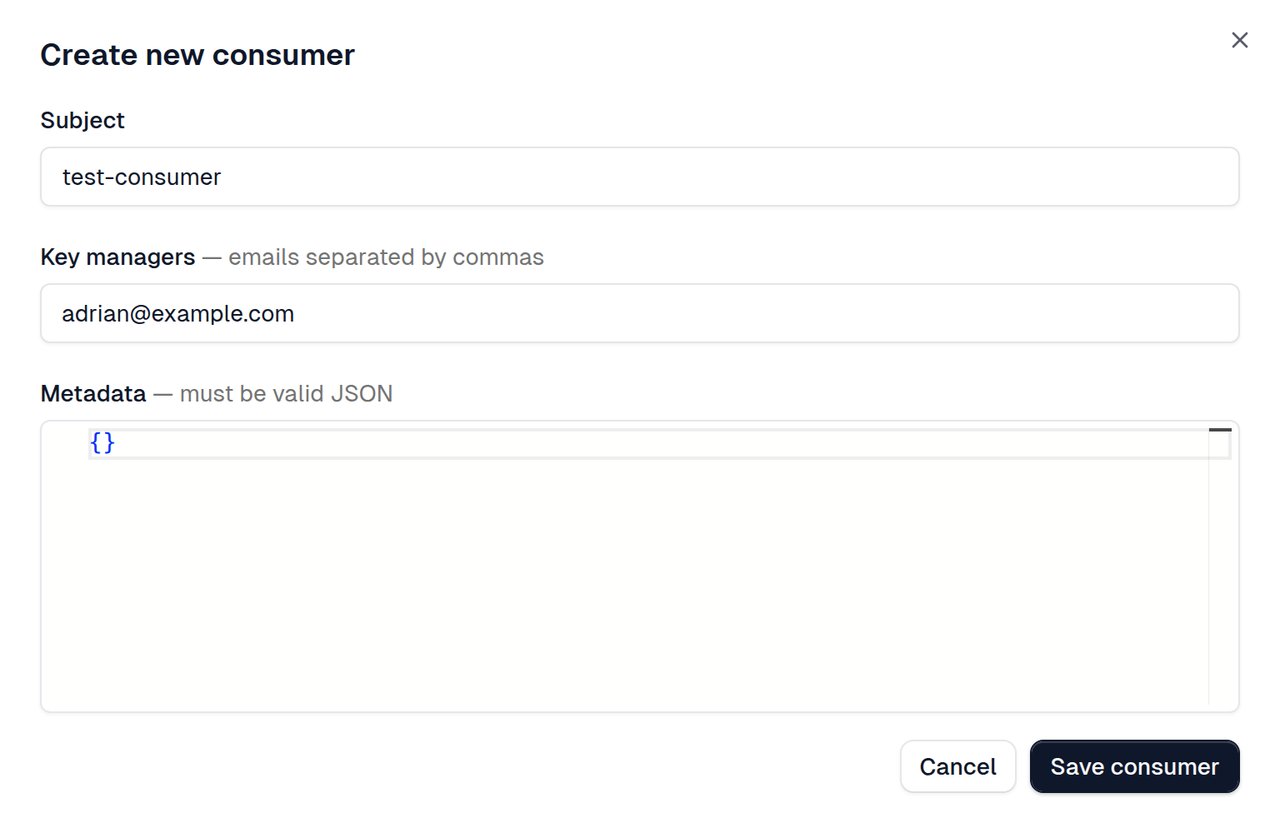
- Subject: Also known as
-
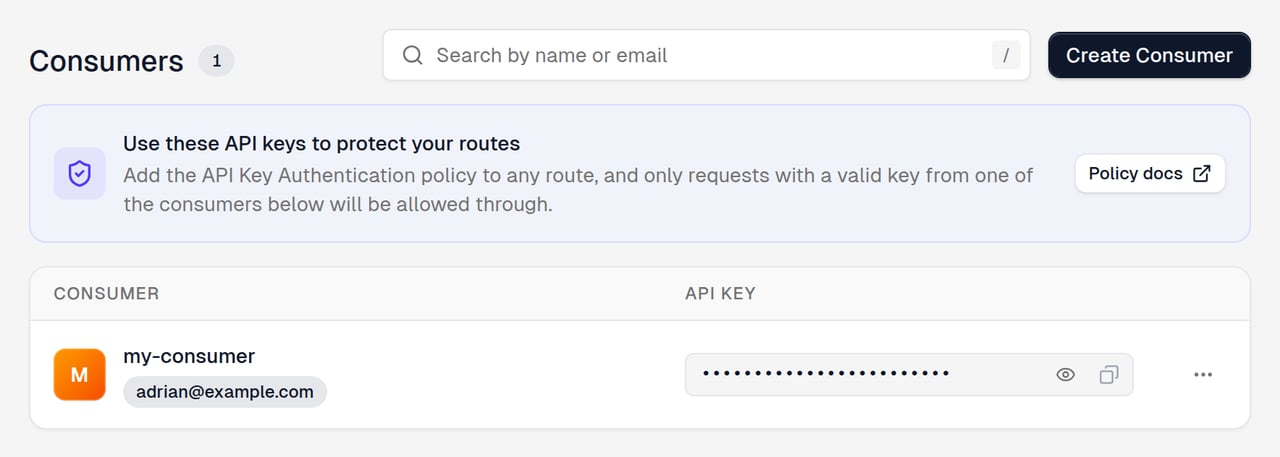
Copy your API Key
After your API Key consumer is created, copy your new API Key by clicking the copy button (next to the eye icon).
-
Test out your API Key
Using any HTTP client (like Postman or curl), make a request to your API.
CodeFirst, try without an authorization header — you should get a 401 Unauthorized response since the API Key policy is rejecting the request.
Now include
Authorization: Bearer <YOUR_API_KEY>with the key you just copied. You should get a200 OKwith the JSON list of todos.We also offer an API for our API key service that allows you to programmatically create consumers and even create your own developer portal or integrate key management into your existing dashboard. See this document for details.