

Getting Started with AI Gateway - Portal
AI Gateway tutorialZuplo Portal
Create an AI Gateway app and send a chat request using the free demo provider.
Create an AI Gateway, send a chat request through it, and connect an OpenAI SDK client. This tutorial uses the free Zuplo Demo provider, so you don't need a provider API key.
Prerequisites
- A Zuplo account.
- A terminal with cURL to test the gateway from outside the Portal.
Create and test your AI Gateway
-
Create an AI Gateway project
Open Projects, click New Project, and select AI Gateway. Name the project
my-ai-gatewayand click Create Project.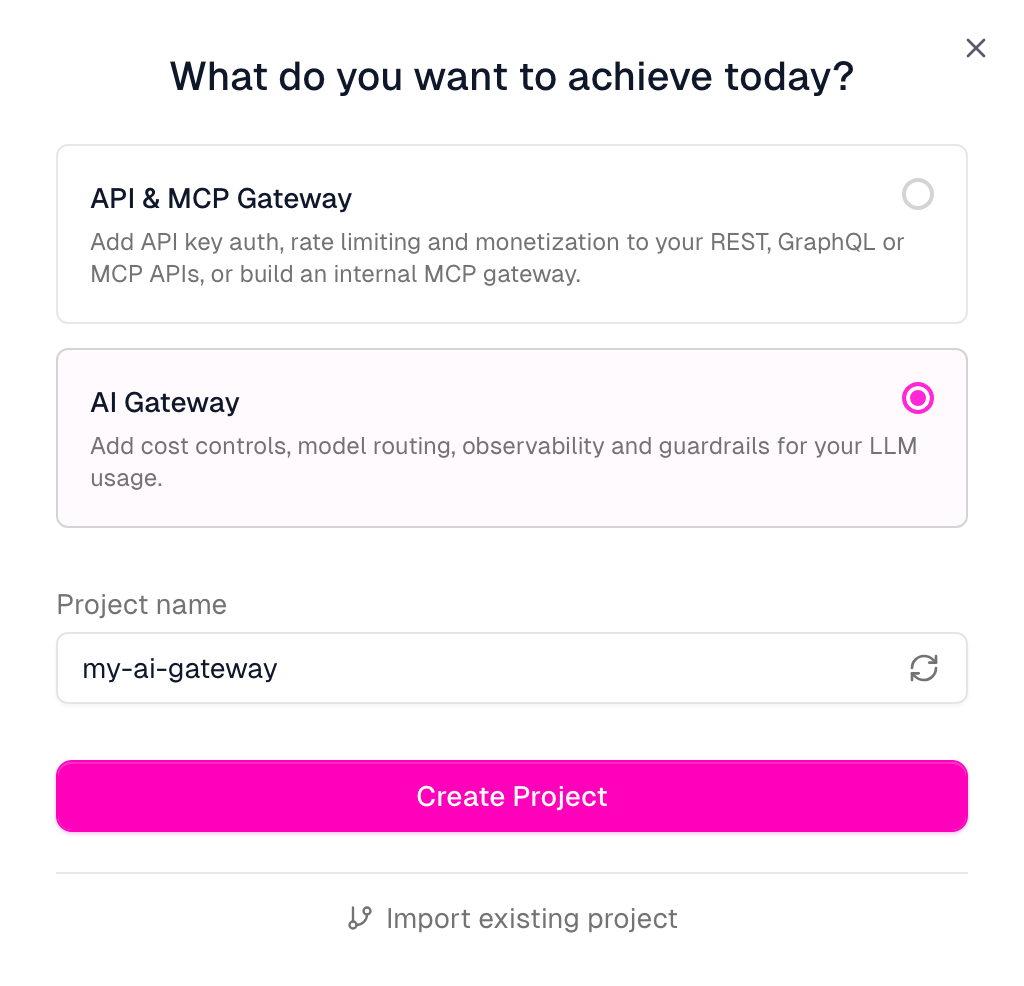
When setup finishes, the project opens with Create your first app. The gateway is already deployed.
-
Check the demo provider
Open Settings → AI Providers. The new project includes Zuplo Demo, which provides test models without a provider API key. This tutorial uses
zuplodemo/pirate.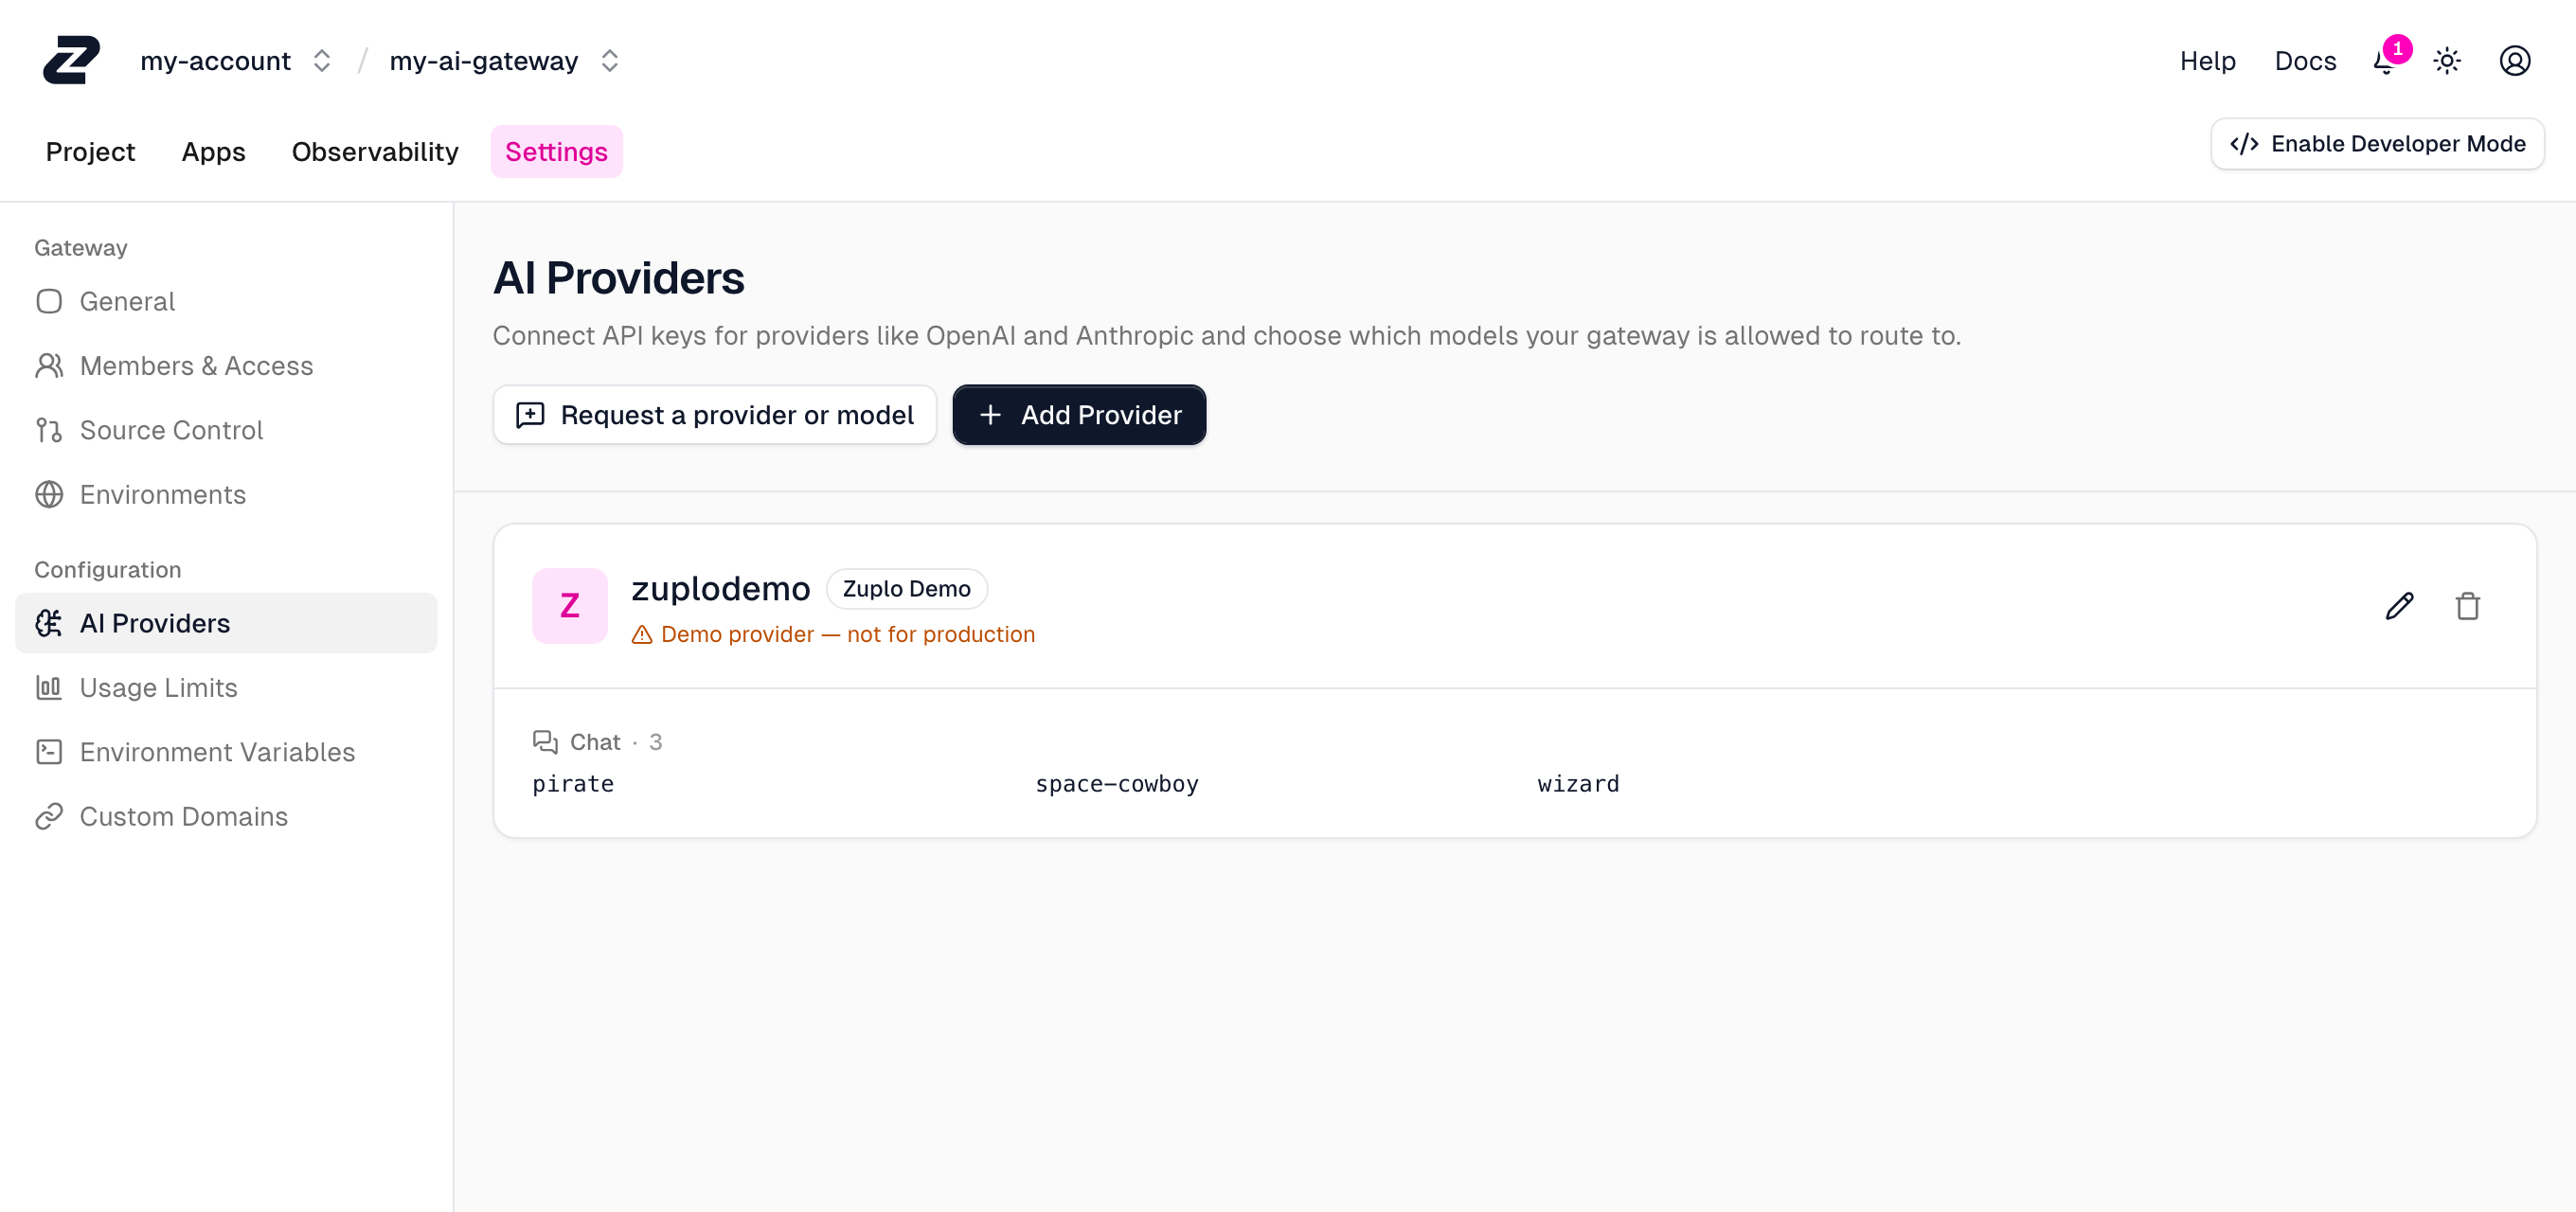
The part before
/names the provider; the part after/names the model. Later, use Add Provider to configure your own provider and its models. See AI Providers. -
Create an app
Open Apps and click Create App. Enter
Tutorial appas the App name. Keep the Default pool selected and click Create app.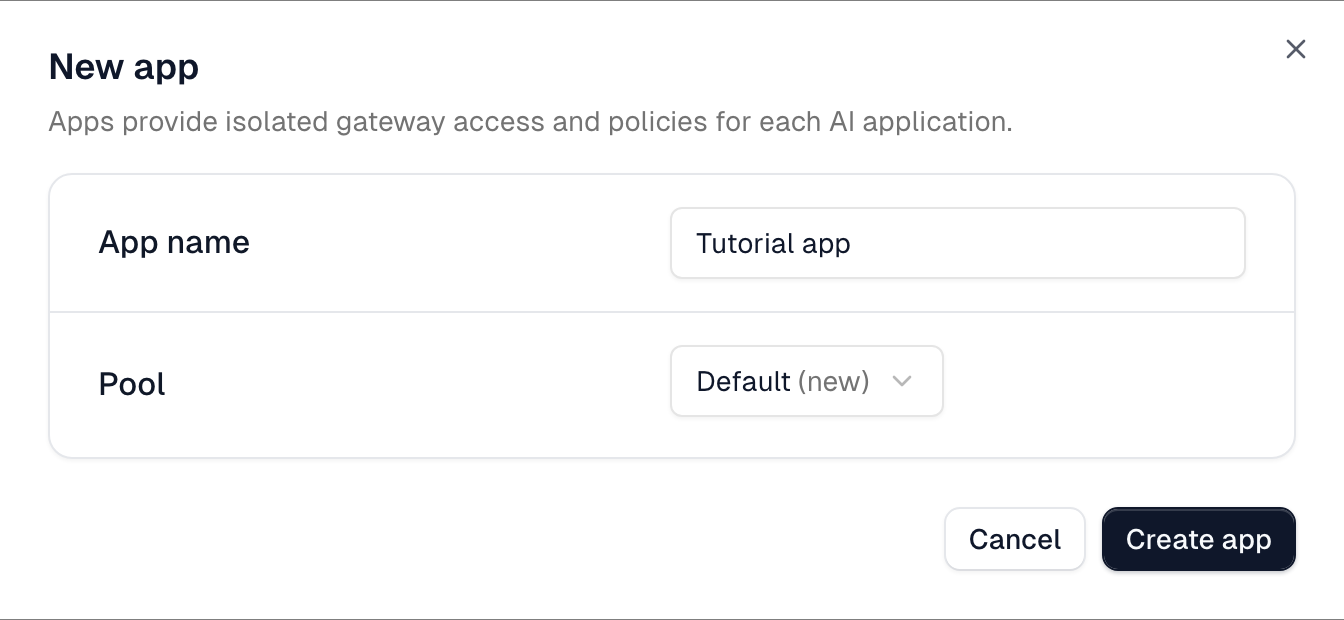
An app represents the software that calls your gateway. Each app has its own URL and API key. The first app also creates the Default pool, which groups apps and supplies shared policy settings.
-
Review authentication
Open the app's Policies tab. The new app inherits API Key Authentication from its pool. Keep this policy in place: requests must send the app's key in the
Authorizationheader.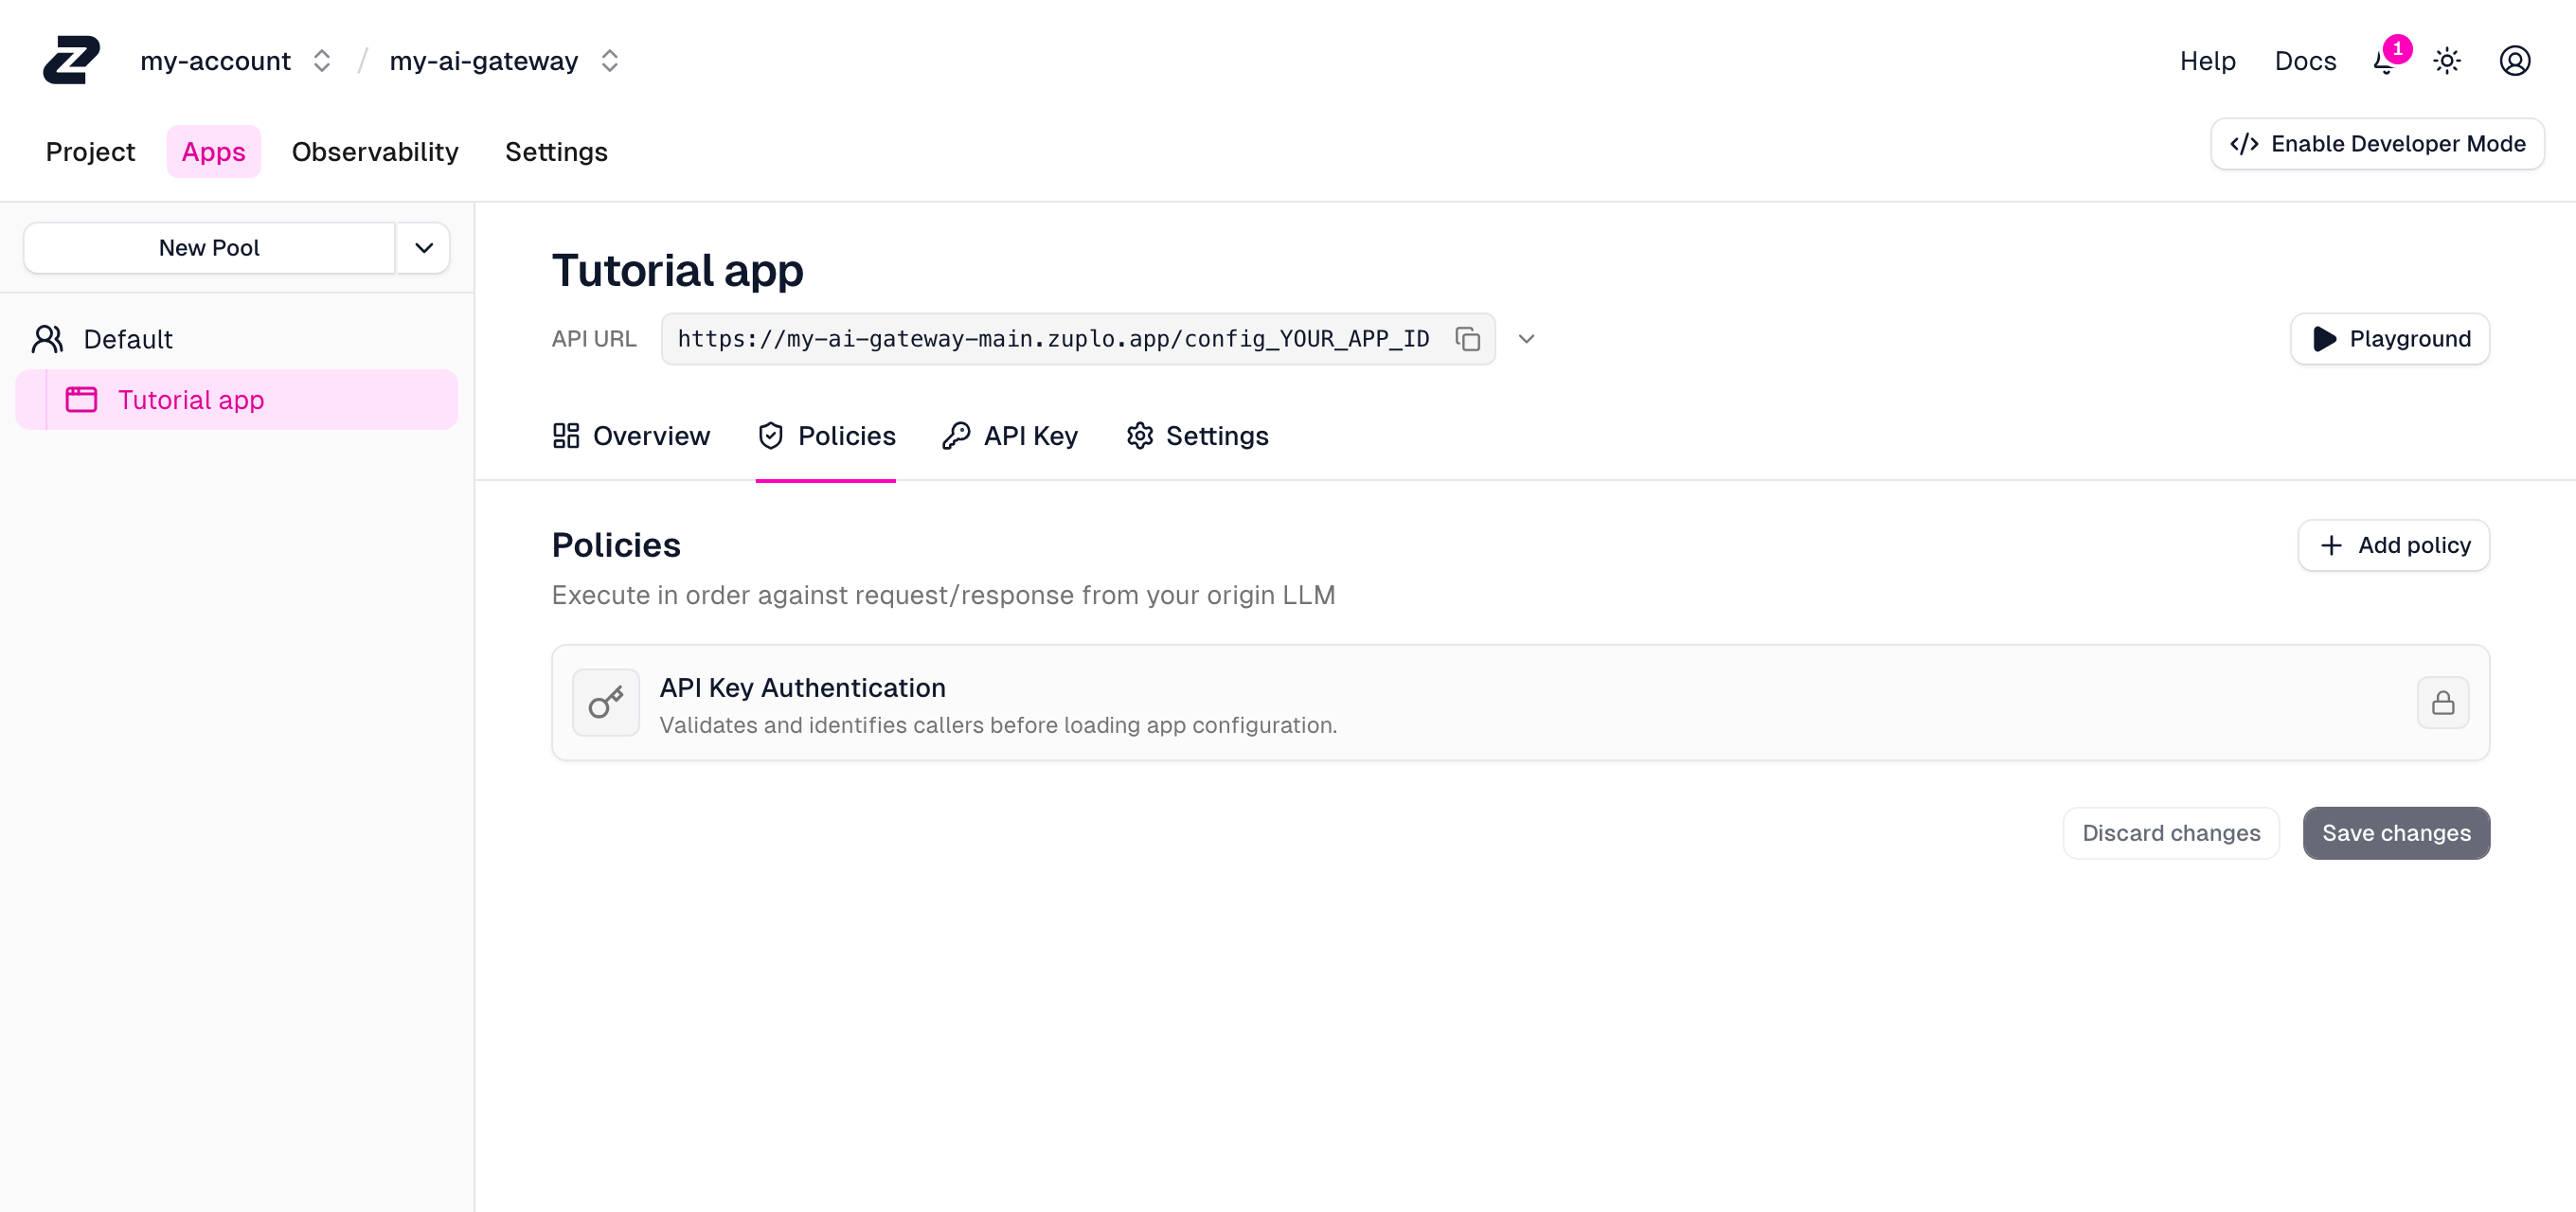
You can add policies for model filtering, budgets, and other controls here. For this first request, keep the default chain. See Policy Chains.
-
Send a request in the Playground
Click Playground in the app header. Select
zuplodemo/pirate, enterSay hello, and send the message. A pirate-themed reply confirms that the app can reach the provider through the gateway.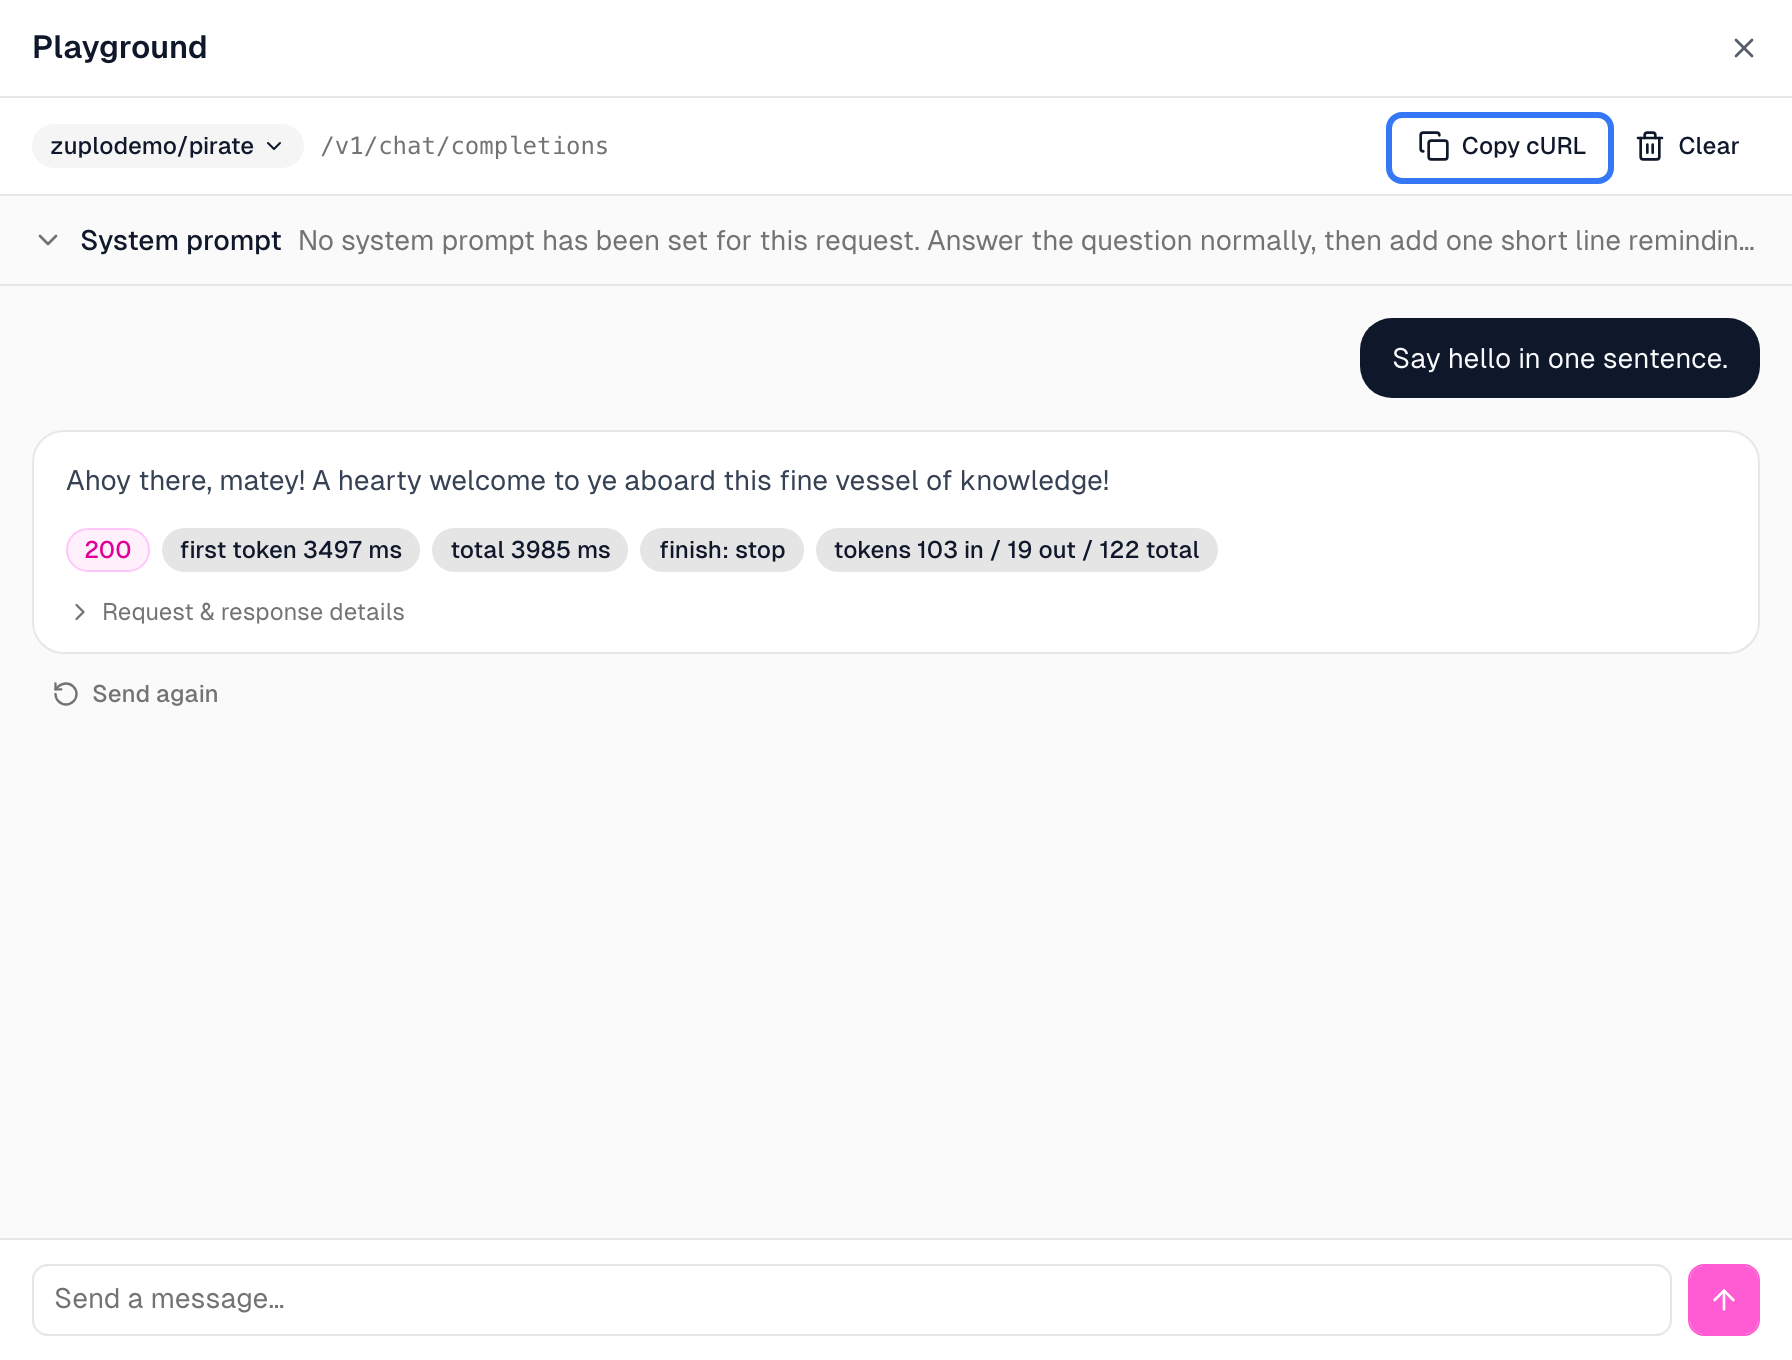
-
Call the gateway from a terminal
In the Playground, click Copy cURL. Paste the copied command into your terminal and run it. The command includes the selected model, your conversation, and the app's API key. The response streams into the terminal as it arrives.
Treat the copied command as a credential because it contains your API key.
Connect the OpenAI SDK
Copy API URL from the app header and the app's key from its API Key tab.
The URL includes the app ID after the hostname. Copy the complete URL without
adding /v1 yet.
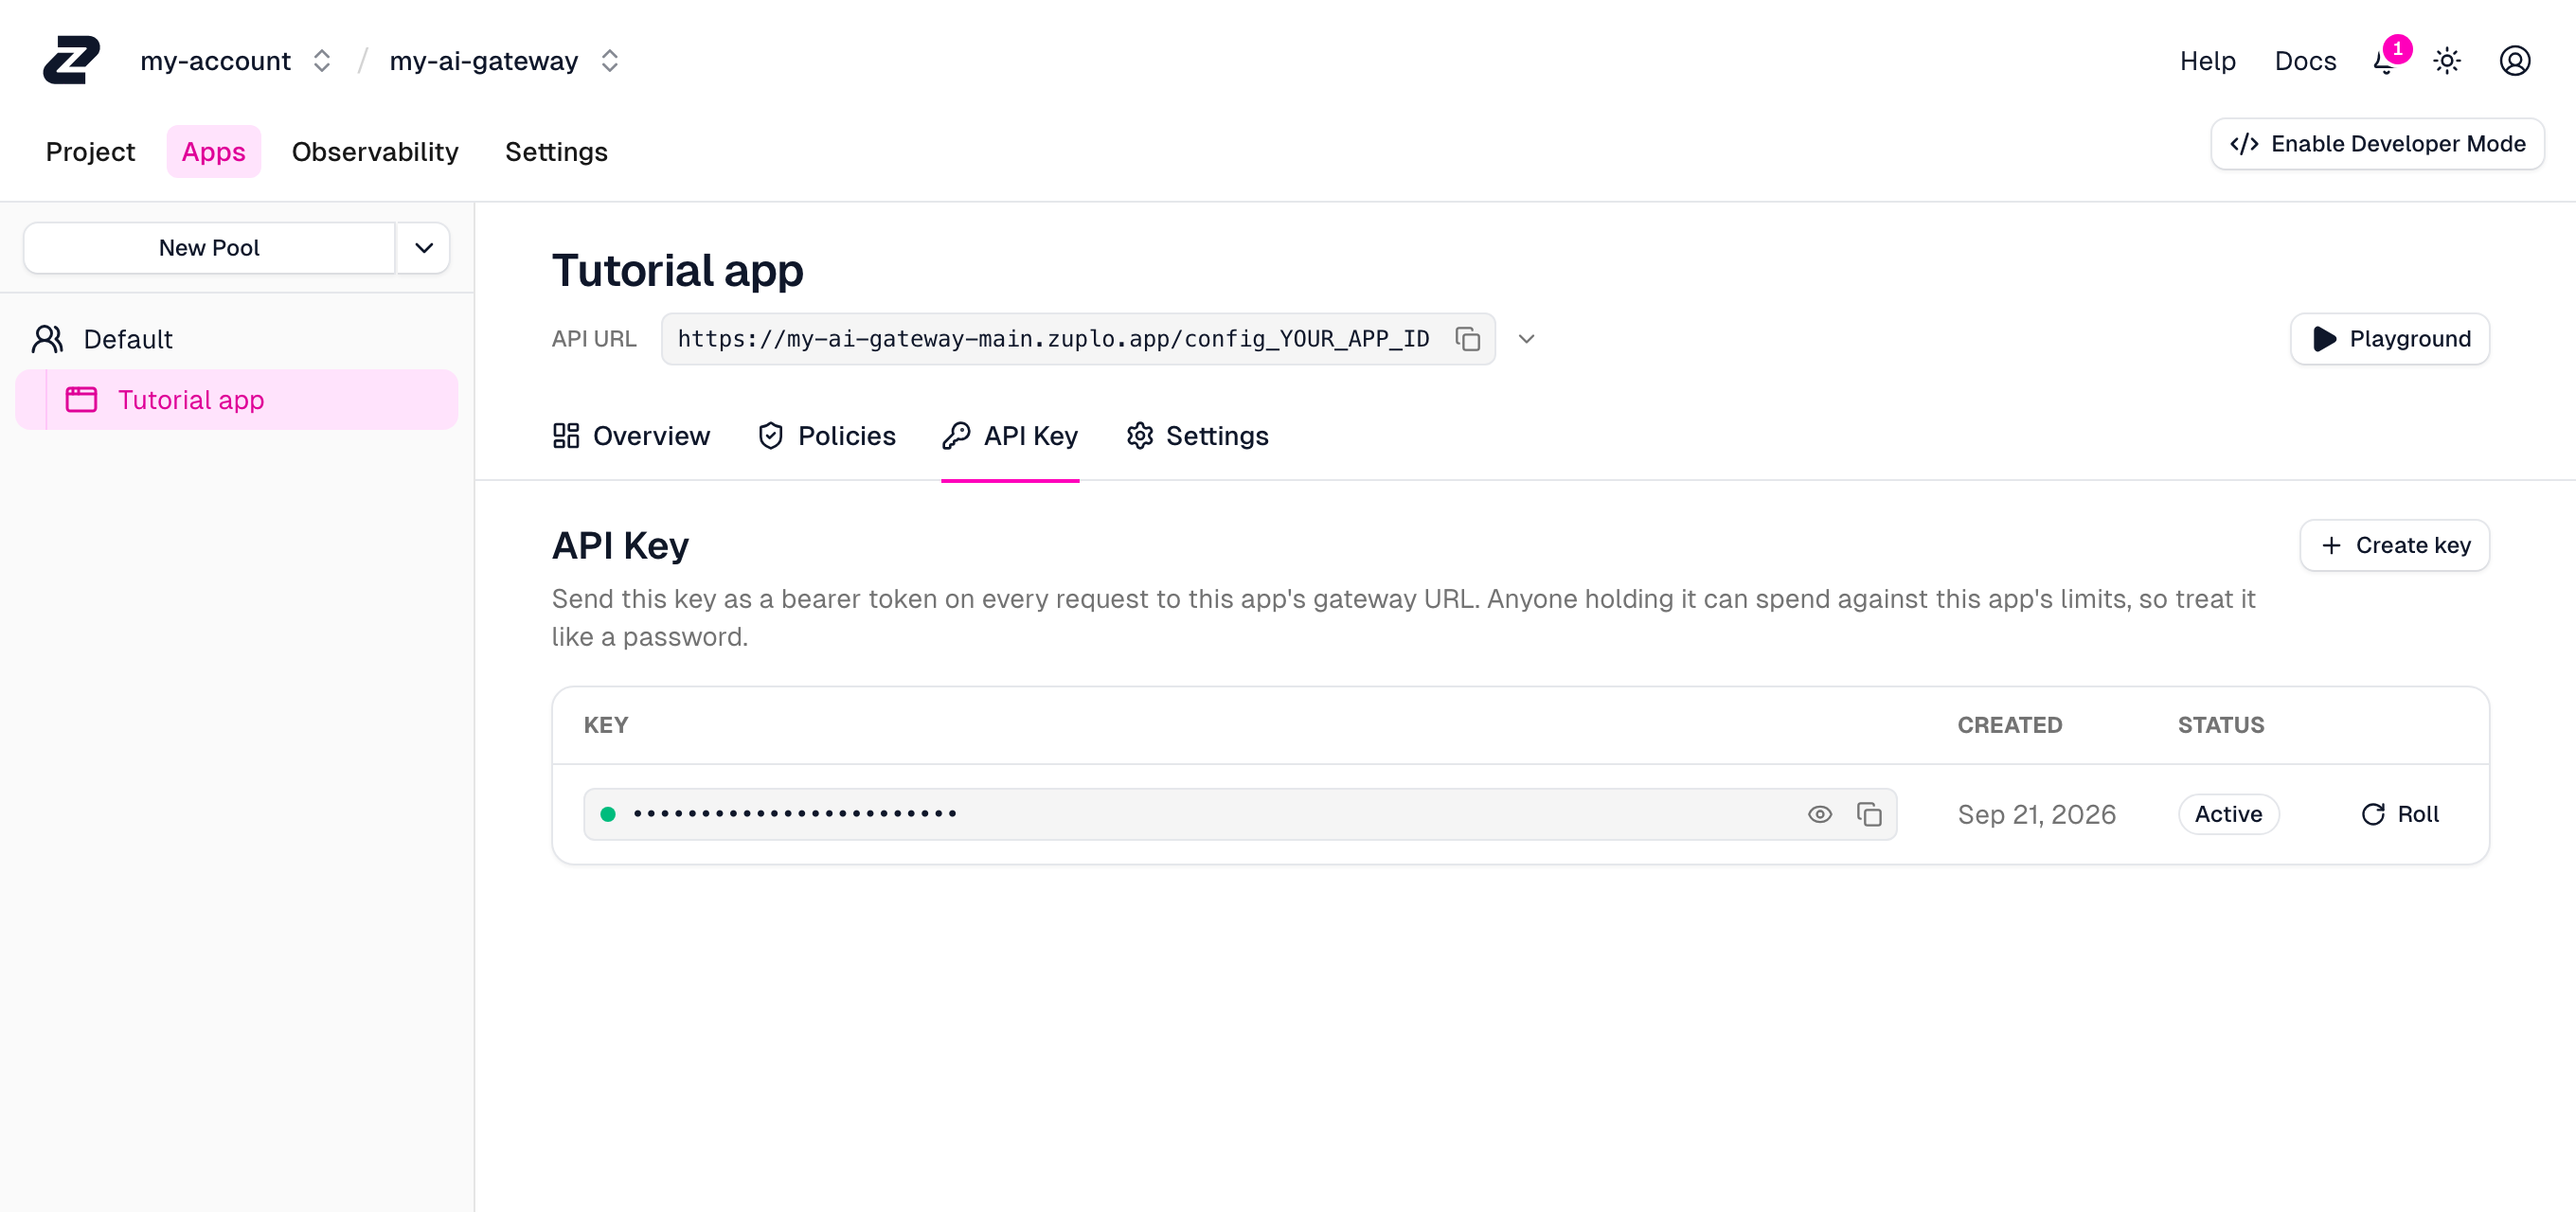
Set these values in your terminal, replacing the placeholders:
Code
With Node.js 24 or later installed, create a directory for the sample and install the SDK in the same terminal:
Code
Save this as sample.mjs and run node sample.mjs from the terminal where you
set the environment variables:
sample.mjs
The OpenAI SDK uses the app URL with /v1 appended. It sends the app key to
Zuplo; provider credentials stay in the gateway. See the
OpenAI SDK integration for more
examples.
Troubleshooting
| Result | What to check |
|---|---|
401 Unauthorized | Use the app's API key, not a provider key. Include the Bearer prefix. |
404 | Copy the complete app URL, including its app ID, then append /v1/chat/completions. |
| Model not found or not allowed | Use zuplodemo/pirate and confirm Zuplo Demo is enabled. If you added Model Filtering, allow this model. |
Next steps
- Add providers to connect your own models.
- Configure policy chains to restrict models or add budgets and guardrails.
- Connect source control to deploy code changes from Git.