

Auth0 JWT Auth Policy
Authenticate requests with JWT tokens issued by Auth0. This is a customized version of the OpenId JWT Policy specifically for Auth0.
With this policy, you'll benefit from:
- Seamless Auth0 Integration: Pre-configured to work with Auth0's JWT format and signature validation
- Enhanced Security: Protect your APIs with industry-standard authentication backed by Auth0's robust identity platform
- Simplified Implementation: Reduce development time with ready-to-use Auth0 validation logic
- Flexible Configuration: Easily customize claims validation, token sources, and audience verification
- Comprehensive User Context: Access user claims and metadata directly in your request handlers
Configuration
The configuration shows how to configure the policy in the 'policies.json' document.
Code
Policy Configuration
name<string>- The name of your policy instance. This is used as a reference in your routes.policyType<string>- The identifier of the policy. This is used by the Zuplo UI. Value should beauth0-jwt-auth-inbound.handler.export<string>- The name of the exported type. Value should beAuth0JwtInboundPolicy.handler.module<string>- The module containing the policy. Value should be$import(@zuplo/runtime).handler.options<object>- The options for this policy. See Policy Options below.
Policy Options
The options for this policy are specified below. All properties are optional unless specifically marked as required.
auth0Domain(required)<string>- Your Auth0 domain. For example,my-company.auth0.com.audience<string>- The Auth0 audience of your API, for examplehttps://api.example.com/.allowUnauthenticatedRequests<boolean>- Allow unauthenticated requests to proceed. This is use useful if you want to use multiple authentication policies or if you want to allow both authenticated and non-authenticated traffic. Defaults tofalse.oAuthResourceMetadataEnabled<boolean>- Flag that determines whether OAuth protected resource metadata is enabled. Defaults tofalse.
Using the Policy
Adding Auth0 to your route takes just a few steps, but before you can add the policy you'll need to have Auth0 set up for API Authentication.
Set Up Auth0
To use Auth0 as an API authentication provider, you'll need to create both an Application and an API in the Auth0 dashboard. The steps below cover the basics, but if you need more details see the Auth0 links throughout this document.
-
Create the Auth0 API (Auth0 Doc)
In the Auth0 dashboard, select APIs on the sidebar, then click the + Create API button.
Enter the Name and Identifier of your application. The identifier is usually a URI such as
https://api.example.com/. The URL used in the identifier does NOT have to be the URL of your actual API. A common practice is to use the URL of your production API. Save this value, you'll use it in the next section. -
Get the Auth0 Domain
On your newly created Auth0 API, click the Test tab. This tab shows how to create a Machine-to-Machine access token from a test application that Auth0 automatically created for your API.
From the first code block on this page, find the URL value as shown below. Copy the hostname portion (outlined in red) of this URL (not the
https://or the trailing/oauth/tokenparts). For exampleyour-account.us.auth0.com. Save this value, you'll use it in the next section.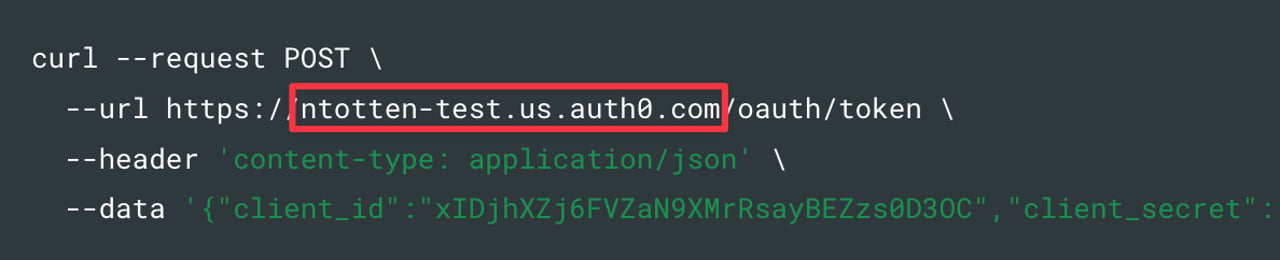
-
Get an Access Token
Find the code block that contains the
access_tokenand copy the entire token value (without the quotes) and save it. You'll use this later to test your Auth0 JWT policy in Zuplo.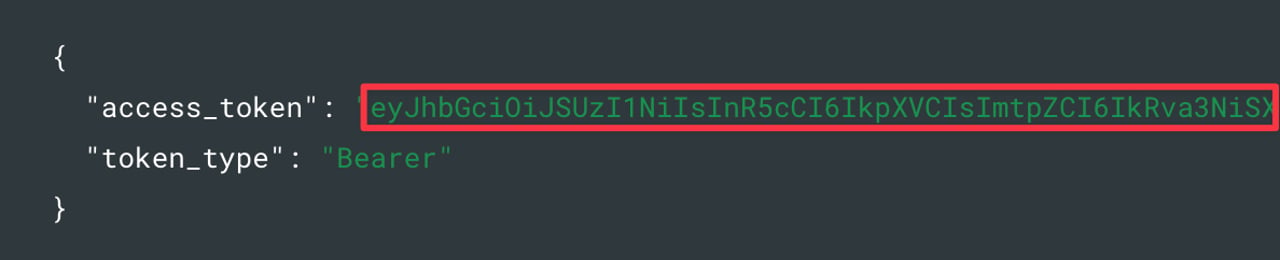
Set Environment Variables
Before adding the policy, there are a few environment variables that will need to be set that will be used in the Auth0 JWT Policy.
It is very important in the next steps that the values match EXACTLY as they are found in Auth0.
-
In the Zuplo Portal open the Environment Variables section in the Settings tab.
-
Click Add new Variable and enter the name
AUTH0_DOMAINin the name field. Set the value to your Auth0 domain. -
Click Add new Variable again and enter the name
AUTH0_AUDIENCEin the name field. Set the value to the identifier URI you used when creating the Auth0 API in the section above (i.e.https://api.example.com/).
Add the Auth0 Policy
The next step is to add the Auth0 JWT Auth policy to a route in your project.
-
In the Zuplo Portal open the Route Designer in the Files tab then click routes.oas.json.
-
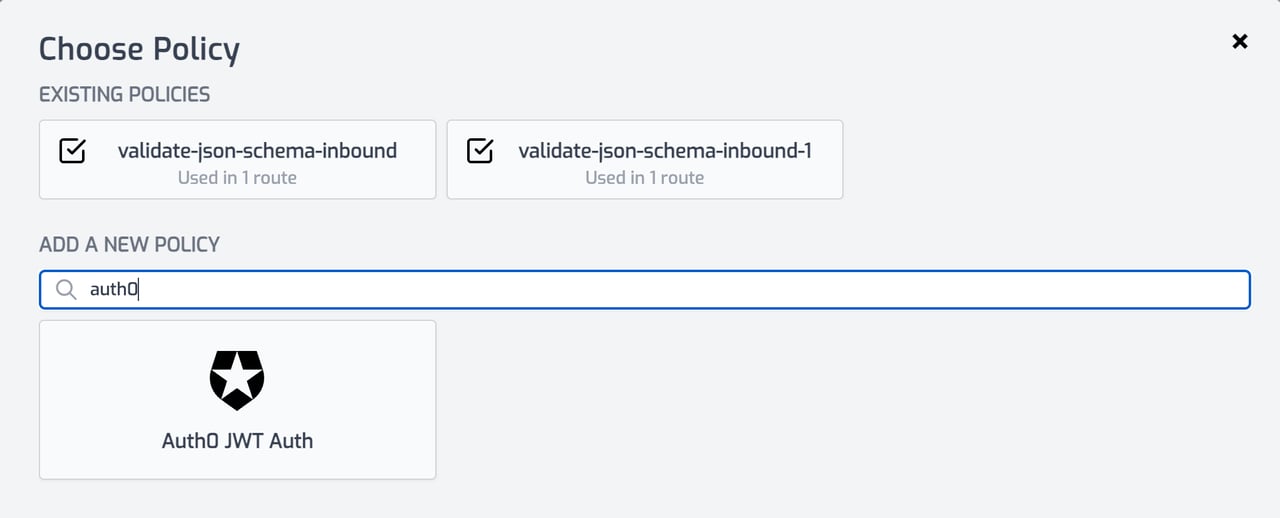
Select or create a route that you want to authenticate with Auth0. Expand the Policies section and click Add Policy. Search for and select the Auth0 JWT Auth policy.
-
With the policy selected, notice that there are two properties,
auth0Domainandaudiencethat are pre-populated with environment variable names that you set in the previous section.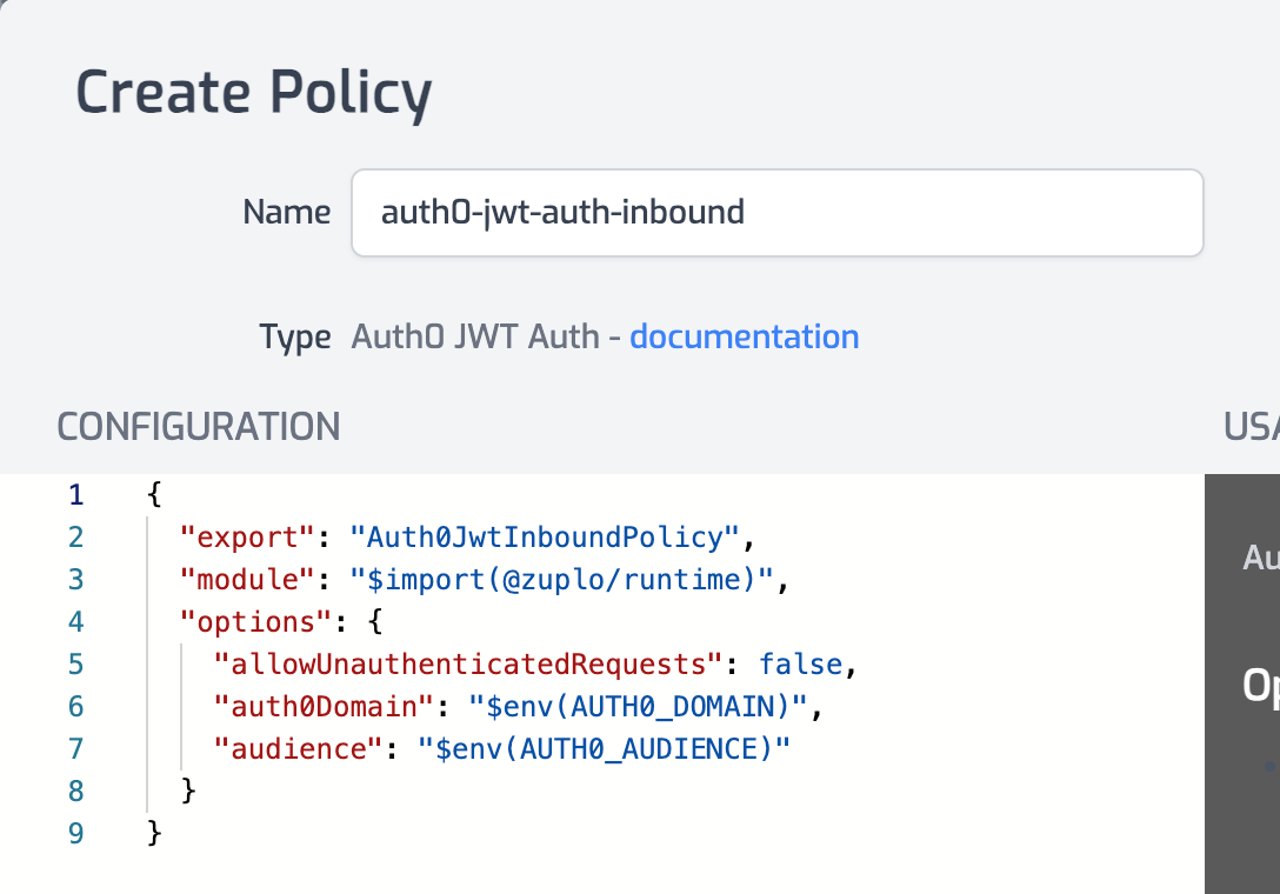
-
Click OK to save the policy.
Test the Policy
Finally, you'll make two API requests to your route to test that authentication is working as expected.
-
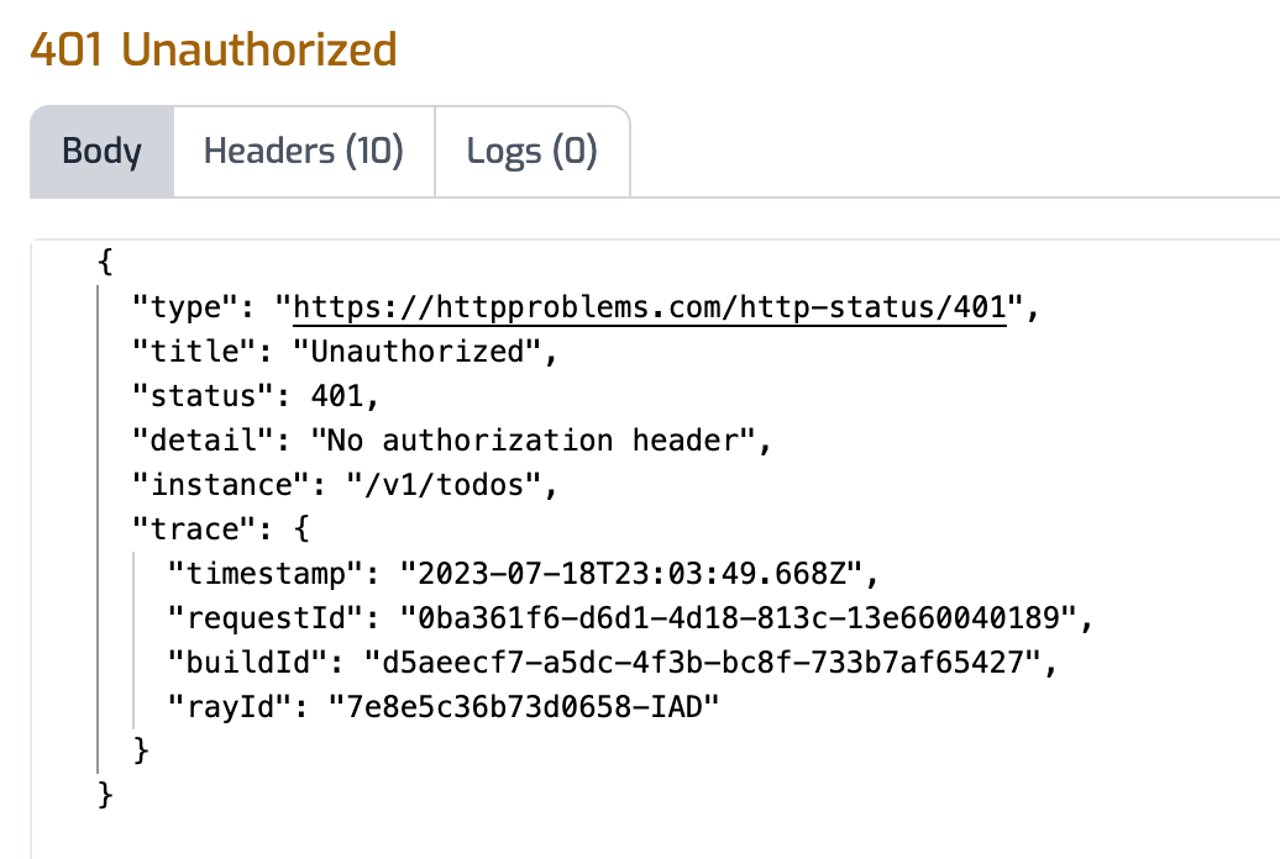
In the route designer on the route you added the policy, click the Test button. In the dialog that opens, click Test to make a request.
-
The API Gateway should respond with a 401 Unauthorized response.
-
Now to make an authenticated request, add a header to the request called
Authorization. Set the value of the header toBearer YOUR_ACCESS_TOKENreplacingYOUR_ACCESS_TOKENwith the value of the Auth0 access token you saved from the first section of this tutorial.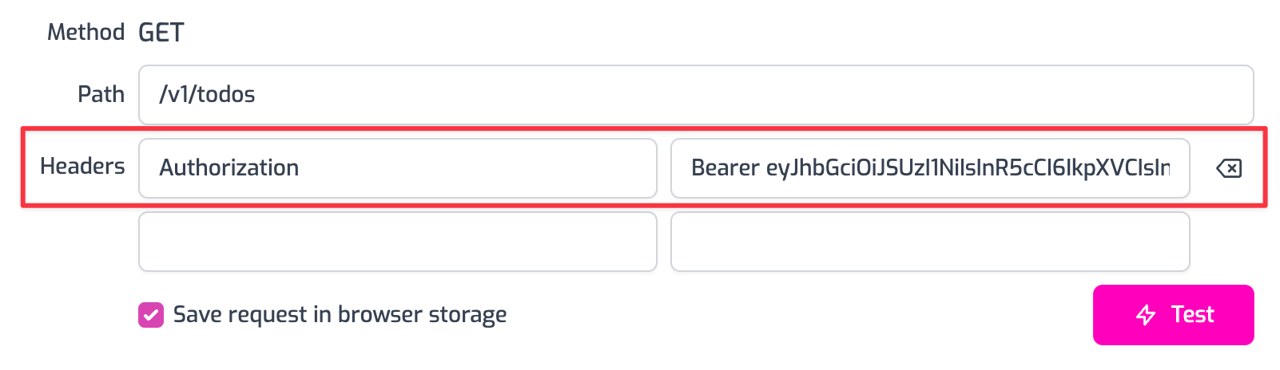
-
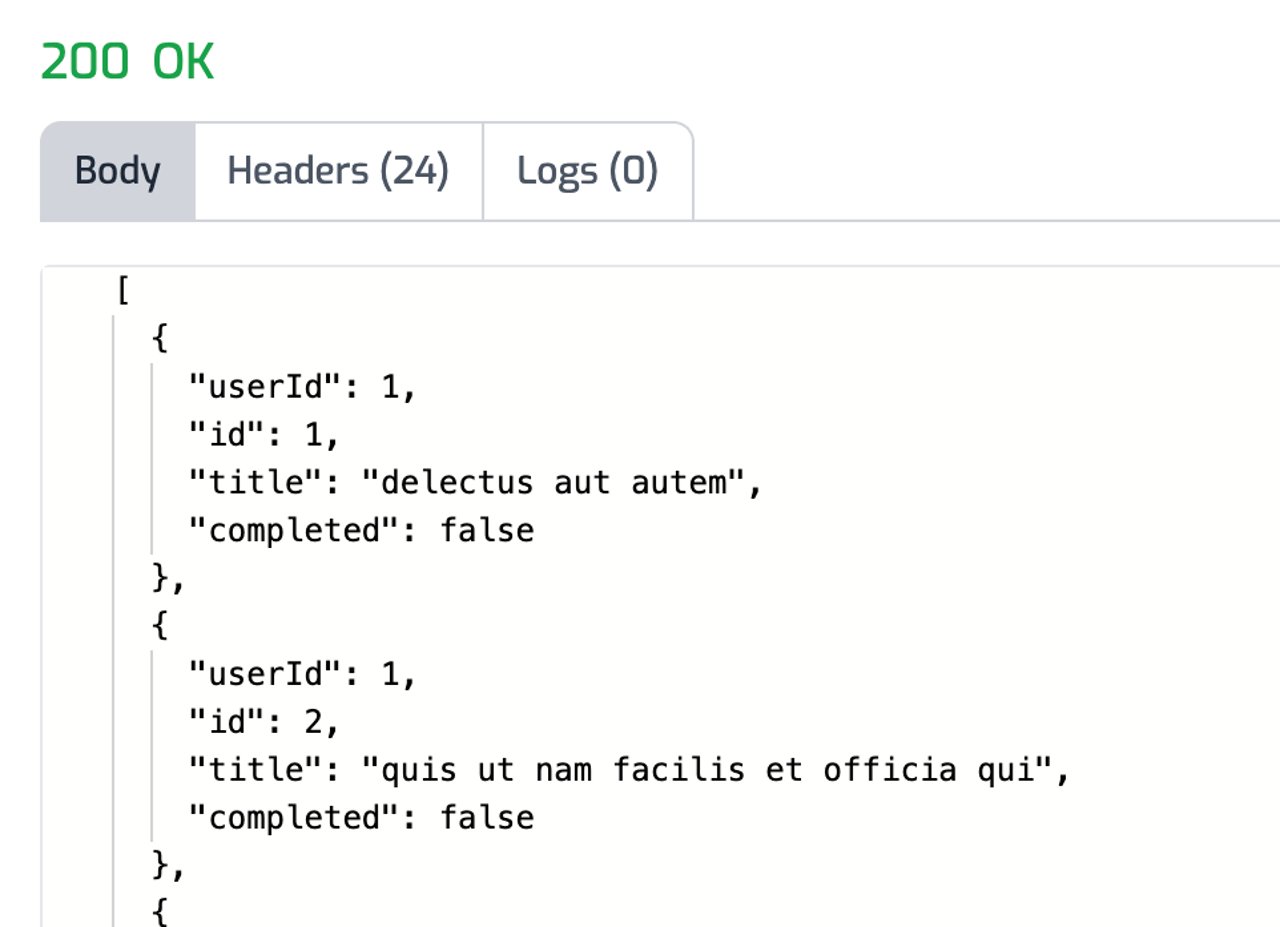
Click the Test button and a 200 OK response should be returned.
You have now set up Auth0 JWT Authentication on your API Gateway.
OAuth 2.0 Protected Resource Metadata
The Auth0 JWT Auth policy supports OAuth protected resource metadata discovery.
To enable this feature, set the oAuthResourceMetadataEnabled option to true
and add the
OAuthProtectedResourcePlugin to modules/zuplo.runtime.ts.
When configured, this enables OAuth clients to find metadata information about
how to interact with your OAuth 2.0 protected resources according to
RFC 9728.
See this document for more information about OAuth authorization in Zuplo.
Read more about how policies work