

Getting Started with MCP Server - Editor
MCP Server tutorialLocal with an editor
Expose a sample Todo API as an MCP server and test its tools with an MCP client.
Follow along using
Turn an OpenAPI-described API into a managed MCP server. This path builds it with the Zuplo CLI and your editor.
Zuplo allows you to instantly add a managed MCP Server to your existing API, powered by OpenAPI.
If you're not familiar with Zuplo, it's recommended to go through Step 1 first.
-
Create a new project
Create a new project and start the local development server:
CodeSee Step 1 for a walkthrough of the
create-zuplo-apiprompts. -
Test the Get all todos route
The default template ships with a working todo API. Open the local Route Designer at http://localhost:9100, select the Get all todos route, and click the Test button next to the Path field.
A test dialog will open, click Test and you should see a
200 OKresponse with a few todos.This is the basic API we're going to turn into a fully functioning MCP Server.
-
Create an MCP Server
On your
routes.oas.jsonfile, choose Add and then Dynamic OpenAPI to MCP Server.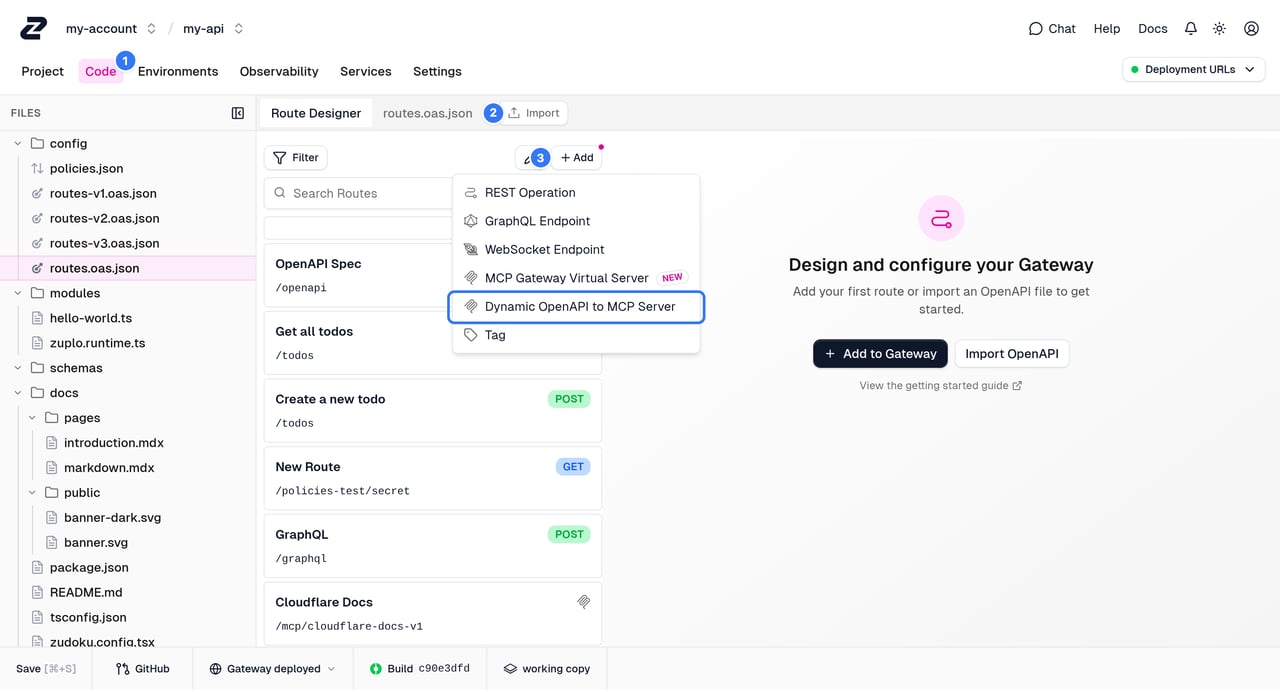
A new route will appear. Confirm the following values:
- Summary: enter
MCP Server - Method: choose
POST - Path: enter
/mcp(the path can be anything, but /mcp is common)
Click the Select Tools option for your new MCP Server endpoint.
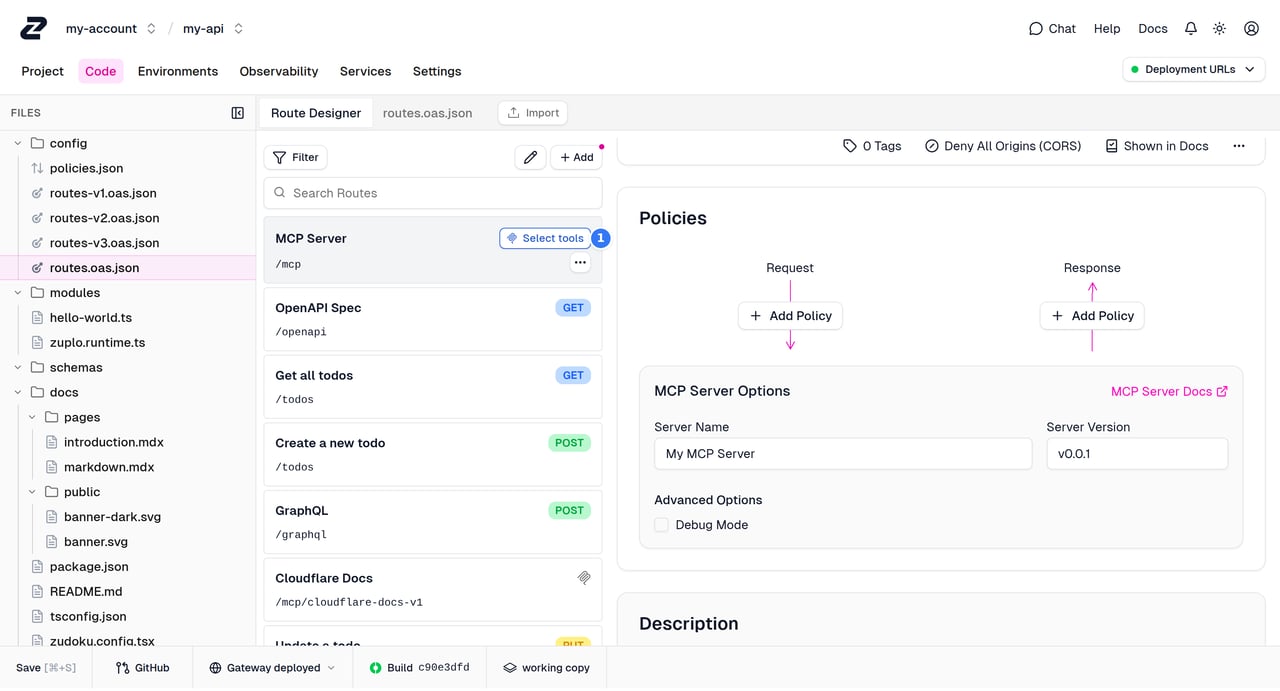
You should see the MCP tools dialog. Check the tools from your
*.oas.jsonfiles that you want to surface in your MCP Server.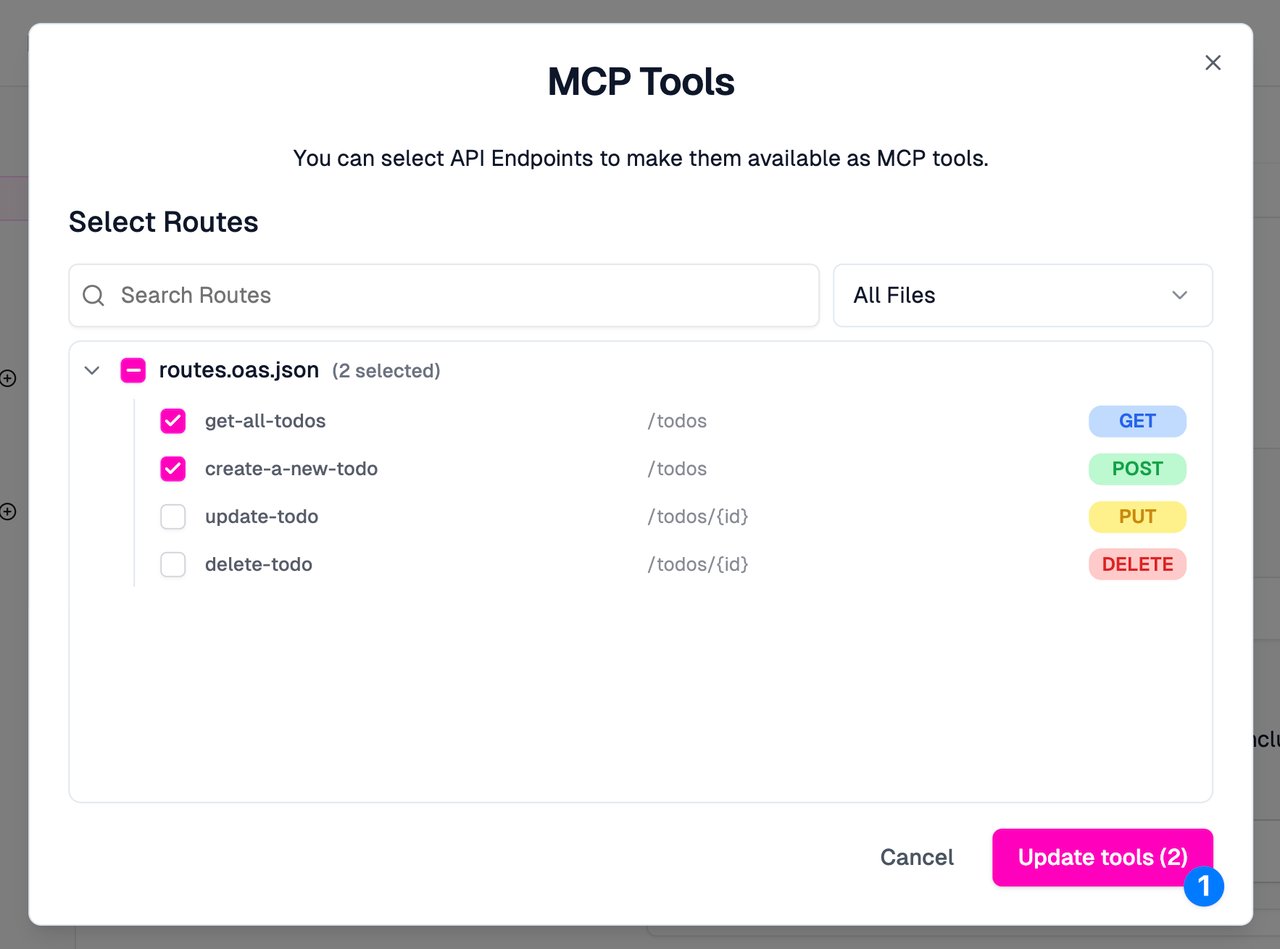
Click Update Tools, then click Save at the bottom left. Congratulations, you just published your first MCP Server! It's now available locally at
http://localhost:9000/mcp. - Summary: enter
-
Connect an MCP Client
You can connect any MCP client that can reach your local gateway. The AI coding agent you configured in Step 1 (such as Claude Code or Cursor) is a great option — point it at your local MCP server URL:
CodeSince we didn't add authentication to our API, no credentials are required.
Using a cloud MCP client
Cloud clients like the OpenAI playground can't reach
localhost. To use one, deploy your project first — see Step 4 — and use your deployed MCP server URL instead. -
Test your MCP Server
Prompt your MCP client to:
list out all the todosThe client should recognize that it needs to call the todos MCP Server. Approve the tool call and you should see the todos listed 👏
Congratulations! Now go read more about the MCP Server handler.