This article is written by Steve McDougall, a longtime PHP/Laravel builder and friend of Zuplo. All opinions expressed are his own.
Laravel and Zuplo are a match made in heaven, and nobody knows about it yet. I thought now would be a good time to walk through how you can up your API game with Laravel and Zuplo together.
Zuplo itself offers a rich suite of tools that will help you build an amazing API, and Laravel is, well Laravel! It’s a full-stack PHP framework that allows you to quickly iterate on ideas and build some good - fast. Together, you can build an API that not only is a joy to work with, but is empowering to use.
- Building a public REST API with Laravel/PHP
- Want to add API key authentication without building it yourself
- Need rate limiting and request validation at the edge
- Looking to auto-generate OpenAPI documentation from your code
Building Your Data Model

I didn’t want to write “yet another todo™️” API that you aren’t going to get anything of value from. Instead, I decided to break out ChatGPT and have a brainstorming session. Amongst that usual crazy AI generated ideas was a gem, LocalLore API. So, with an idea in my pocket and a coffee to keep me going - let’s build an API using Laravel and Zuplo that will allow user submitted short-stories that are tied to local areas. Pretty funky right? Let’s begin.
All good Laravel projects start with laravel new, but having recently switched
to using Laravel Herd Pro, I now have a fancy UI that I can do this on. I will
still write the commands for you though, just in case you’d like to follow
along.
We aren’t going to use any Starter Kit for this project, as we definitely don’t need a UI or any JavaScript - and we want to leverage Zuplo for generating our API Keys for authentication! Once this project has been created, let’s open it up in your favourite code editor or IDE.
We are going to leverage the existing User model and migration - only making a few minor changes to switch from an incrementing ID to a ULID or UUID.
As you can see, the User migration stays relatively standard apart from a key minor quality of life adjustments. So, let’s move on.
The point of Local Lore is to allow users to post Short Stories about a local area, such as local myths and such. So next up we are going to want to look at creating the Story model and migration. For the purpose of this article I’m not going to go into detail too much on this, but the code will be up on GitHub for any parts that I do not include here.
This will create the Story model, a migration and a factory for us. This is helpful as it gives us everything we need to manage our stories and have a way to create stories for our test suite. Our Story model is relatively simple, we aren’t trying to build anything groundbreaking here:
We have the normal columns you would affect, a title and content as well as the user identifier. Then we have a status, which is a PHP enum - either Draft or Published. We also want to add a latitude and longitude, so that we can be as local or hyper-local as possible. We then add the published timestamp, so that when the story is updated to published - we mark the date.
At this point, we have the main things we need to get started with the real API work. The fun part! Usually I would start with authentication, but I will get around to that - as it is where we will want to create some custom code for Zuplo to make sure it works correctly.
Creating API Endpoints
I tend to organise my routes into folders in the main routes directory, as it
allows me to reduce the cognitive load when scanning files. So create the
following file:
We are going to focus on the routes/api/routes.php file, as we aren’t too
worried about console command scheduling right now. This file is the entry point
to our API, where all requests will be defined, kind of. Let’s take a look.
We are starting with a prefix of stories and setting a group name of
stories:* so that we can reference and link to stories nicely later if we need
to. You will notice that I haven’t included any actions to the routes yet - this
is something I will add shortly. But first, I wanted to take a second to talk
about the design.
The purpose of this API is to allow users to submit, update, read, and search for stories. We do not need an index action for this. So we are keeping the API purposefully short and to the point here. What I would usually do in a larger API, is to switch it to use the following file:
So when I read the main routes file for my API, I can see the resources and how they’re grouped and any middleware I may want to add to it later on. As your API scales, this sort of thing becomes important so it is useful to get into the habit of just setting your API like this from the start.
However, this API is pretty small, so we will stick to all of our routes being
defined in the main routes/api/routes.php file we looked at earlier. I tend to
import the namespace for the resource at the top, instead of importing each
individual route action class. Let’s take a look:
We have now linked up our routes, to controllers, and this will all be loaded by the framework for us. Let’s look at the initial controller, the Create Controller. The one that is needed to allow users to actually create the stories. To do this, we are going to want to validate the users input. So we can create a form request using the artisan command line:
Laravel Request Validation
Our form request is in charge of validating the incoming request payload, and making sure it matches a certain set of rules. The reason we use a form request for this, is because as it is resolved from the DI container - it will validate the payload before the controller action is even called.
The Laravel validation rules are really helpful, and are part of the reason why Laravel is so easy to build with. What I tend to do next, is create a payload DTO. It is a little bit of an over-engineering effort, but it means that when dealing with request data I am dealing with a contextual and typed object instead of a flexible PHP array.
This gives us a structured object that we can pass around our application which will not only keep its context, but also keep the type safety I need in my application. Let’s add a method to our form request, that will build this for us.
Once our form request is resolved from the container and injected into the
controller - we can call the $request->payload() method to create a new
instance of CreatePayload.
Creating a Queued Job
Before we carry on, let’s talk about APIs in general a second. When working with an API, we expect it to be consistent and fast. When creating a new resource using a POST request, we don’t always need to get the resource returned back. A lot of the time, the client integrating with the API will push a local record to its local state not really requiring anything from the API straight away. So we can push the creation of the resource to a background job, allowing our API to be faster at responding.
Let’s create a queued job using our artisan console, that we will be able to dispatch from our controller.
The purpose of this job is to take the request payload, and the user identifier, and store a new story in the database.
Our handle method here can be used to inject dependencies from our container,
instead of the constructor. This allows us to inject the DatabaseManager
instead of using the DB facade. We can then start our transaction, and create
a story by merging the payload as an array and the user_id for the author.
Let’s go back to our controllers now, and make sure we dispatch this job in our
CreateController.
Here we are making use of dependency injection as well as a new attribute from Laravel, which allows us to resolve an instance of the authenticated user from the container too. Then, to take it a step further we are dispatching a background job to do any write operations - but we are deferring the operation of this until the response has been sent back. This makes sure that the request is as fast as it can be.
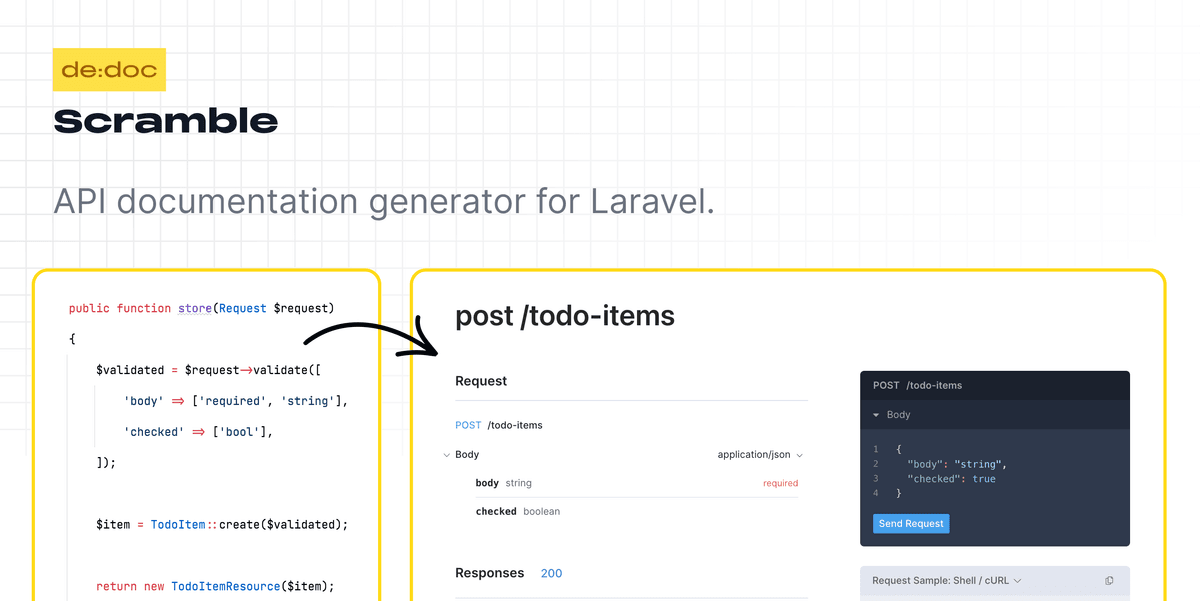
Generating an OpenAPI Specification with Scramble
We are now at a point where I can introduce you to Zuplo, which as an API developer is absolutely fantastic. I can use Zuplo as an edge located proxy for my API, and apply rules to my API that are managed in the Zuplo dashboard instead of in code. Want to tweak rate limits? Want to add heavier caching? No deployment needed.
To get started using Zuplo though, you will need an OpenAPI specification that describes your API well. In Laravel there are a few different approaches that you can take, but in this article I am going to use a package called Scramble. Scramble is OpenAPI documentation generator for Laravel. It generates API documentation for your project automatically without requiring you to manually write PHPDoc annotations. Using the package is relatively simple, so let’s install it using composer:
This will install the package for you, but to properly utilize it you will want to publish the configuration file to allow you to customize it for your usage.
This will create a config/scramble.php file. We want to update parts of this,
as we have made a few changes to our API.
The configuration file contains a lot more than just this, however this is all we really need to update right now. One important step you should take before exporting your OpenAPI Specification, is to analyse what the output would be. Scramble has a handy command for this, which will do a dry run of your export and let you know if it expects any problems. You can use this command by running the following artisan command:
If all goes well, you should see the following message:
Everything is fine! Documentation is generated without any errors
If you see this, then the next step is to export the OpenAPI Specification. If you do not see this, then you will need to check the Scramble documentation and your code to see if you can see why it isn’t exporting. Let’s assume everything is working as expected, and let’s export our OpenAPI file now using the following artisan command:
We should now have an OpenAPI Specification exported to the root of our project, let’s take a quick look at what it generated - minus the paths as they will take up a lot of space!
As you can see, it is pulling the information we set up in the configuration
file, and it is pulling our APP_URL from our .env file for the server
address. If we need to customize this we can update the configuration to list
the different servers we might have.
Now we know that the process works, let’s take a look at the post request to create a new story and see what was generated for us.
It has detected our route, our form request, and how we will respond. It has also created components for responses and the request body - which is really handy. One thing that I didn’t like about previous attempts to generate OpanAPI Specifications is that they would create all of these inline, making it harder to maintain in the long run.
Setting Up Your Zuplo API Gateway
Once we have generated our OpenAPI Specification, we can import it into our Zuplo project and get started!
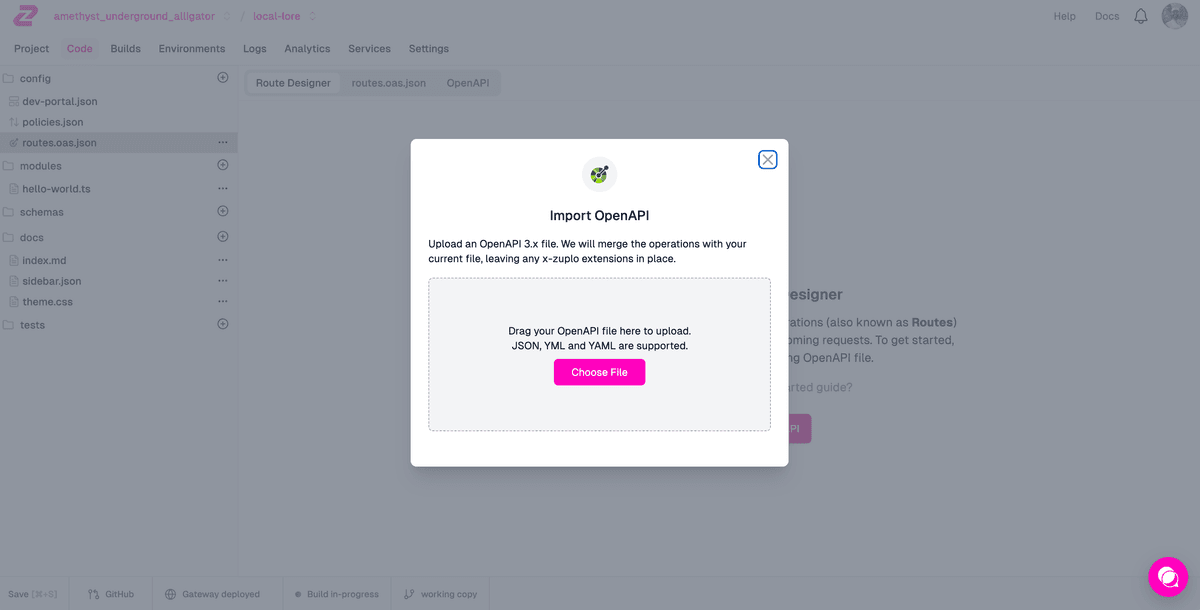
Once the spec has been imported (you can do this via Code >
routes.oas.json > Import OpenAPI in the Zuplo portal or via the CLI if
developing locally), we can select the route we care about in the editor and
start to apply policies to it.

Getting Started with Zuplo
Learn how to set up your first API gateway with Zuplo, import your OpenAPI specification, and start applying policies to your endpoints.
Adding API Request Validation
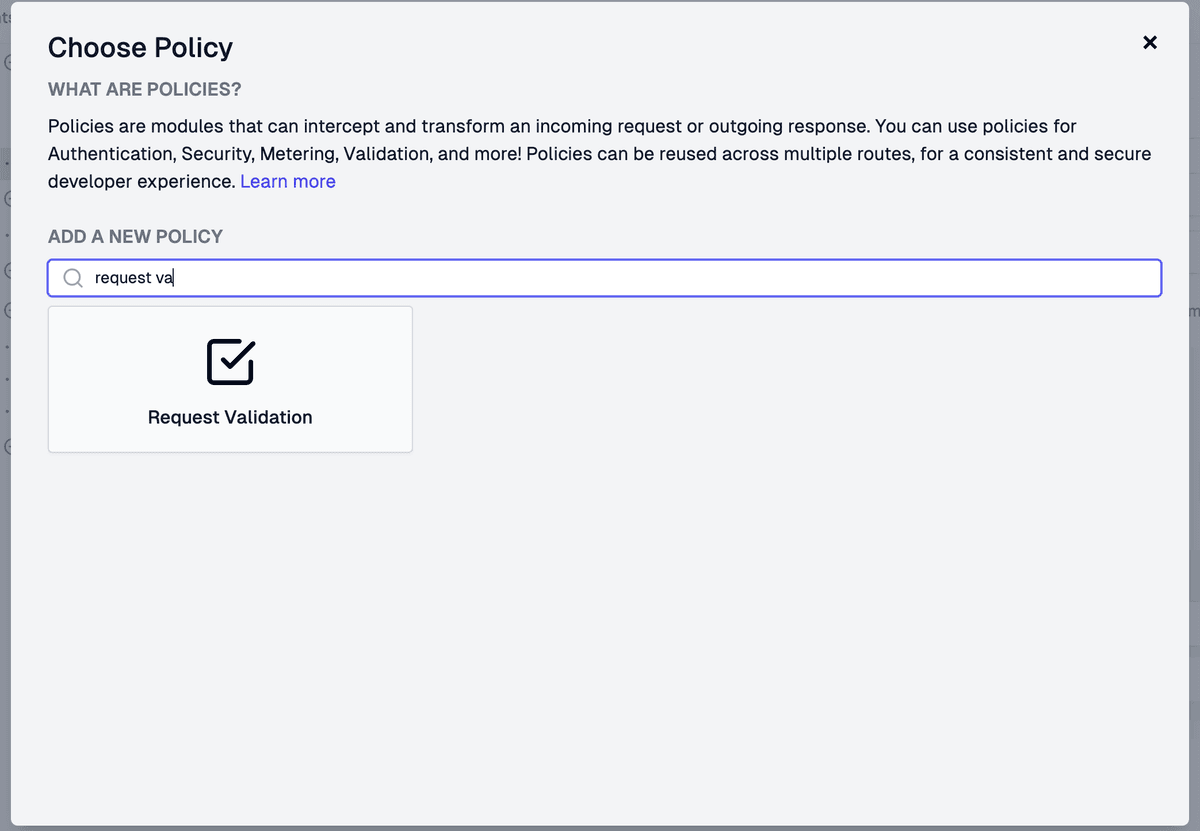
First up, we will add some request validation. This isn’t strictly needed, but it will stop requests coming to our API if they aren’t going to pass the Laravel validation rules that were in the OpenAPI Specification.
On your endpoint, you’ll see the “+ Add Policy” button. Click on it, and search for “Request Validation”.
When you click on it, you’ll see a JSON with some options that are described under “Usage”.
Click OK to apply the policy. Let’s save, and try it out. Click on “Test”, and then “Test” again, and your request will be rejected.
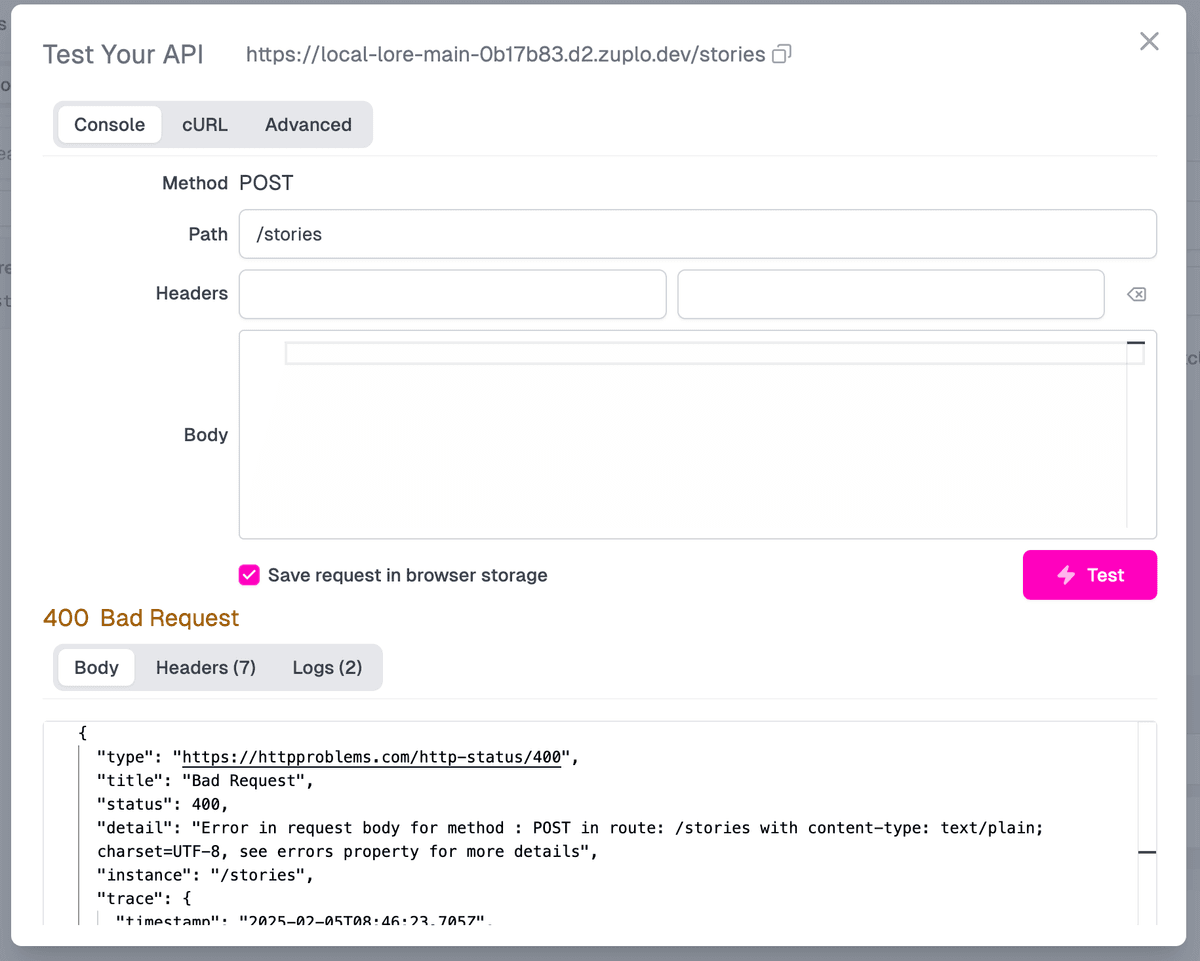
You will need to craft a JSON body that matches our CreateRequest schema from
before - and also set the Content-Type header to application/json. Here’s a
sample story for you:
After filling in the headers and body - click Test again.
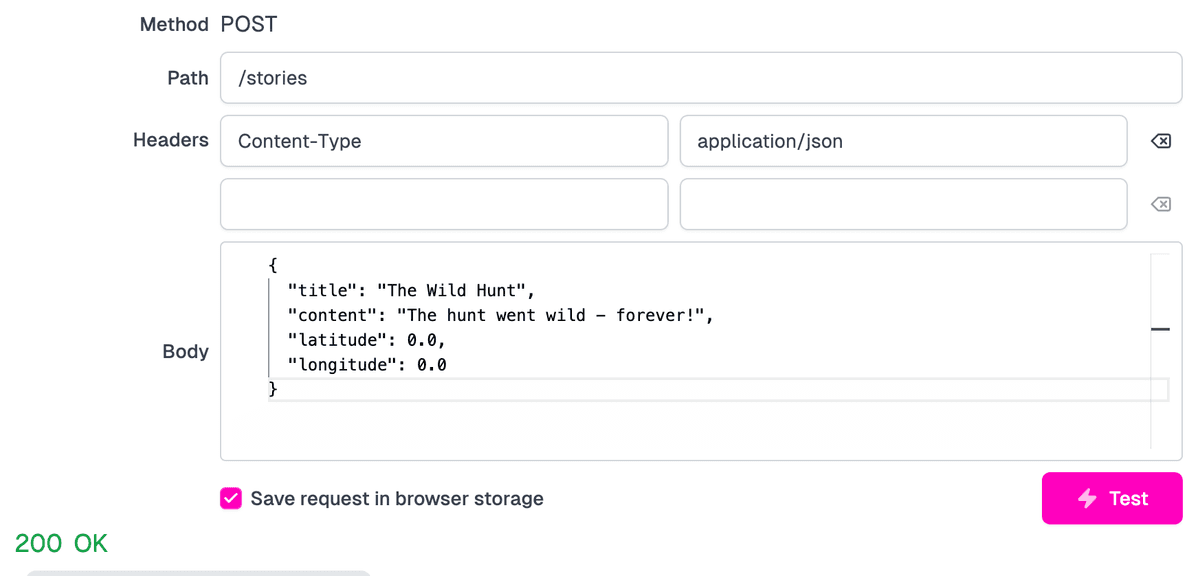
Success!
Request Validation Policy
The Request Validation policy validates incoming requests against your OpenAPI schema definitions, ensuring requests conform to your API's expected structure before reaching your backend.
Adding API Key Authentication
Next, let’s add the API Key Authentication policy:
Adding the policy is actually not the full setup flow (check out the full documentation) - but this is just to demonstrate what functionality can be performed at the gateway.
Now we are authenticating, and validating. All things that we can do in Laravel too - but this is happening on the edge before it is routed to us, meaning users get quicker more instant feedback and our application can stay available for any requests that will pass these policies. It sounds like we are doubling our checks, but in reality we are just filtering out requests that are going to fail anyway - keeping our API available for requests that will be successful.
API Key Authentication Policy
Zuplo's API Key Authentication policy validates API keys against your configured key store, providing simple yet powerful authentication for your APIs.
Adding Rate Limiting
One final policy I would recommend adding is the rate limit policy, yes we can do this in Laravel too - but it stops anyone from attempting to make a request and failing, multiple times, before getting a successful request in. Think of it as a breach rate limit, if it is going to keep failing, we will rate limit their attempts. You can click “Add Policy” and search for “Rate Limiting” - here’s the default setup which rate limits by IP, allowing 2 requests every minute:
Open up the “Test” panel again and fire off 3 requests. You should get rate limited.
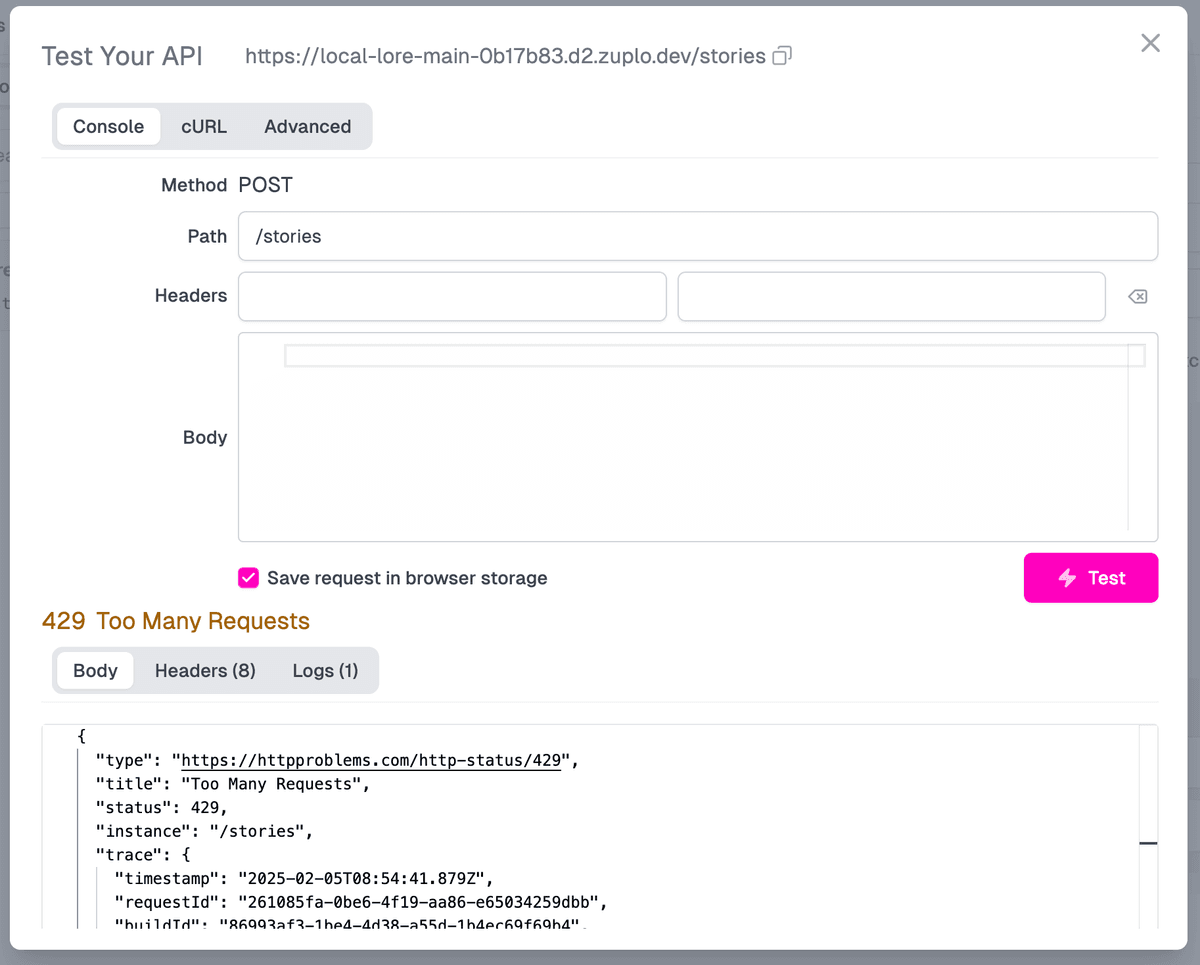
So, now we have a good way for our application to validate and authenticate incoming requests. We also have a good way to pre-validate against our OpenAPI Specification and rate limit these attempts. Not only that, but Zuplo will also apply DDoS protection for us automatically, making our API even safer and even more secure from the outside world. The latency it adds from forwarding requests is extremely minimal, and with the way it works it is not anything you or your users would notice.
Rate Limit Policy
Zuplo's Rate Limit Policy enables per-user, per-key, or global rate limiting with configurable time windows and request thresholds.
Deploying Your Laravel API

Now that this is all in place, we want to actually deploy our API. Now, when it comes to deploying APIs in Laravel, there are multiple approaches you could take. Laravel Forge is a great option, and will automatically deploy for you to your own infrastructure based on GitHub webhooks. Another option is to use something like Ploi.io which is similar to Laravel Forge but built and maintained by a different company. One thing I like about Ploi, is they have invested in more than just deploying a Laravel application with a few extra tools. They have gone into great details on how you can effectively manage your infrastructure and applications from their console.
If none of these are what you are looking for, the upcoming Laravel Cloud release will be perfect. You can achieve zero downtime deployments in under 60 seconds, to a scalable infrastructure that is fully managed by the Laravel team themselves. From reports I have seen, it really is as good as it sounds - however, having not tried it I can only stipulate how good it will be.
Wrapping Up
Whichever way you choose to deploy your API, these automated tools take the stress, pressure, and risk out of deploying. As long as you have an adequate test suite in your CI pipeline, triggers will be sent to deploy the latest version for you. Then, update Zuplo with your new OpenAPI Specification, sit back, enjoy your API getting a lower error rate as Zuplo starts to filter out the bad requests for you. Once deployed, you can watch the logs and analytics in your Zuplo dashboard to understand how your API is being used, and what areas you might need to improve upon based on error ratio and response timings.
Update Zuplo via GitHub Actions
Automate your API gateway updates by integrating Zuplo into your CI/CD pipeline with GitHub Actions.
I know for sure that the next API I build will be using Zuplo to act as an edge gateway for my project so that I can not only sleep happily at night, but also check-in on my API’s performance. Why not give it a try for your next API?