
This article is written by Pavle Davitković Software Engineer @TraceOne . All opinions expressed are their own.
APIs serve as the fundamental framework of contemporary software systems,
functioning as the contract that facilitates seamless communication among
diverse applications and services.
By exposing well-defined endpoints, they allow developers to integrate
functionality, share data and construct scalable, modular architectures.
Although APIs are instrumental in powering mobile applications, enabling
third-party integrations, or developing web apps, they also simplify the
development process and diminish redundancy.
However, one must consider the security implications associated with their use.
Last but not least, the documentation of the API cannot be overlooked; it is, in
my view, a critical pillar of the API development process because it ensures
reliability, trust and ease of integration.
Secure APIs are essential for protecting sensitive data, preventing unauthorized
access and guarding against vulnerabilities, such as injection attacks or data
breaches.
Conversely, well-documented APIs function as a guidebook for developers,
streamlining the adoption and integration process by clearly delineating
endpoints, request structures and expected responses.
So, this blog will focus on creating an API in .NET and how to secure and document it with a tool called Zuplo.
Table of Contents
- Creating a .NET Web API
- Azure deployment
- What is Zuplo?
- Creating a Project on Zuplo
- Adding Rate Limiting
- Adding API Key Authentication
- Generating API Documentation Portal
- Conclusion
Creating a .NET Web API
If you are familiar with the process of creating APIs in .NET, there is a
possibility you have encountered a “traditional approach” where you first lay
down models, then add database providers, etc.
But there is another, and in my opinion, much faster way to create an API by
using the technique called scaffolding.
Let’s begin.
Open Visual Studio and create a new ASP.NET Core Web API project and give it a meaningful name.

On additional information screen copy this configuration

In order to export Open API configuration to Zuplo Enable OpenAPI support is mandatory.
After a few moments, a new project will be created. Remove the WeatherForecast controller and model from the project. We don’t need them because we are going to create our own.
Adding a model
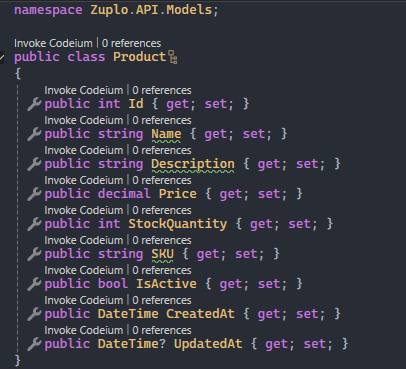
In the project root add folder Models and then add Product model.
Once you’re done with it, let’s scaffold endpoints.
Scaffolding endpoints
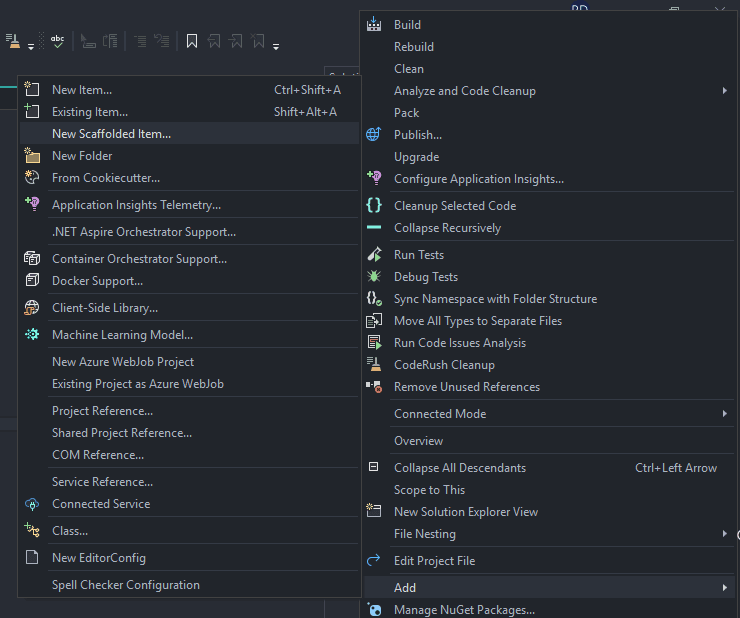
To start scaffolding process, right click on project root - Add - New
Scaffolded Item
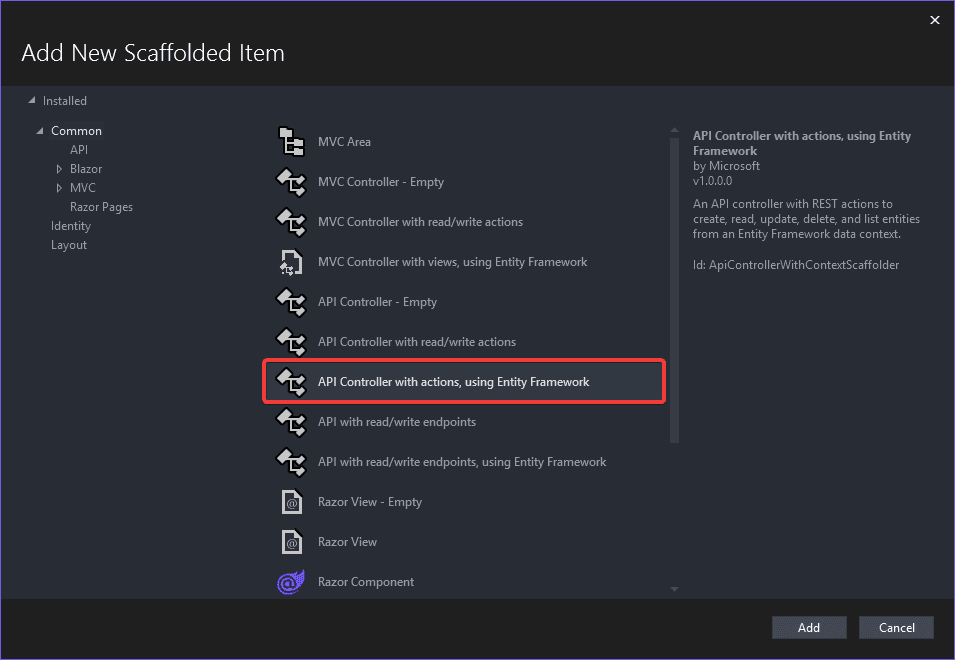
On next screen chose API Controller with actions, using Entity Framework option
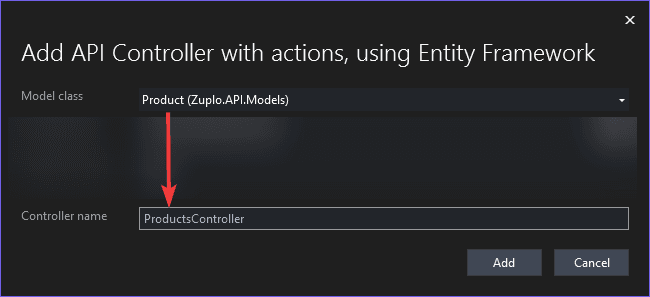
Immediately, you will get a new popup where you need to configure DbContext class, database provider and controller name.
In the Model class dropdown chose a previously added model:

Next step is the DbContext class. It can be added by IDE by clicking on + plus sign:

Name it like you want and click Add:

In database provider dropdown you have 4 providers at your disposal:

For sake of simplicity, I will go with SQLite:

Controller name is populated based on the model name, so you don’t need to
change that. Click Add to complete the whole process.
If everything went successfully, you will see that your project has changed a bit. There is Data folder with DbContext, controller file with all endpoints and also minor changes to Program.cs file and appSettings.json
Next step is creating a new migration and updating the database.
Database migration
This process is also fast and simple as endpoint scaffolding. Let me show you.
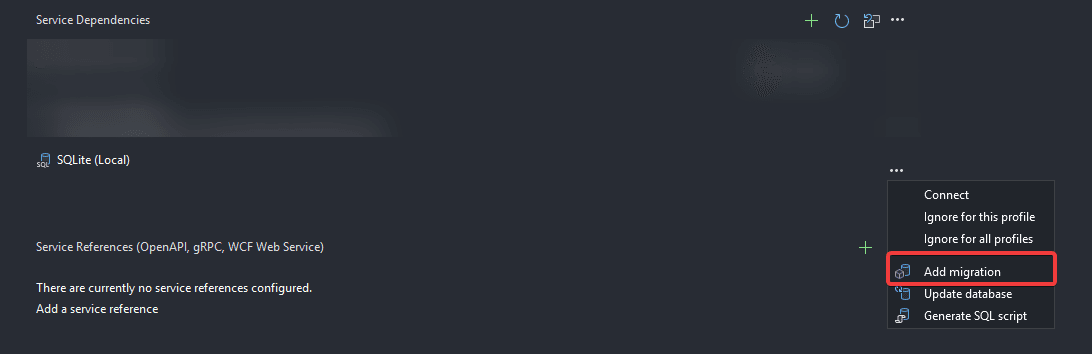
Double click on Connected Services in project root. Next go to SQLite(Local)
service click on … and chose Add migration
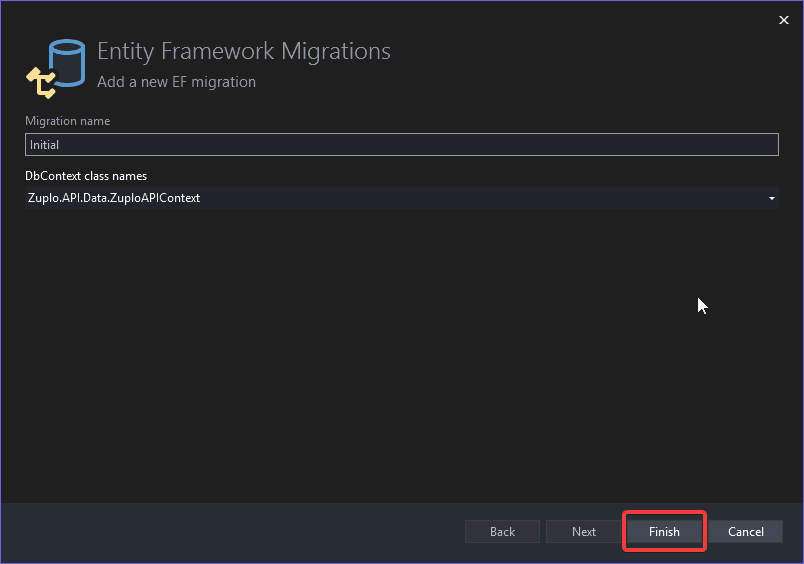
On the next screen give a name for migration and wait a few moments for IDE to populate the DbContext class and click Finish:
When migration is successfully added, go to same menu and chose Update database:
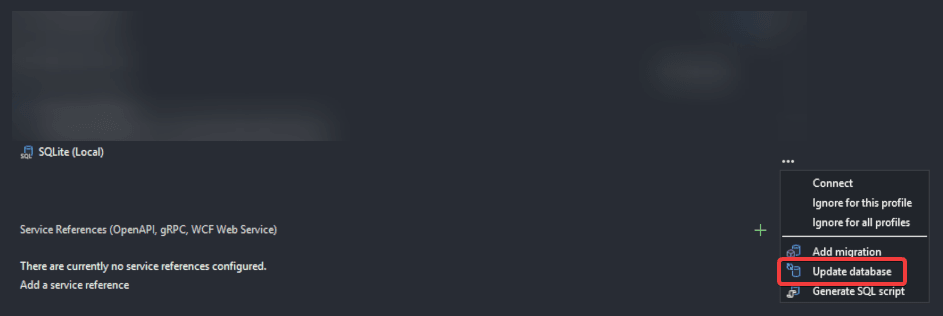
Once IDE populate DbContext class click Finish:

Congratulations! You have created a full Web API in a matter of minutes.
But before you test if everything works fine, I suggest you seed some test data in the database. Here are preferred approaches by Microsoft.
For simplicity, I have generated some test data using a Mockaroo that will be added via POST endpoint from http files.
Open file that have extension .http and add following code:
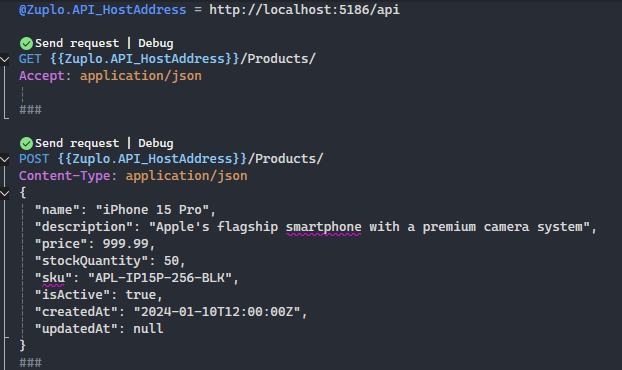
First execute POST action to persist test data into the database. Then invoke
GET action. You should get response like this:

Last thing that needs to be done is exporting an OpenAPI file and importing it to Zuplo. Luckily, there is a NuGet package that does the export at build time.
Generate OpenAPI document at build time
In most web applications, OpenAPI documents are generated at runtime and made available through an HTTP request to the application server.
However, in certain cases(like this particular case), it can be beneficial to produce the OpenAPI document as part of the application’s build process.
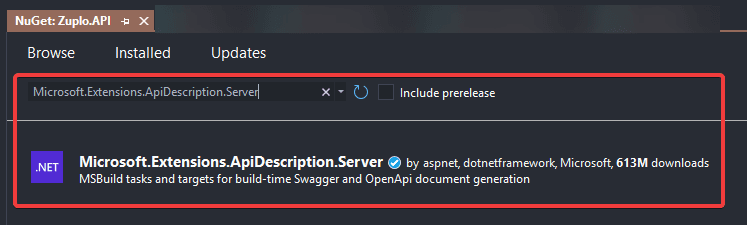
Go to NuGet library and look for Microsoft.Extensions.ApiDescription.Server package.
Next, let’s modify the output directory. You can also change the file name, but default is pretty intuitive in my opinion.
In .csproj file add this lines:

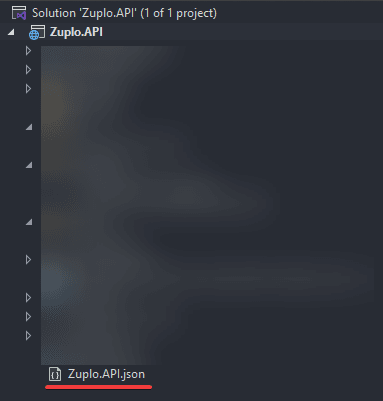
When a project is successfully built, there should be an OpenAPI json file project root.
Next step is to deploy an API with a database to Azure.
Azure deployment
Azure offers several
free services(some
tiers are free forever and some are free for 12 months only).
In our case, I will use only two services:
Azure App Service and
Azure SQL database.
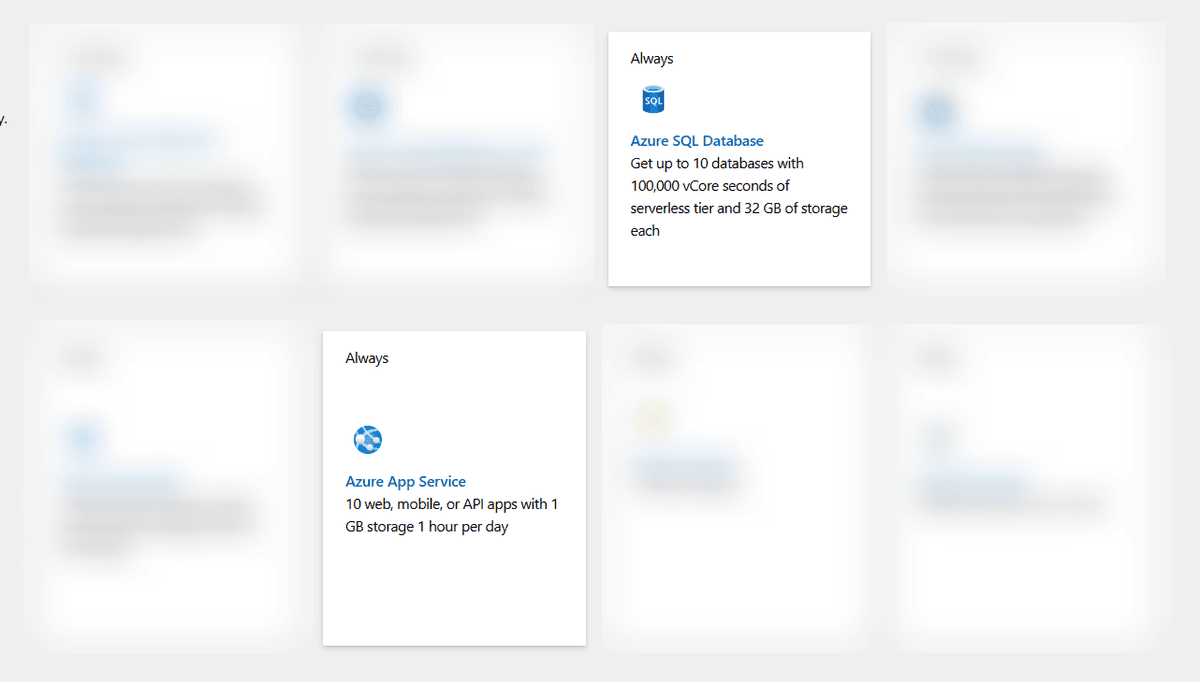
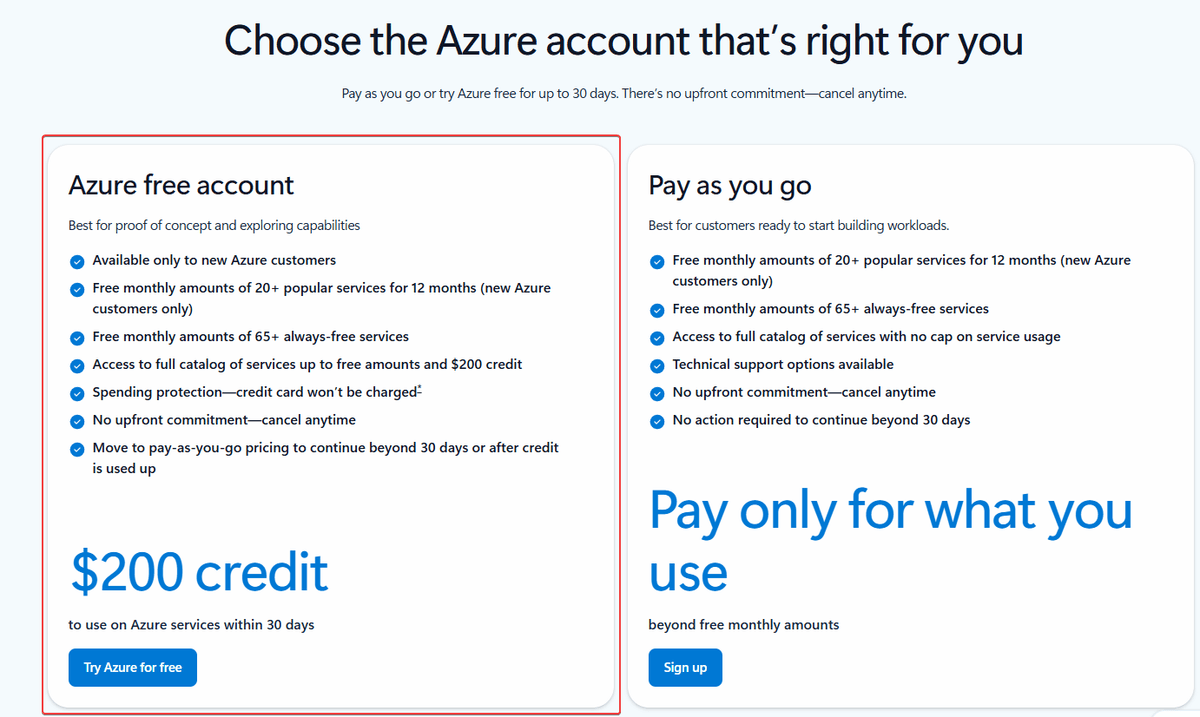
To keep this section simple, I will link all the useful tutorials starting from account creation (be sure to choose Azure free account)
After that is done, create an Azure SQL database with this official step by step guide.
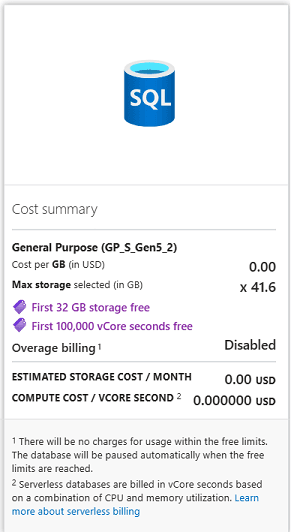
Be sure to look for the Apply offer banner to get free tier:

Once, you apply to free tier, you should see something like this:
Once that is done, next is deployment of API to Azure App service and connecting to SQL server instance.
But if you are more of a visual type, you can follow the video that covers all the steps above.
And that is it! You have deployed your application to Azure(🤞for small invoice at the end of the month).
But, let’s see how Zuplo manages API security and documentation.
What is Zuplo?
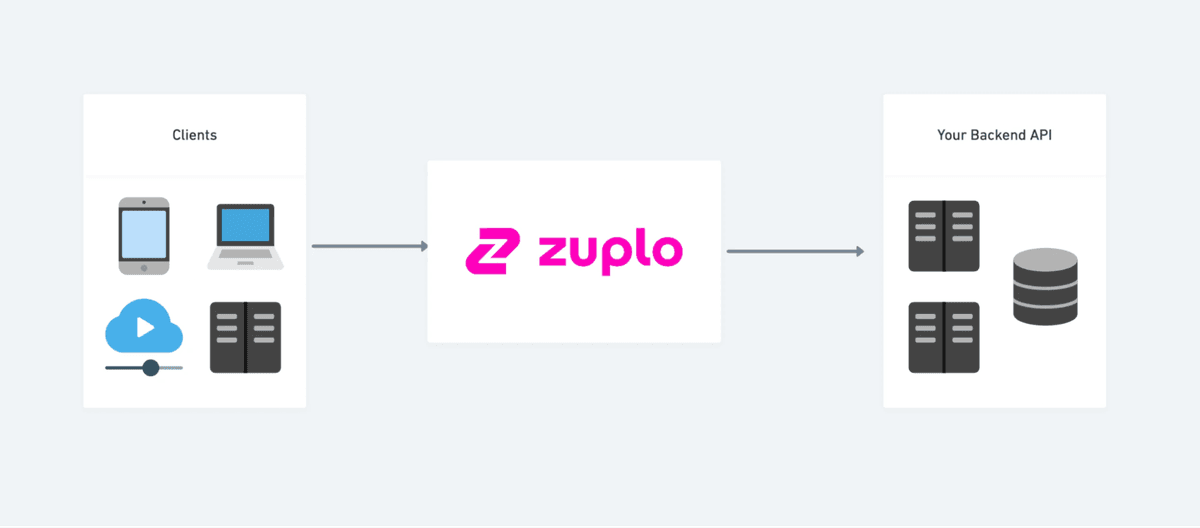
Zuplo is an API management platform that simplifies the process of securing,
documenting and optimizing your APIs.
It sits between clients and API and traffic is proxied through the Zuplo gateway
where you can enforce protections like rate-limiting and authentication,
validate requests before they hit your backend.
Zuplo features
Some of key features that comes with Zuplo are:
- Developer portal - auto generated developer portals where users can manage keys, subscriptions and view analytics
- OpenAPI support - integration with OpenAPI definitions for automatic API documentation and request/response schema validation
- Rate limiting - rate limit support per API, user or API key
- Deployment to unlimited environments - modern git-ops workflow allows API Gateway deployment to unlimited environments
- Monetization - make $$$ with your API ☺️
Now that you learned what Zuplo is and what features it has, let’s see how to integrate with .NET Web API.
Creating a Project on Zuplo
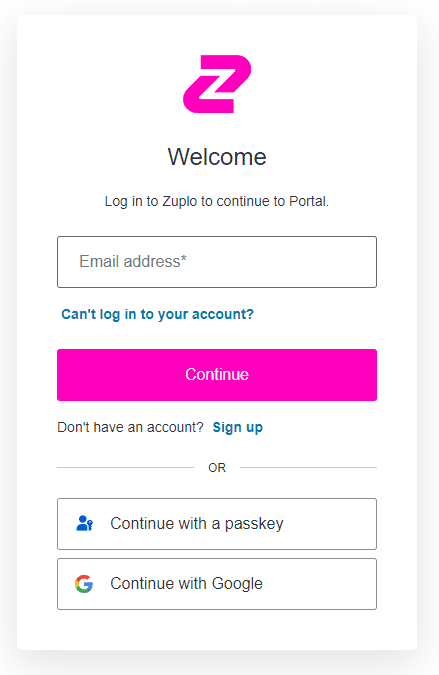
Go to the Zuplo portal and login in:
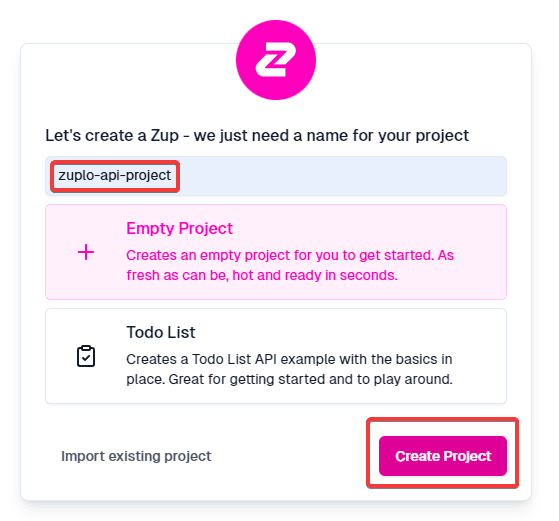
Next step is project creation:
When
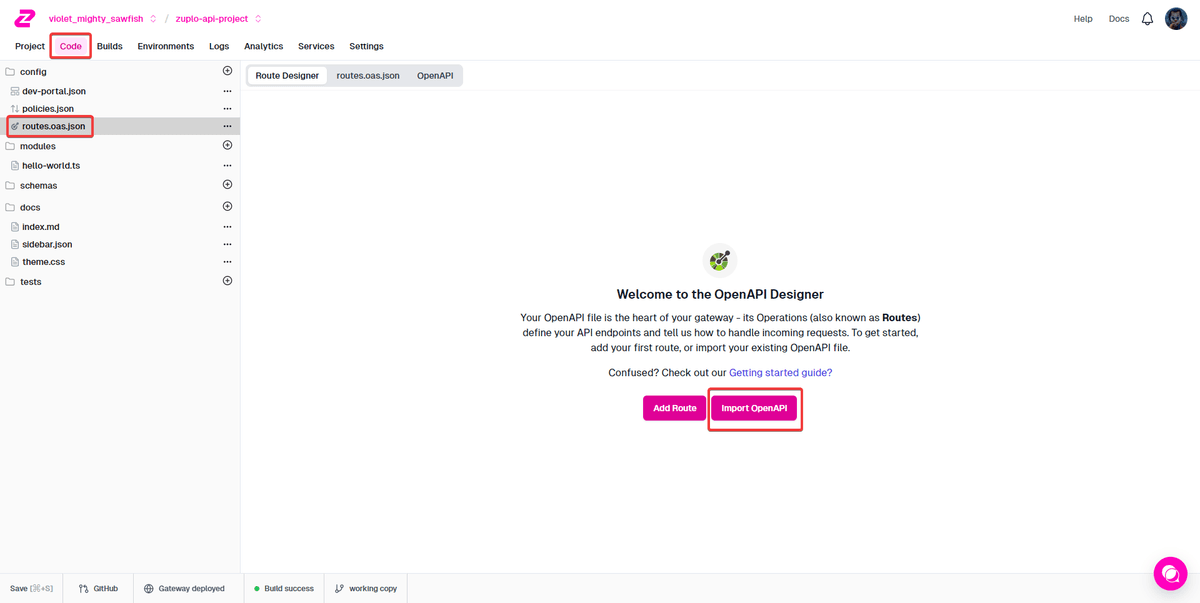
project is created successfully, go to Code tab and chose
routes.oas.json file and click on Import OpenAPI.
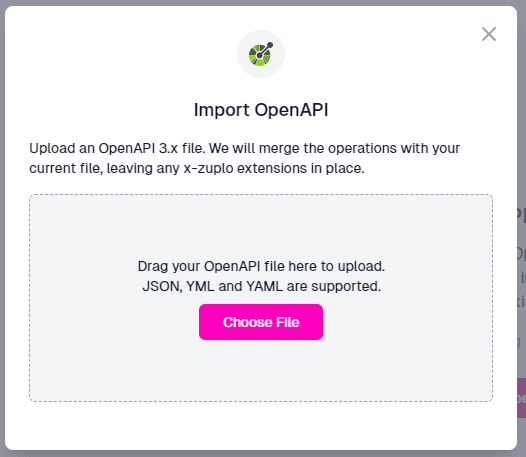
On next screen, find and chose previous exported file:
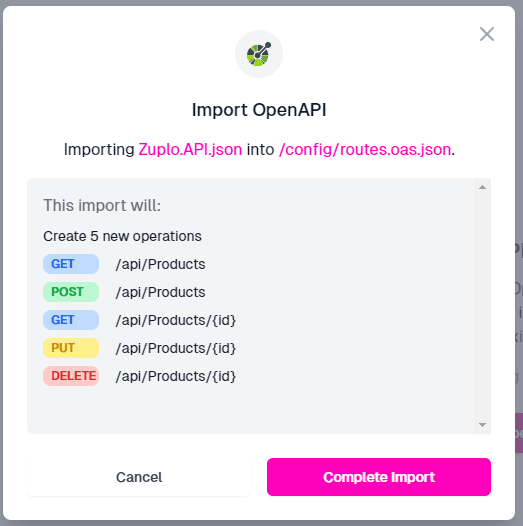
Make sure you map the OpenAPI
serversproperty to your Azure web api deployment URL!
Next screen will read and display all endpoints with their metadata:
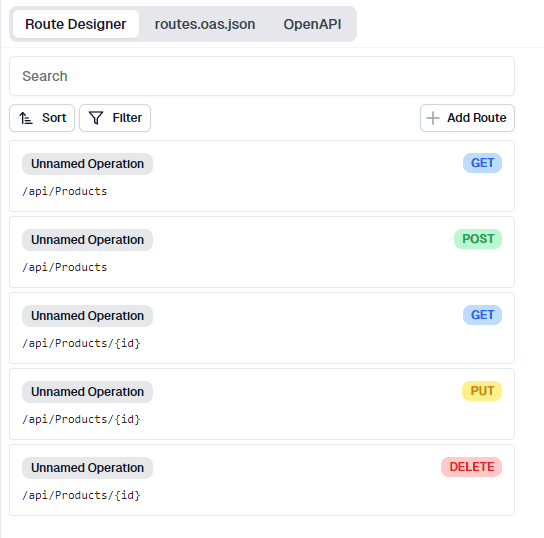
When Complete Import is clicked, on Route designer tab endpoints will be displayed:
Final step is saving this configuration by clicking on the Save button in the left bottom corner, and letting Zuplo deploy it.
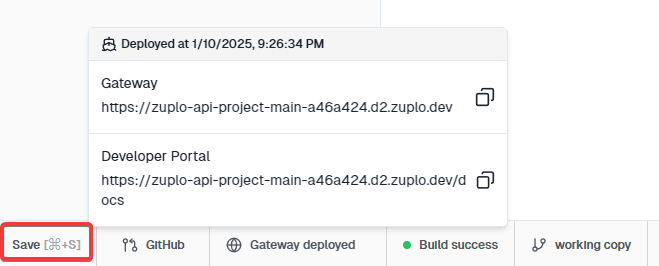
Clicking the Test button allows us to test our API integration. If your Azure service is working - then you should get a 200 OK!
Adding Rate Limiting
Most likely, we don’t want people abusing our API or attempting to take down our server with DDoS attacks. While coding a rate limit policy isn’t difficult, there are many factors to consider—so why bother? Let’s have Zuplo manage that for us.

We need to add a new policy on the request side. Since we’ll be dealing with many policies, simply type rate and select Rate Limiting:

All we need to do here is press Ok. Easy, right?

Our rate limit has been added. Now, we just need to save and run the test three times. On the third attempt, we’ll hit the rate limit. Of course, we can adjust this in the policy, as shown in the image above, where requestsAllowed is set to 2.

We can do that for all the other endpoints if we want to.
Exceeding the request limit will temporarily block further data requests. We’ll need to wait a minute before trying again.

So far, so good—but what if we want to prevent unauthorized access to our API? We’ll need to implement some sort of authentication. While it’s not overly difficult to build, it involves multiple steps, configurations, and testing. Wouldn’t it be great to let Zuplo handle those details for us? That way, we can focus solely on our API.
Adding API Key Authentication
We need to navigate back to the Policies section and add a new policy—this time, API Key Authentication:

There’s not much to do here—just press OK.

It’s important to move the api-key-inbound policy to the top:

If we save it and try testing the API, access will be denied:

At the top of the screen, click Services, then select Configure under API Key Service:

We need to create a consumer, which will function as a token:

We need to set a name for the subject and specify the email or emails associated with the key:

Once we click Save consumer, an API key will be generated. We can either view it or copy it:

Now, we can go back to Code → routes.oas.json to test our API. Here, we need to add the authorization header and pass the Bearer token along with the API key:

Success once again! It’s working as expected! 🥳🥳🥳
If you think that doing this manually is not for you, read this:

And that’s how you enhance your API with Zuplo 😎 But wait, there’s more! As always, we have a cherry on top.
Generating API Documentation Portal
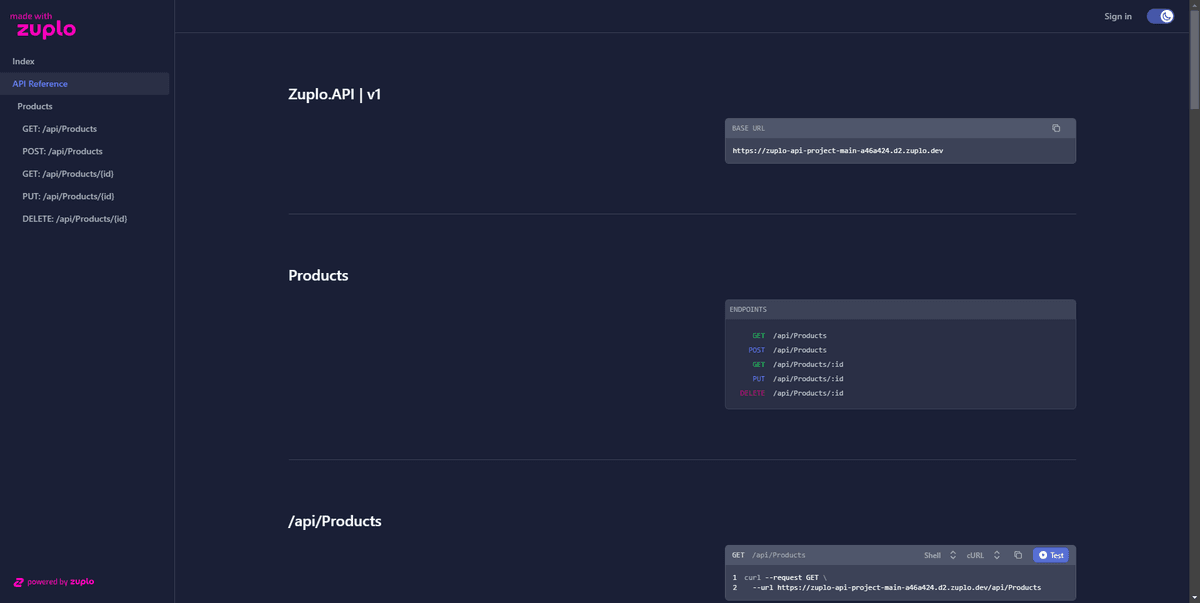
Copy the Developer portal link, paste it in the browser and enjoy 🙂
Conclusion
In this “how to” guide I covered:
- How to create complete .NET Web API in matter of minutes
- How to export OpenAPI file at build time
- How to secure your API and create rich documentation with Zuplo
Now, what kind of API will you build with .Net? 😎