In Day 1 of the Supaweek we covered how to create an AI-based API using OpenAI and Supabase DB as its backend, and we added auth and rate-limiting using Zuplo’s API Gateway and even programmed a request handler directly in the gateway.
Today, we’ll cover how to handle user requests dynamically in your API (i.e. user-level auth) because not all users are created equal.
User-level authentication
Putting an authentication layer to your API is essential for its security, but it wouldn’t have taken you long to start asking, how do I actually program my API to handle different users differently?
If you were using JWT tokens, you could add claims to the token and then program your API to handle these claims differently. But, as we saw in Day 1, Zuplo’s default authentication mechanism is API Keys, and API Keys are just short strings opaque strings, so how do we handle different users differently?
We wrote extensively about why we chose API Keys over JWTs, one of them is our Wait, you’re not using API keys?, where we covered how the best APIs in the world use API Keys. At Zuplo, we wanted to make the use of API Keys as easy as possible, but we also made them customizable. Let’s see how in today’s tutorial.
Adding metadata to API Keys and using them in your API
We continue to build on the API we created in
Day 1, so make sure you have it deployed and ready to go.
We will add an orgId to the API Key so that we can use it in our API to know
which organization the user belongs to. We will then store the orgId in the DB
and use it to filter the requests.
You can find a video walkthrough of this tutorial here:

Step 1 - Add orgId column
In your Supabase DB, add a column orgId to the blogs table, and the
resulting schema should look like this:
Step 2 - Program the request handler
For both the GET and POST operations, we will modify the request handler to
filter the requests based on the orgId of the user.
For the POST operation, go to generate-blog.ts which is used as the request
handler and update the function with the following code (your generate-blog.ts
to look like
this sample
).
Notice that we’re pulling the orgId from the API Key metadata by using
request.user.data?.orgId, that’s because Zuplo populates the request.user
object to include the details of the API Key that was used to make the request
and the metadata that was added to it. If the user is not authenticated, the
request.user object will be undefined.
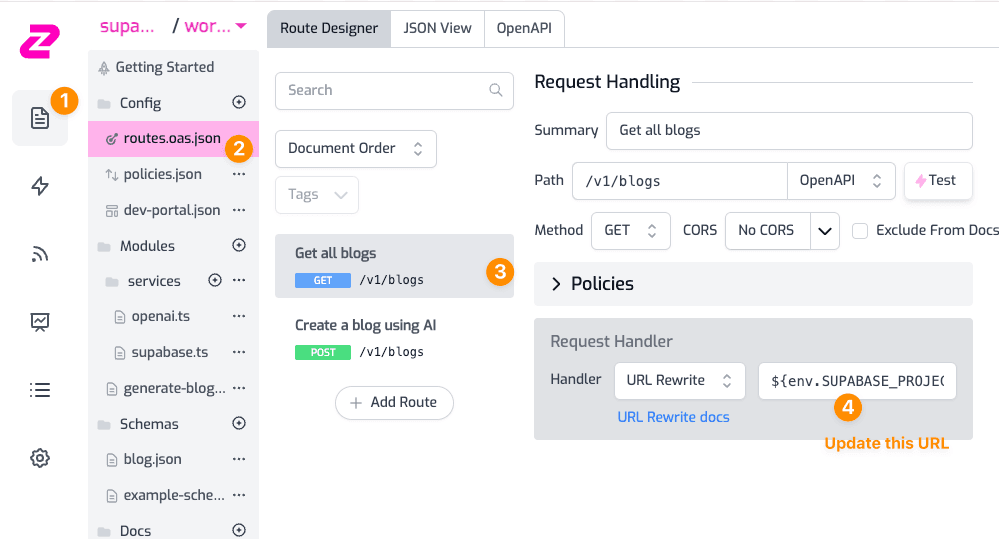
For the GET operation, go to the Request Handler and update the URL to be
${env.SUPABASE_URL}/rest/v1/blogs?orgId=eq.${request.user.data?.orgId} as
shown below:
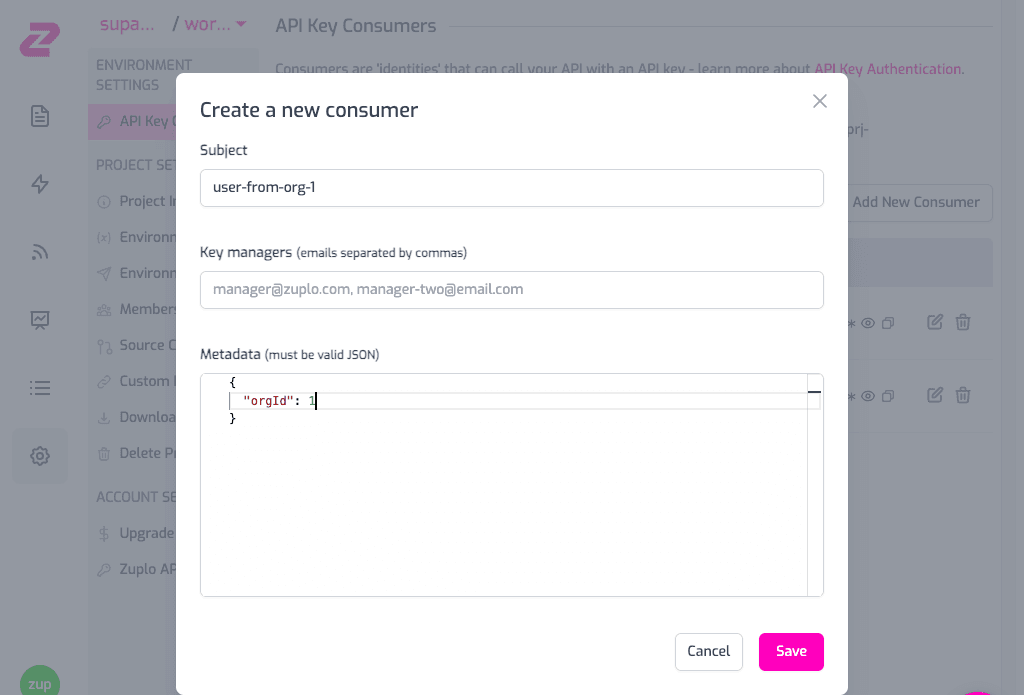
Step 3 - Create an API Key with orgId in the metadata
To make an authenticated request to the API, create an API Key in Project
Settings > API Key Consumers > Add New Consumer. Add the orgId in the API
Key metadata, you can leave the manager field empty for now.
Copy the generated API Key as we will use it in the next step.
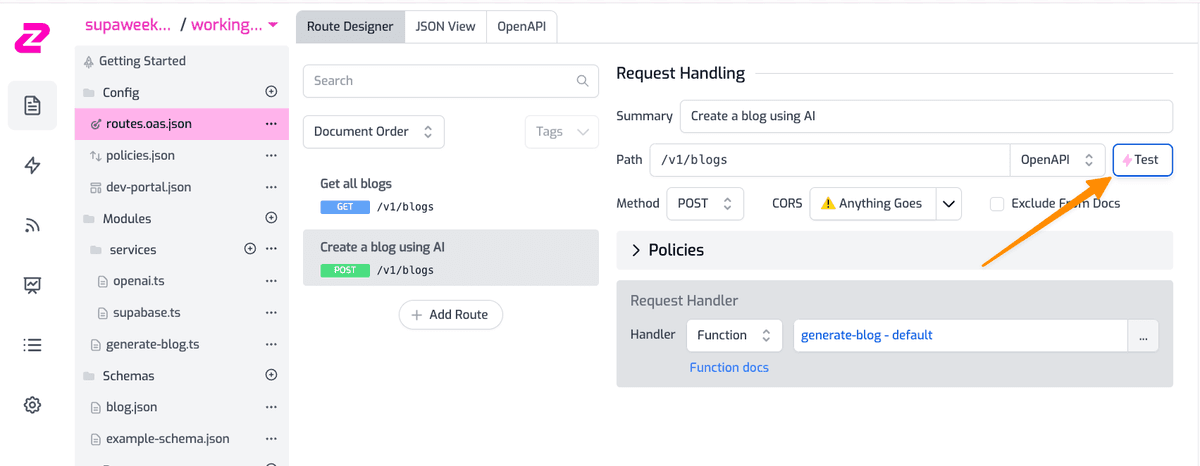
Step 4 - Make a request to the API!
First, create a blog using the POST operation from the test console.
- Add your API Key header in the format
Authorization: Bearer zpka_1234and make a request - Add the request body. This endpoint accepts a JSON in the format
{ "topic": "you blog topic" }. Add it to whichever topic you want OpenAI to create the blog about. - Hit Test! 💥
You can now try to make the request with the GET operation, which will now
filter the blogs based on the orgId of the user.
If you now try to make a request with a different API Key with a different
orgId, you will get an empty array.
This is Day 2 of Supaweek
As always if you have any questions, comments or feedback, join us in our Discord server, or drop us a tweet at X. We’d love to hear from you!
Check out Day 3 of the Supaweek to learn about the API Documentation that’s generated with your Zuplo API!