Monetizing APIs: a step easier with Moesif

Our mission at Zuplo is to provide companies the best way to get an API in production including developer portals, authentication, rate limiting and more, all working together seamlessly and running in an edge network, as close as possible to each person and computer in the world.

We also wanted to provide our customers a solution to monetize and build a business around their APIs, enabling any company, small or big, to have an API-first approach. In this post we explore Zuplo’s new integration with Moesif, enabling developers to build API business in minutes!

What is Moesif?#

Moesif enables analytics and monetization for some of the largest companies in the world across every vertical. By having a direct integration with Zuplo, developers can quickly monetize their customer’s API usage. Let’s look a little deeper at some highlights of the platform.

By integrating with Moesif, we can offer our users a straight-forward way of monetizing APIs easily along with publishing the API.

Tutorial: Connect Moesif to monetize your API#

Let’s monetize an API in Zuplo by connecting it to Moesif. Zuplo would be in charge of handling your API requests enforcing authentication, security and providing your API documentation.

Every requests handled by Zuplo would report the information to Moesif’s platform where you can configure different monetization models for your API.
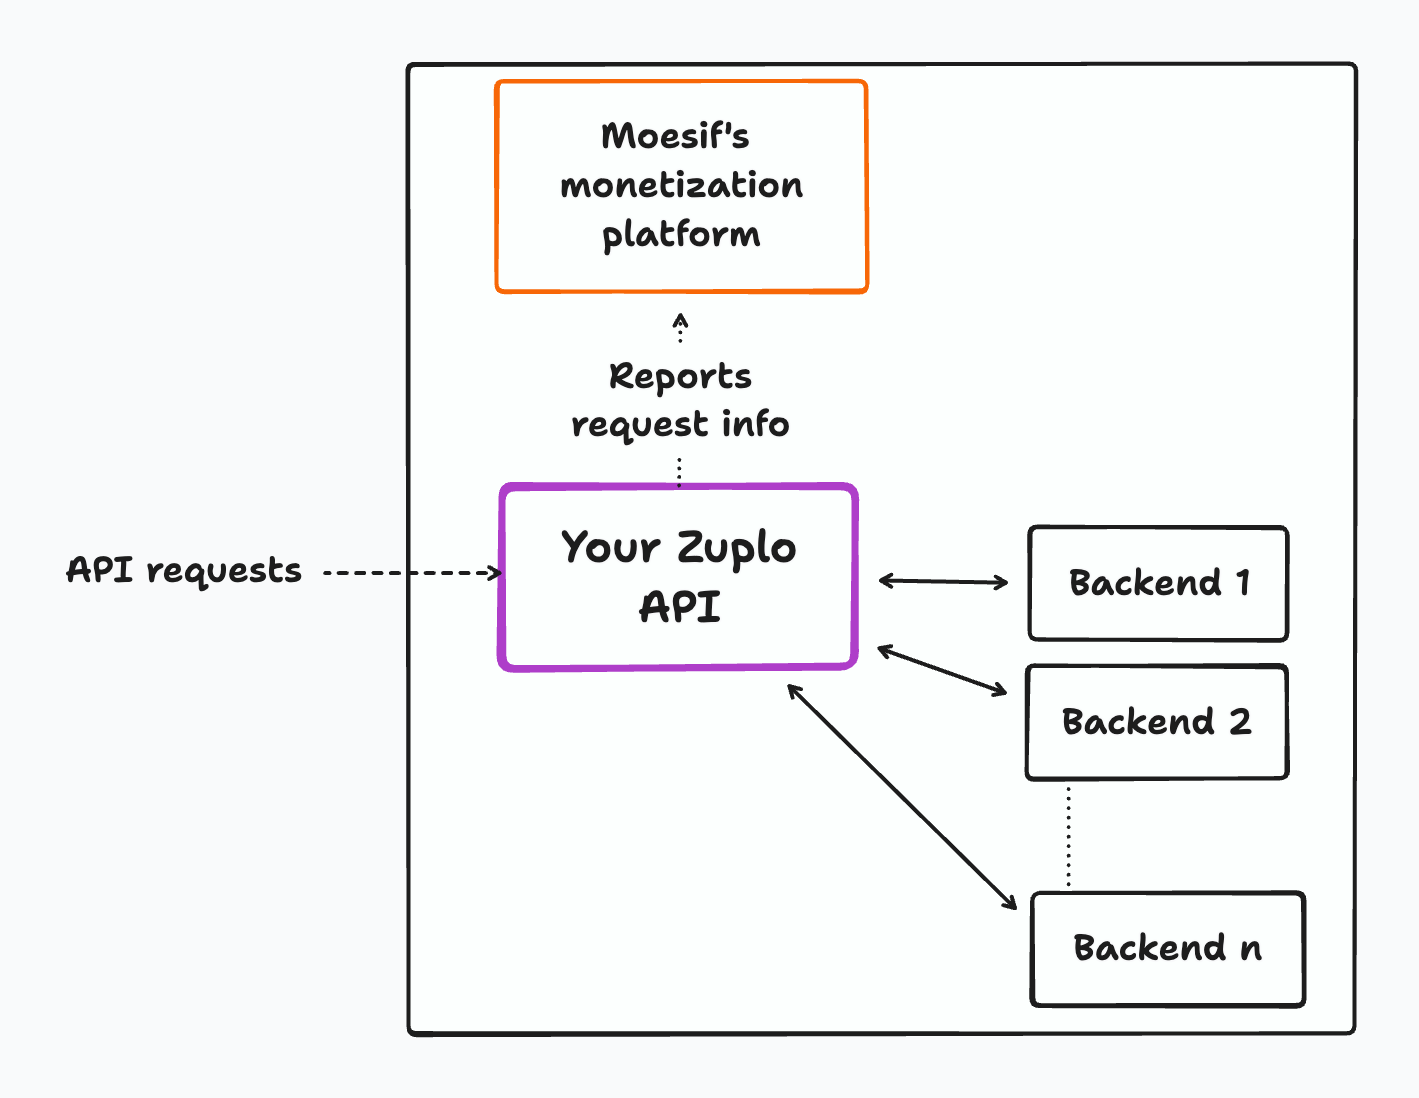
Diagram of Zuplo and Moesif

Step 1: Create a Zuplo project#

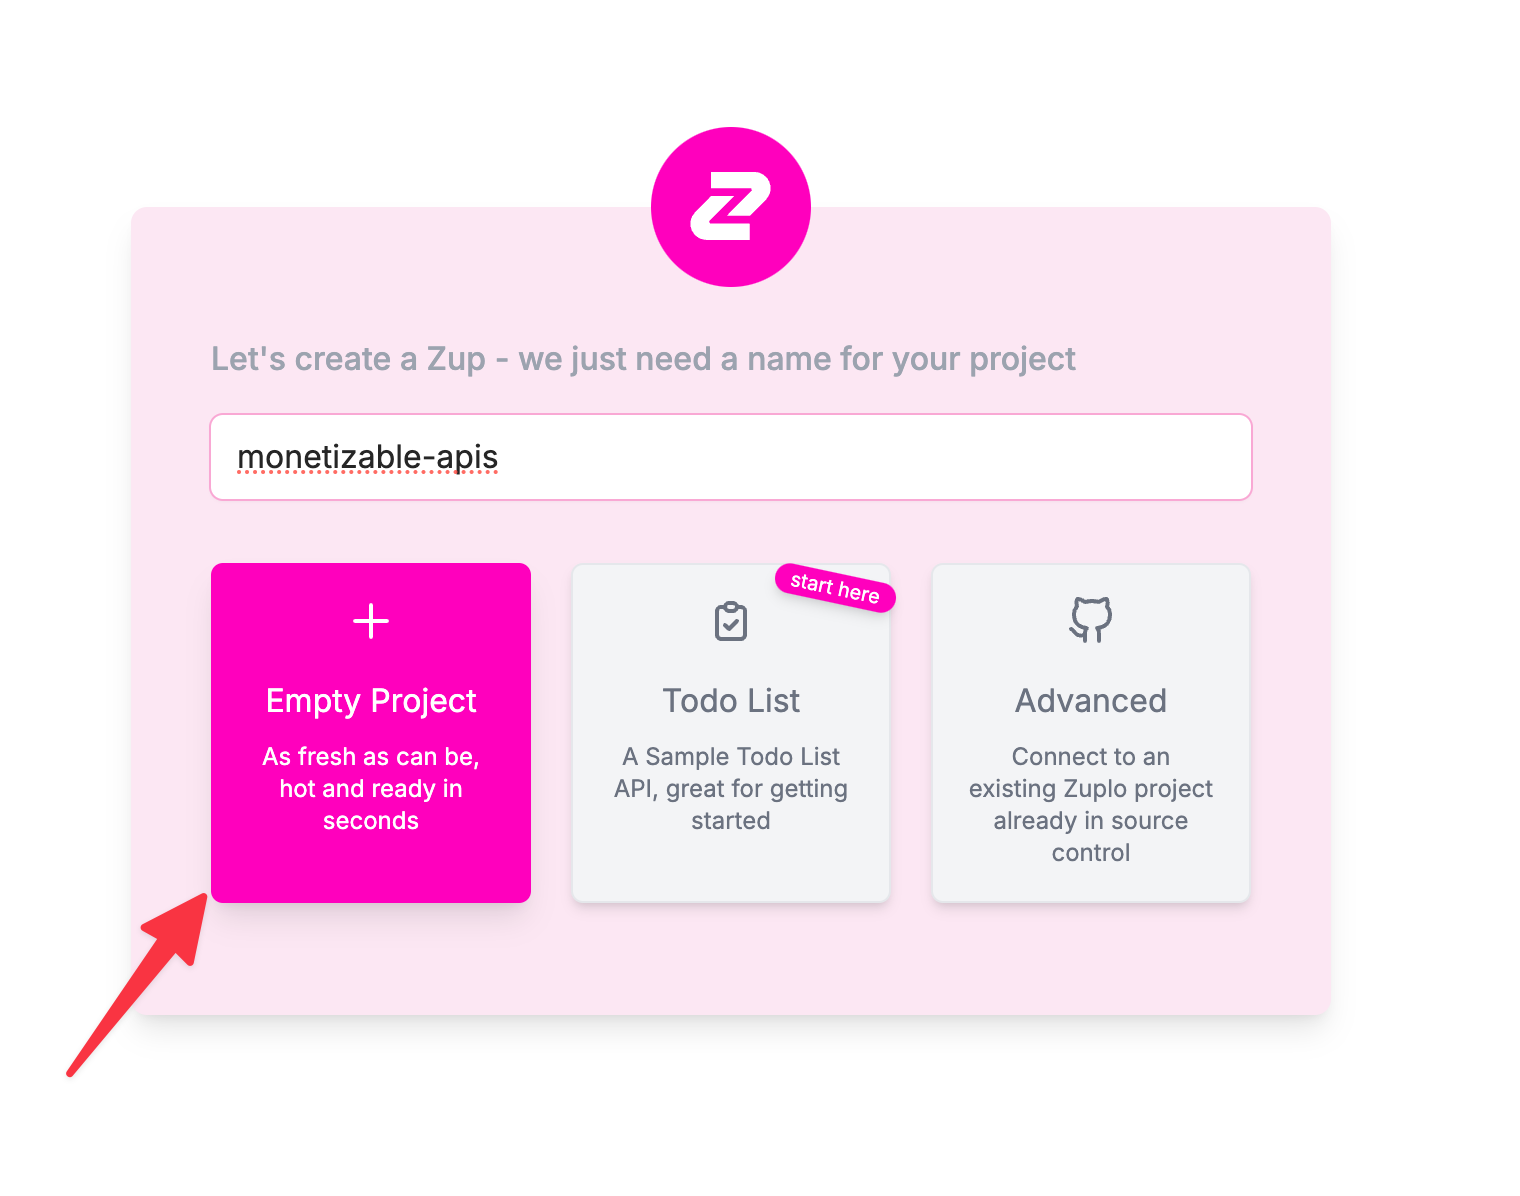
Sign up in https://portal.zuplo.com/signup and create an empty project.

Create project

Step 2: Add a route to your backend#

In this example, we’ll use a free Todo List backend API but you can connect your own backend to Zuplo.

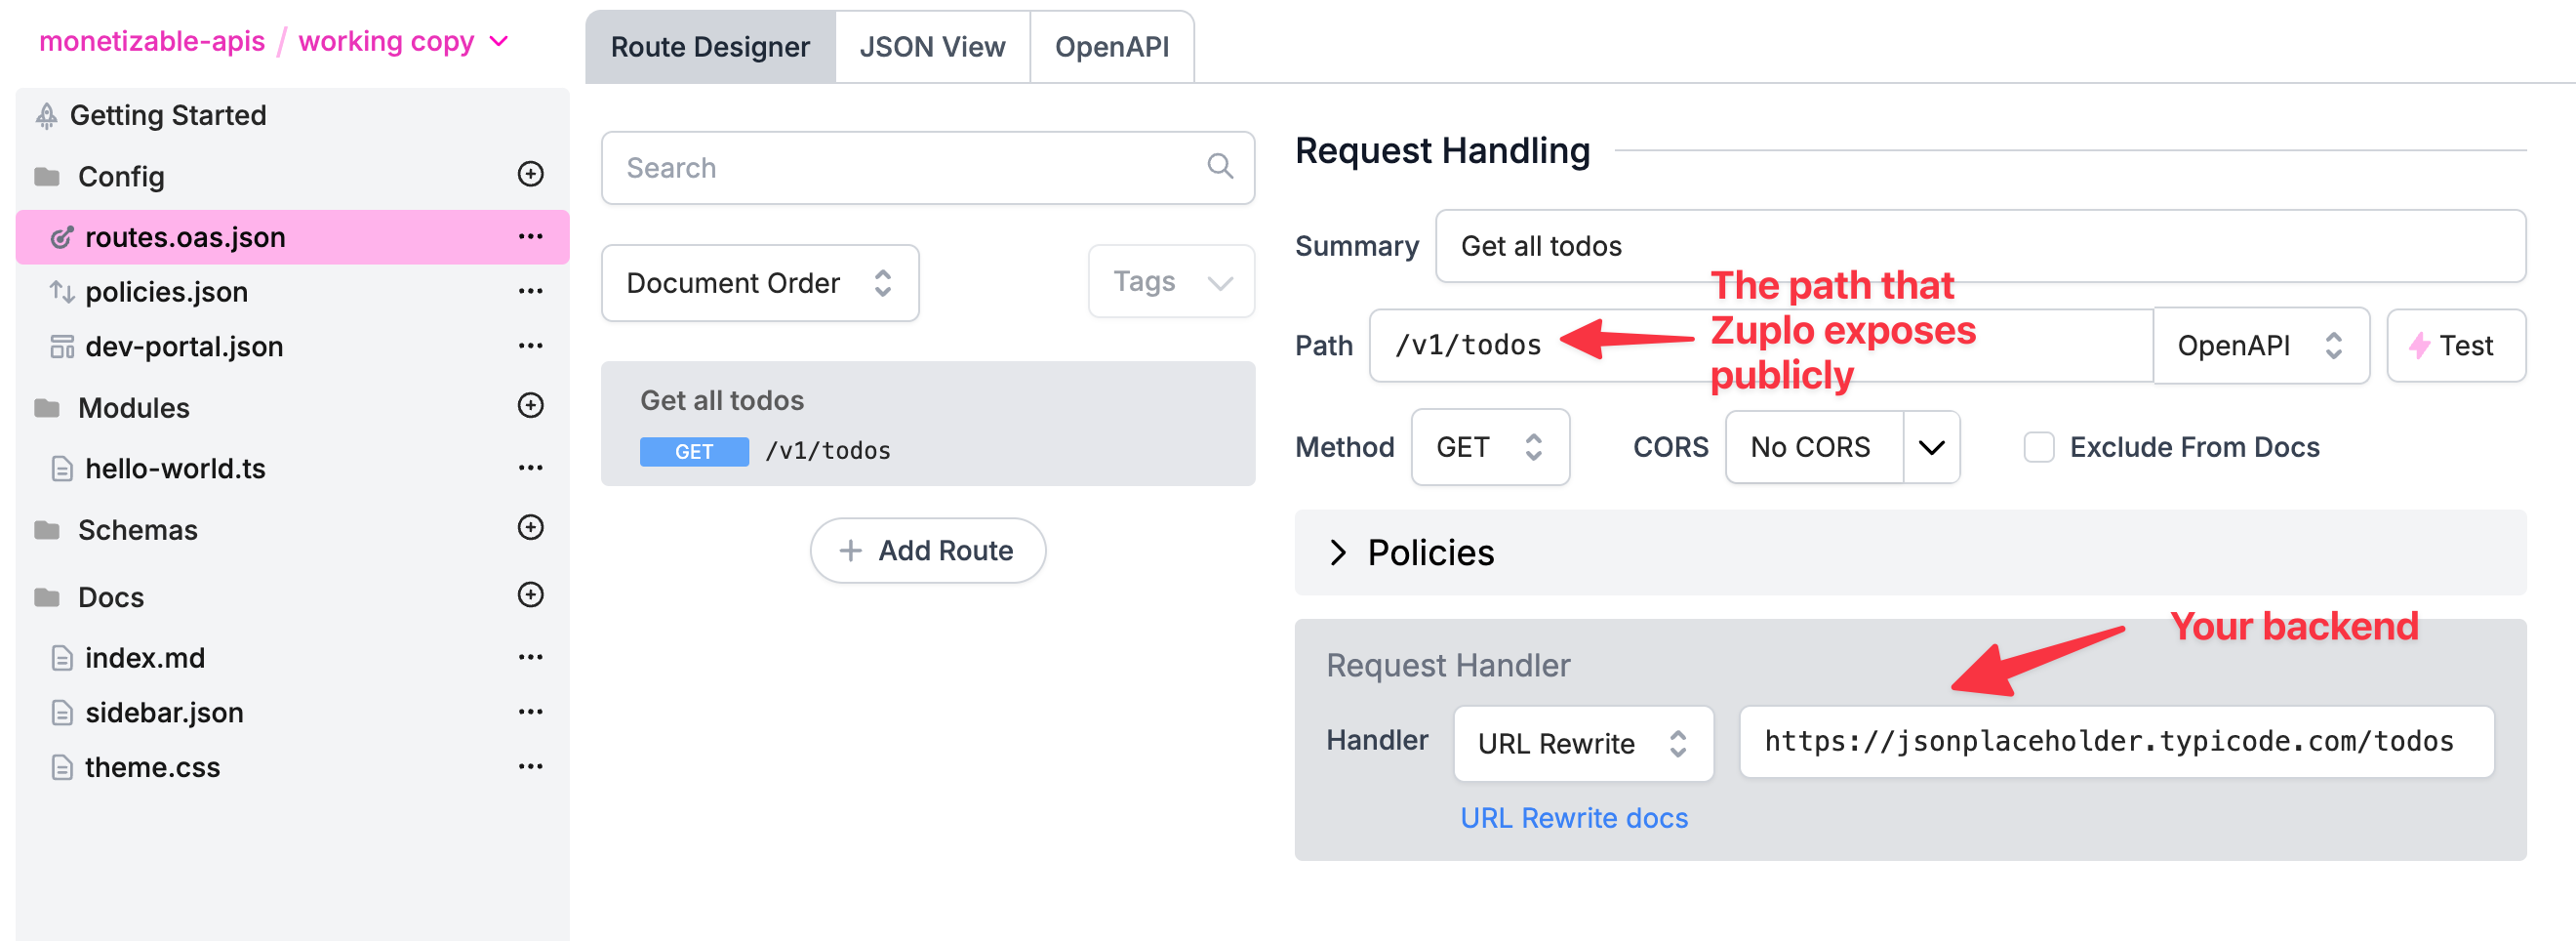
In the Files tab, open the routes.oas.json and click on Add Route, and connect the /v1/todos path of your API with the Todo List backend.

Now Save All and use the Test console (find it next to the path) to check that your API works.

Add route in Zuplo's editor

Step 3: Add Zuplo’s policy for Moesif integration#

Zuplo allows you to add built-in policies to your requests so you can have authentication, rate-limiting and more in just one click. That simple. Same goes for the Moesif plugin, which once connected to an Moesif instance will start metering your API.

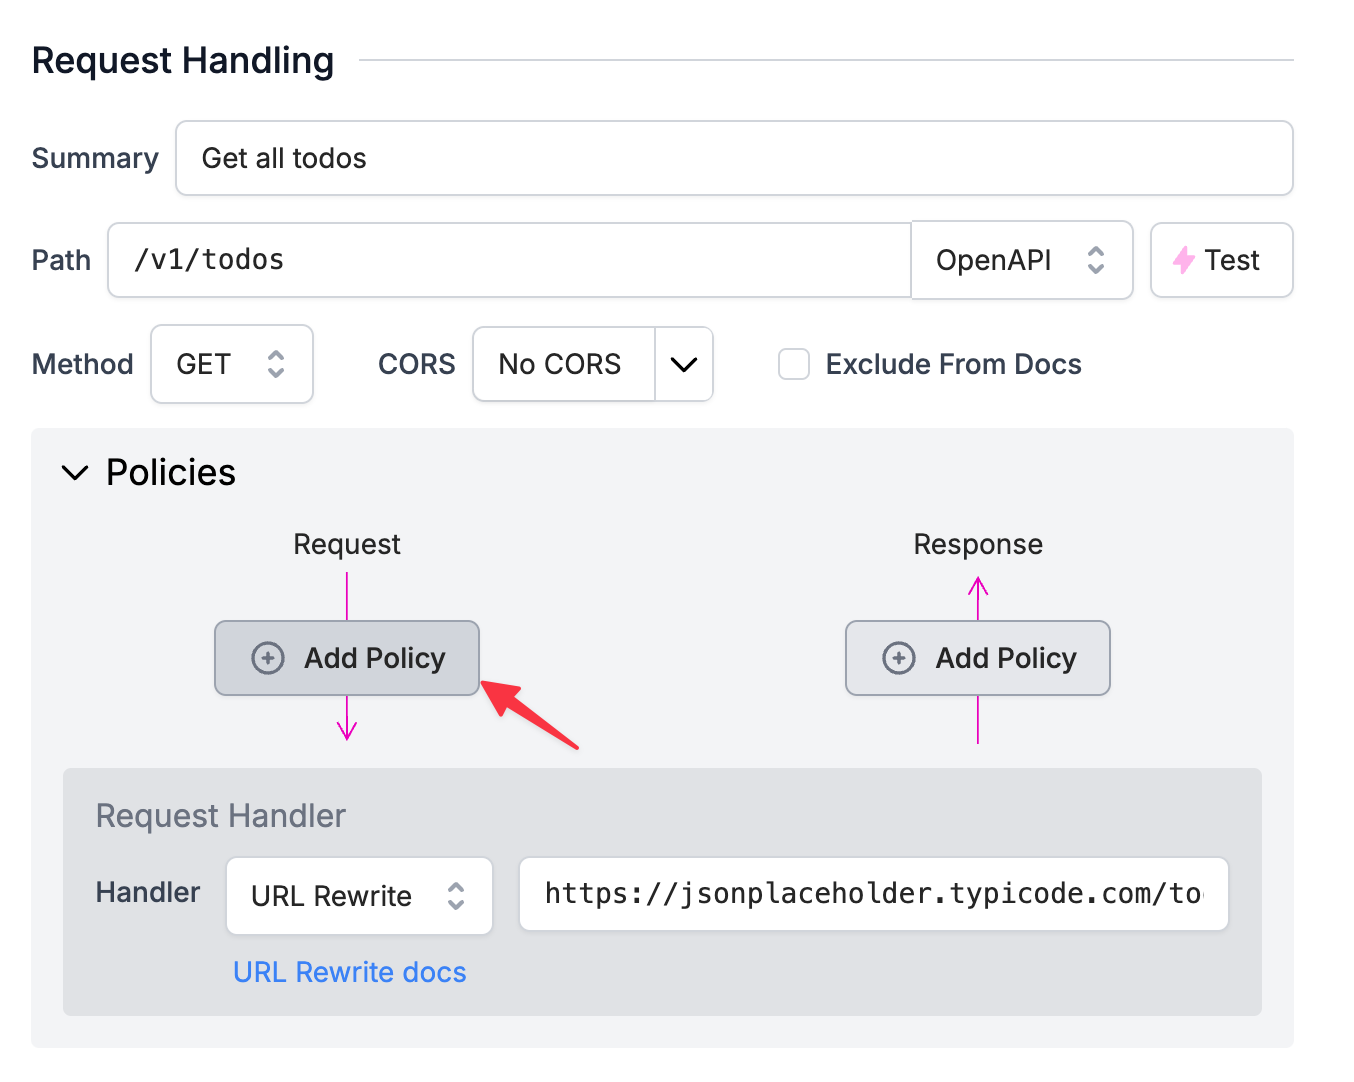
Click on Add Policy for your route and search for the Moesif plugin.

Add Moesif's policy

Step 4: Get the configuration of your Moesif instance#

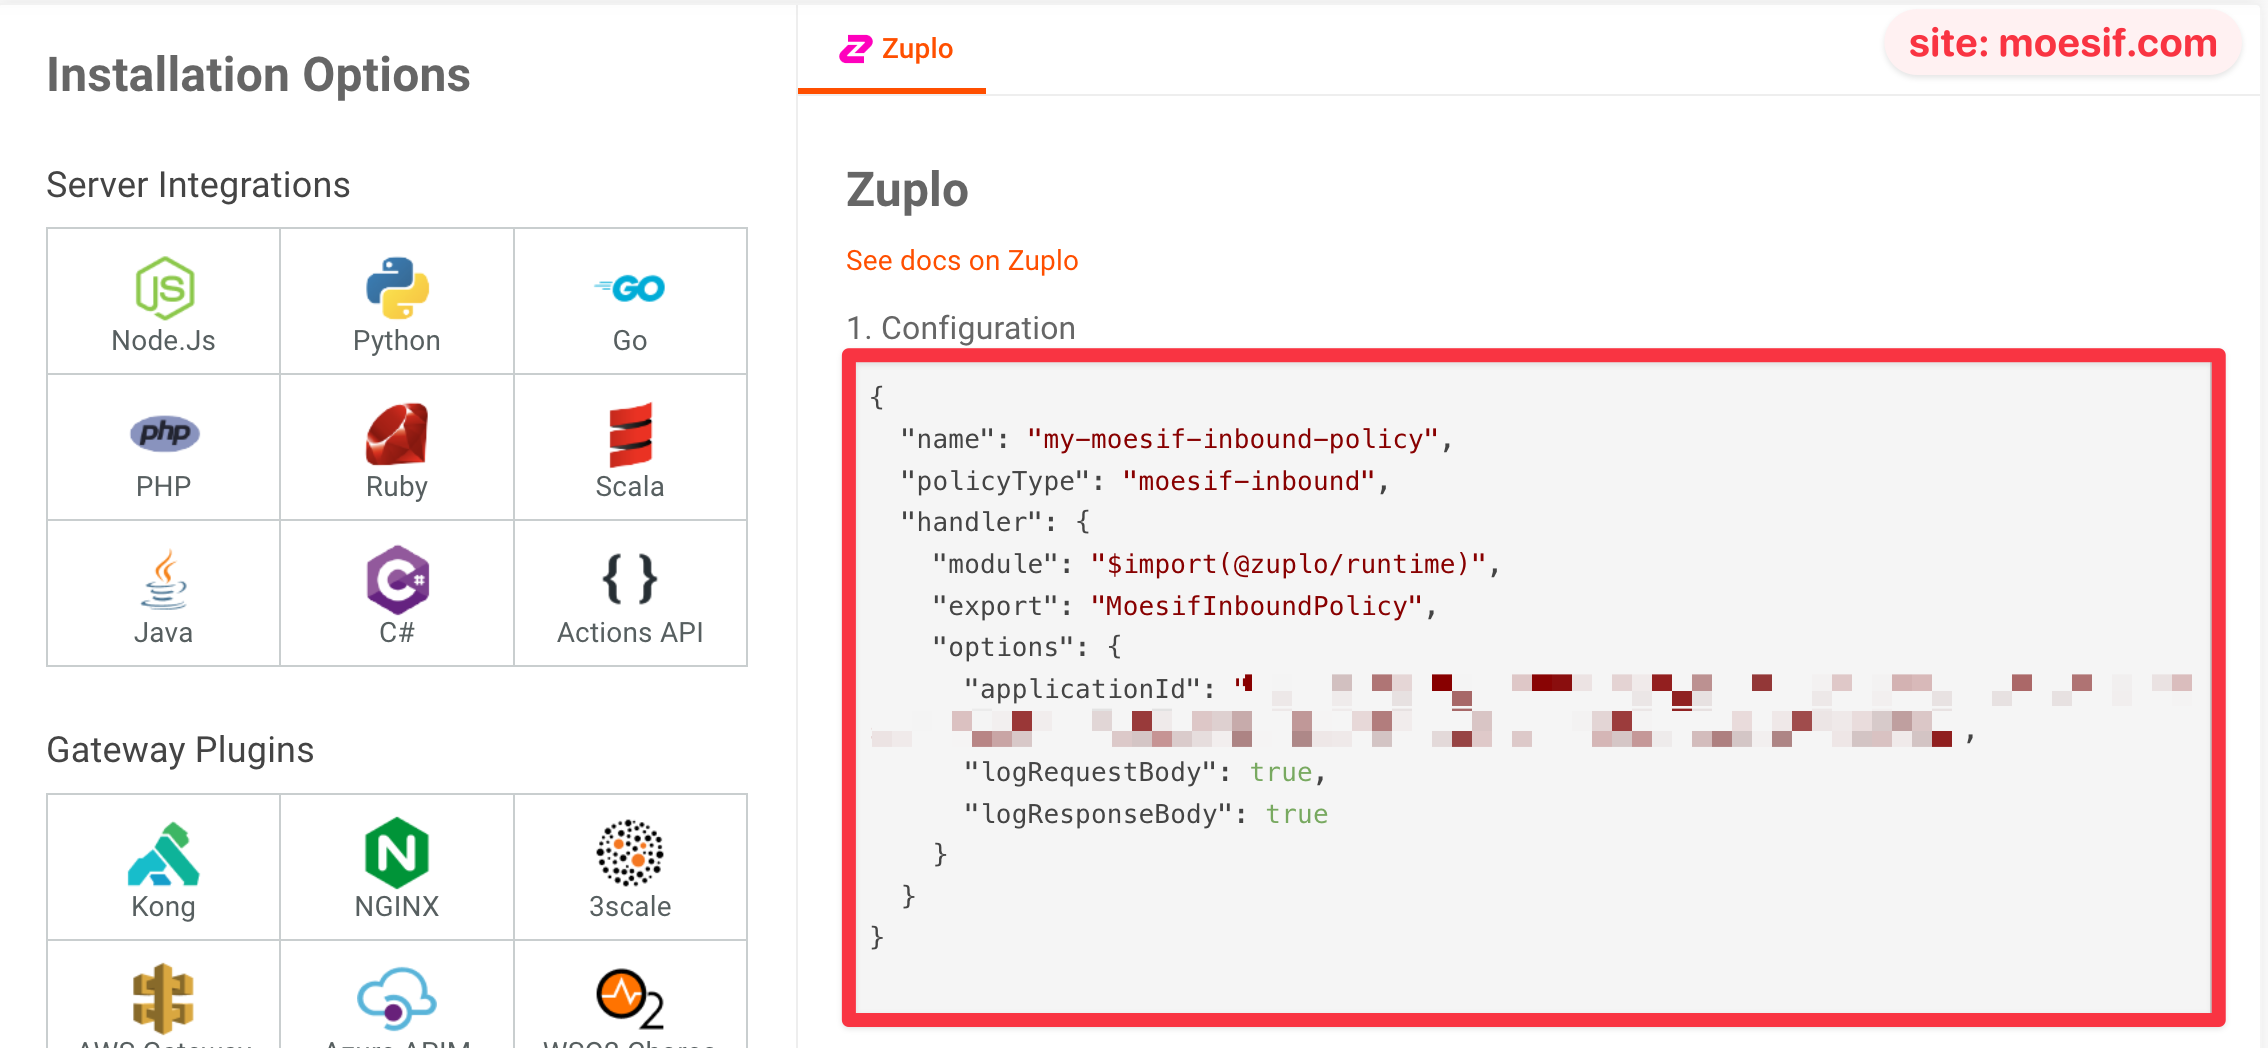
Create an account in Moesif, and follow the onboard steps until the Quick Install section. Here you’ll find Zuplo in the Gateway Plugins section readily available!

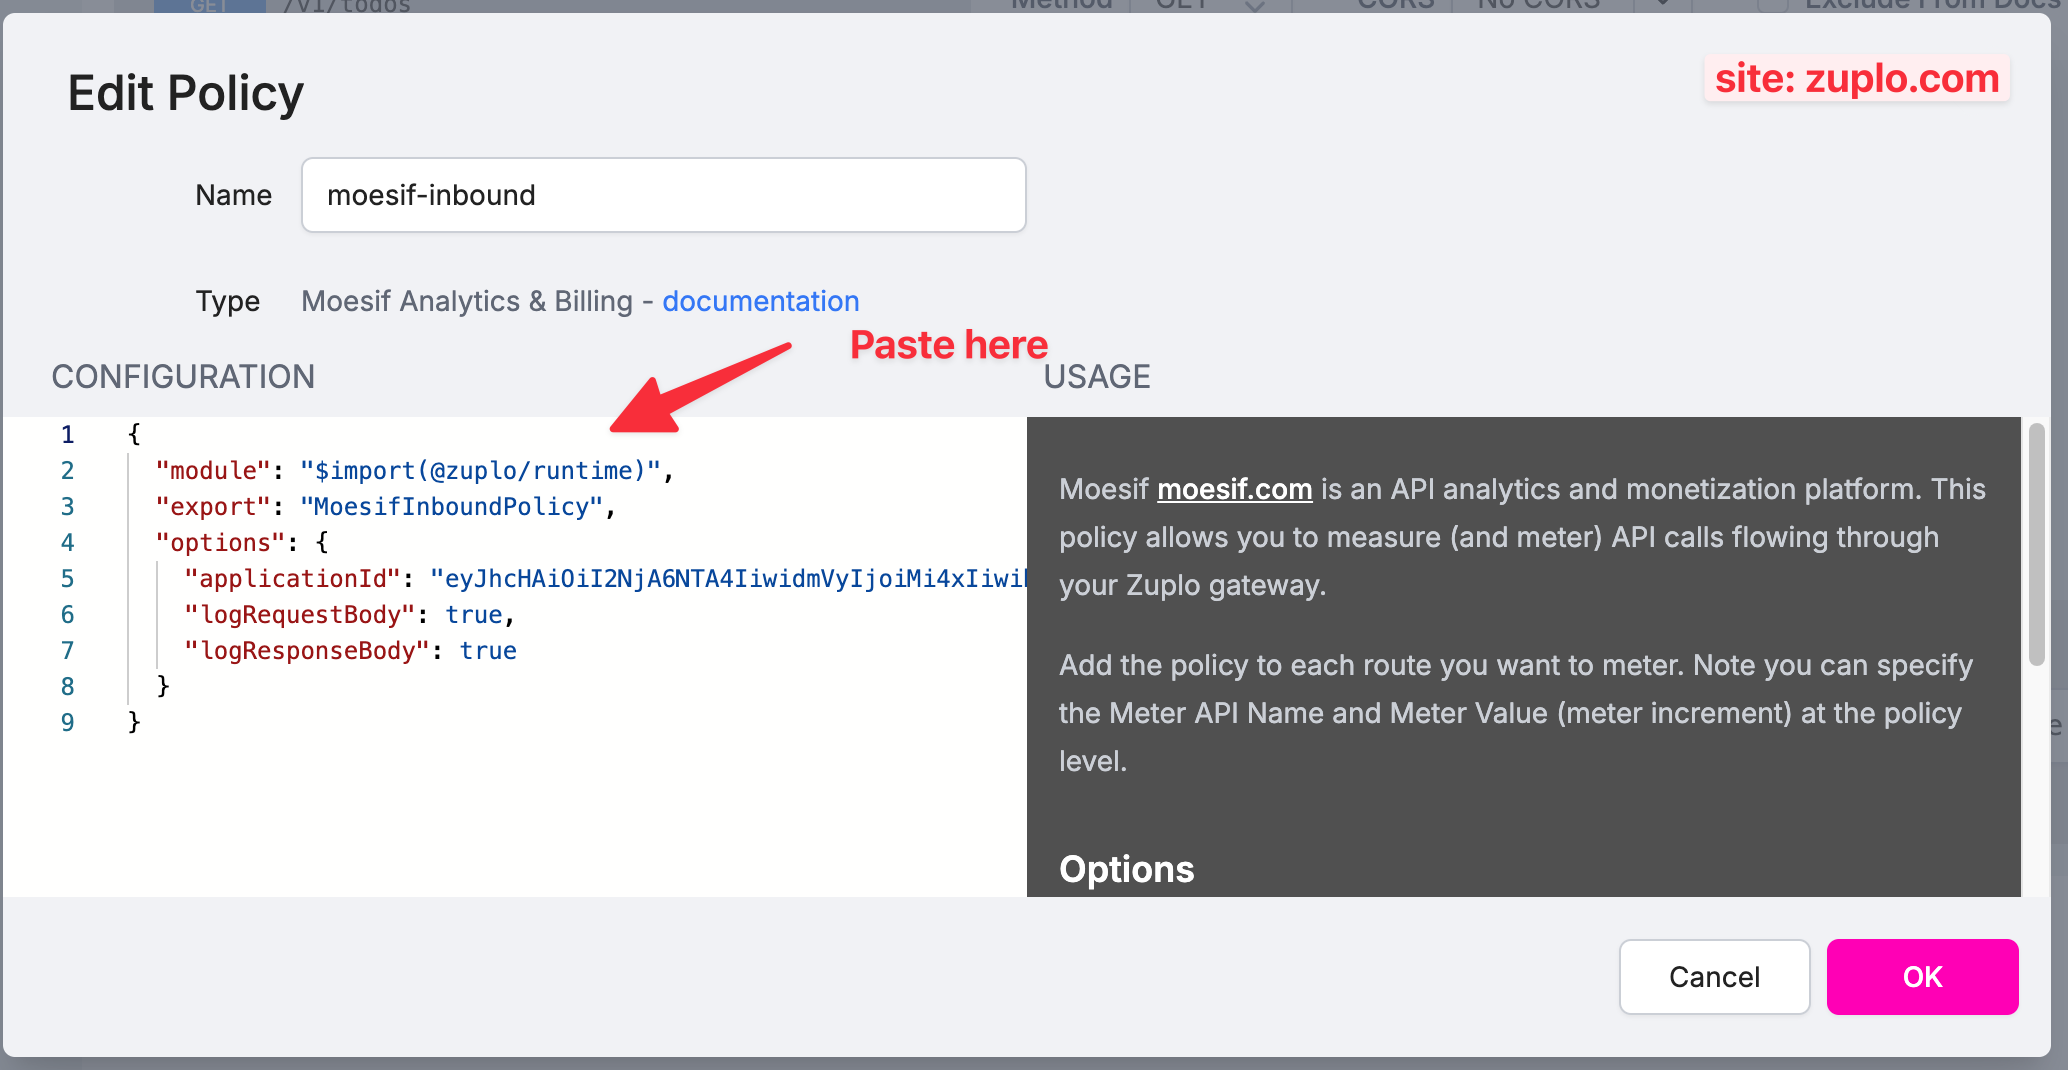
Copy the default configuration and paste it in the Moesif plugin’s configuration in Zuplo.

Copy config from Moesif

Info

Make sure to only paste the content under handler.

Paste config here

And finally make sure to save your changes in Zuplo!

Step 5: Test that the integration works#

Use the Zuplo Test console once more to test your route, this time make sure that your integration with Moesif is connected in the onboarding page (this might take up to 1 minute from the first call).

Data received in Moesif

Step 6: Use API Keys to identify your users#

Now that you’re logging requests to Moesif, you can identify your customers by just adding any API auth plugin in Zuplo. You can use Zuplo’s API Key management for that.

In Zuplo, add a new policy to your route’s request flow. Search for API Key Authentication and apply the policy with the default value.

Info

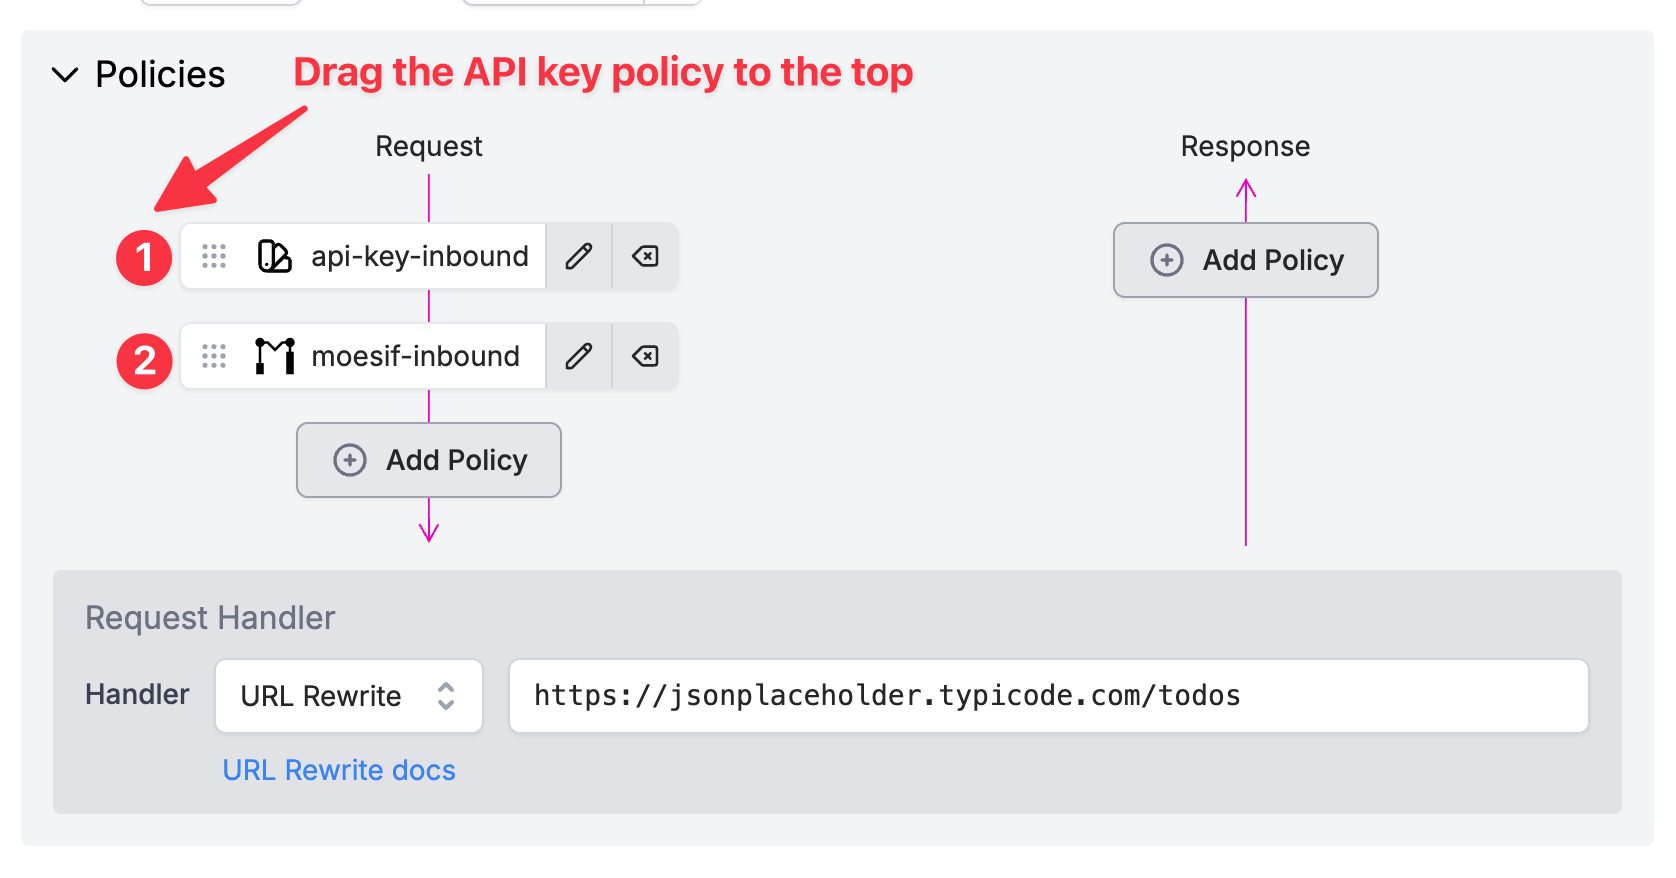
Make sure that the API Key policy is above Moesif’s, that way the user is identified before hitting Moesif’s policy. This is typical command-chain pattern of Zuplo’s policy.

Drag API Key policy to the top

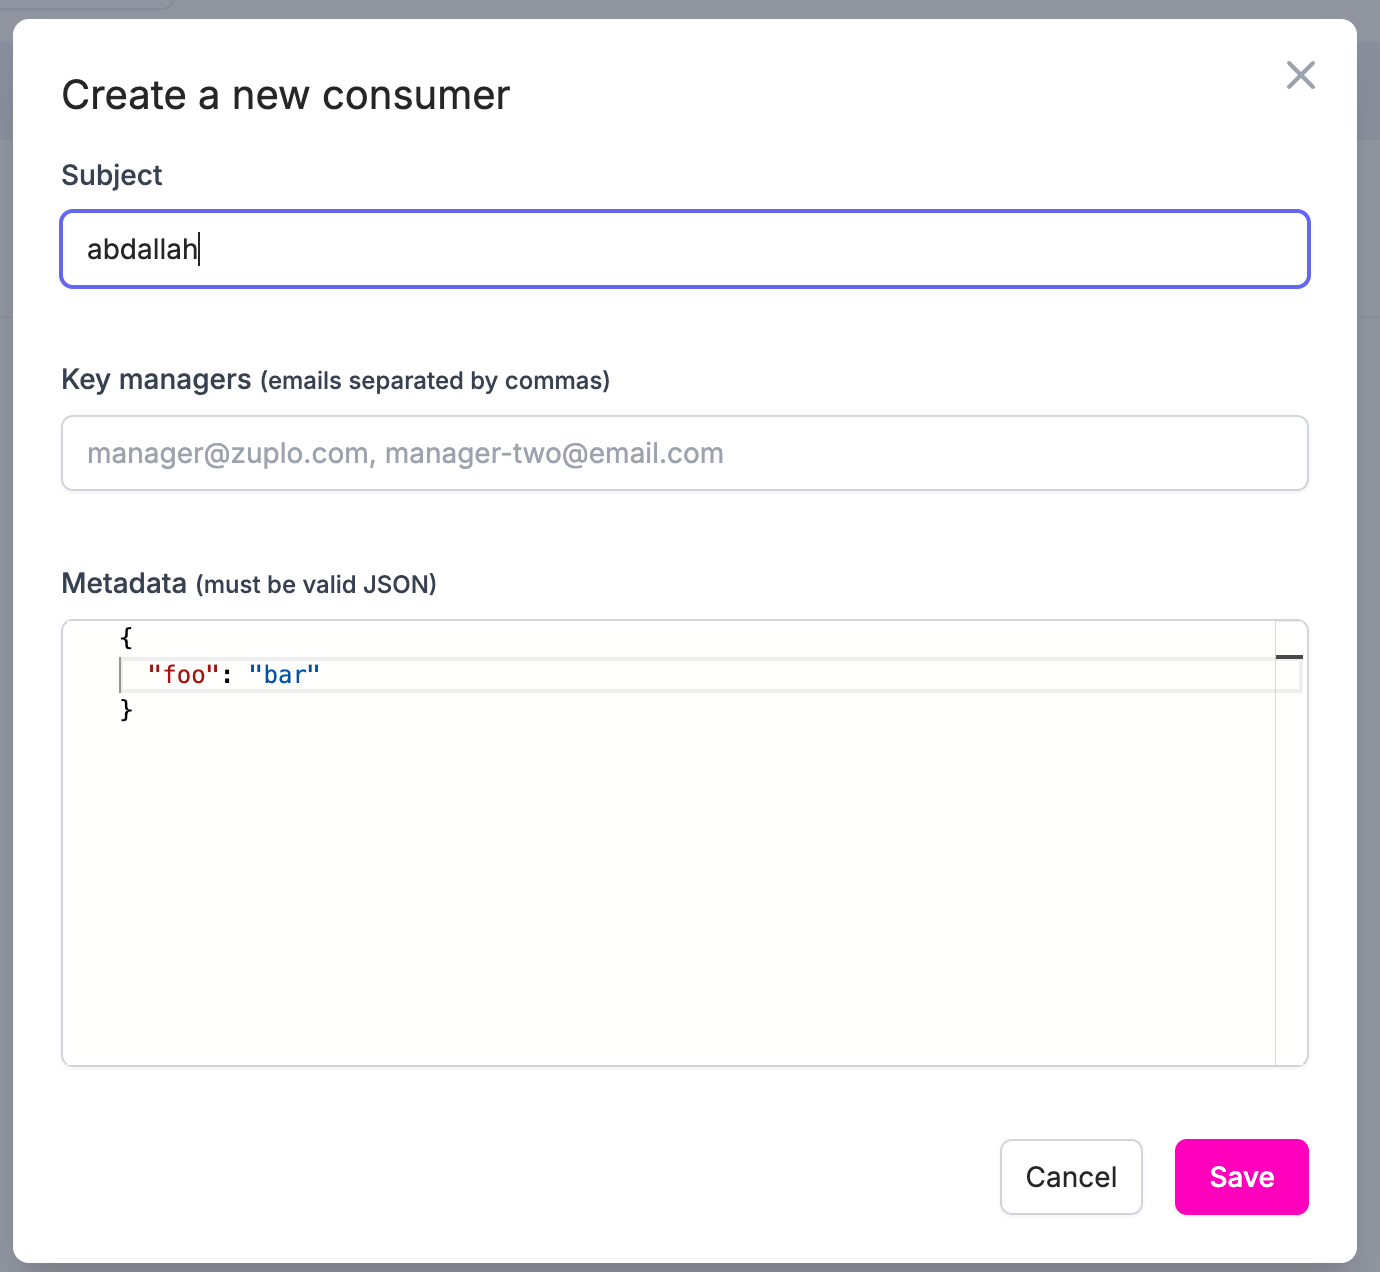
Now create an API key by going to Project Settings > API Key Consumers > Add New Consumer Add your own name to the API key (I added mine - “abdallah”) and for the metadata field you can leave it with an empty JSON or add any user metadata. This will also be sent to Moesif which can be helpful to apply different monetizations models for each customer.

Create API Key consumer

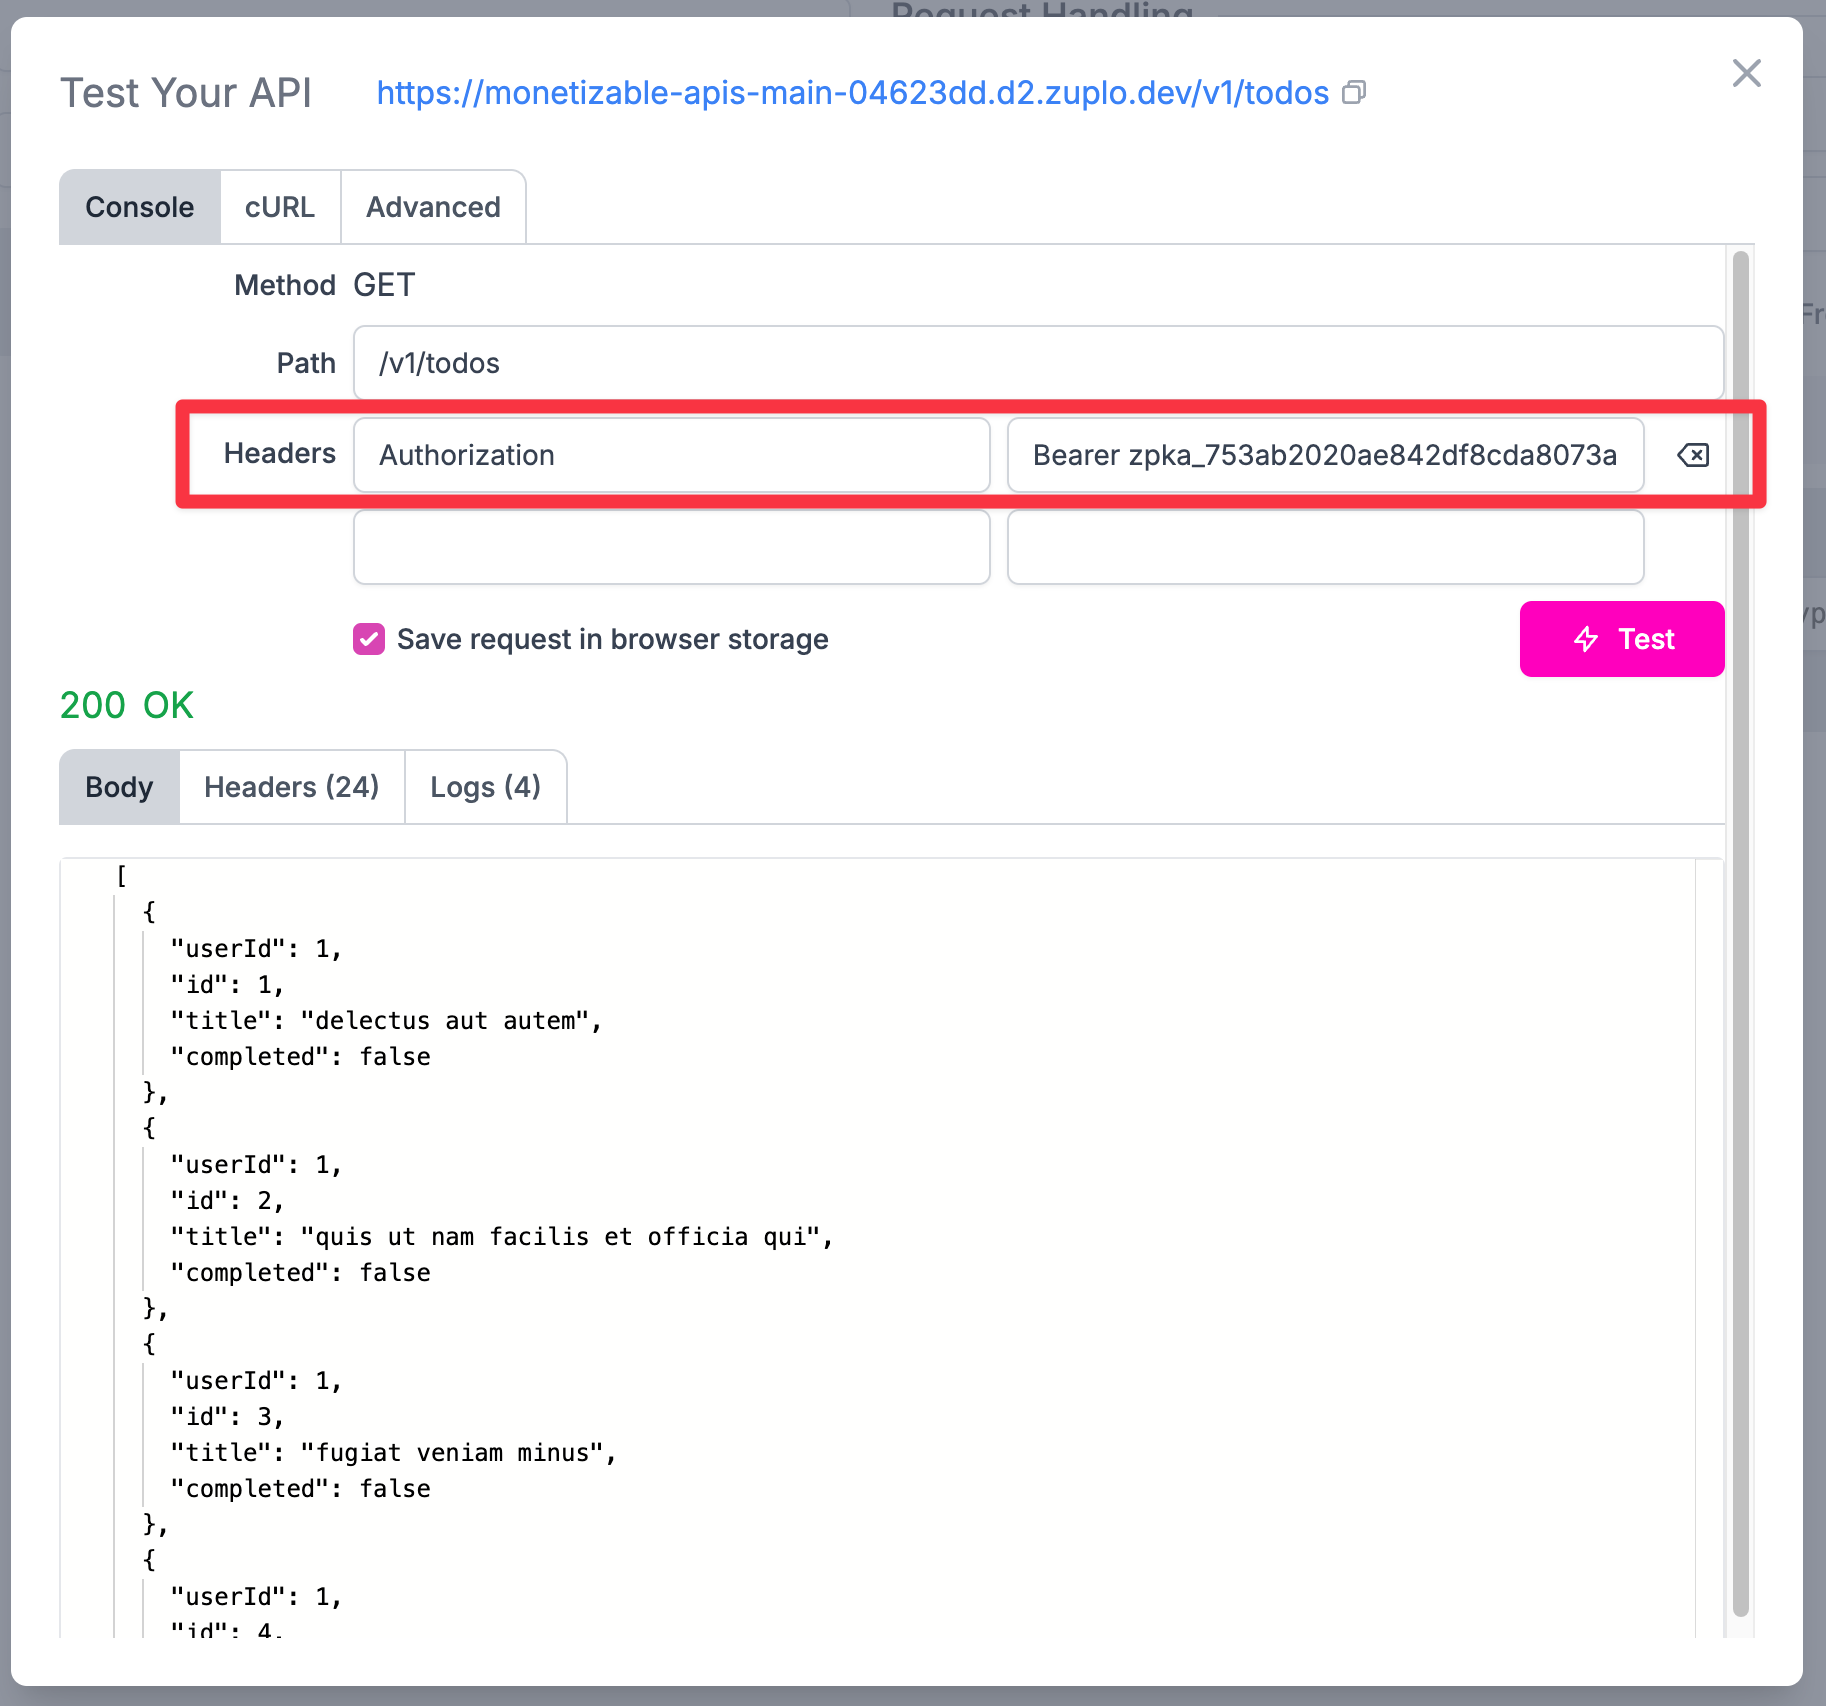
Finally, copy the API key and test in the the Test console of your route by adding the Authorization header.

Make an authorized request

Check that the user is recognized in Moesif:

Check data in Moesif

You can now explore the requests in Moesif, create analytics, and monetize your API 💥

Conclusion: API businesses becoming easier every day#

With the combined power of Zuplo and Moesif, it's easier than ever to launch, secure, and monetize your APIs. This integration is just the beginning!

Let us know what you think in our DiscordTwitter/X, or Linkedin.

Designed for Developers, Made for the Edge