
API Gateways often serve as centralized hubs for managing authentication and authorization. This approach simplifies the security model, providing a single layer that ensures all incoming requests are correctly authenticated and authorized. It does this irrespective of differences in backend architectures, where the microservices are running, or which teams developed them.
In this tutorial, we’ll demonstrate how to implement authentication and authorization for your API on Zuplo using PropelAuth. We’ll begin with the built-in PropelAuth policy to authenticate requests carrying a JWT token. Then, we’ll explore crafting a custom policy to exercise granular control over API access based on organizations and roles set in PropelAuth.
PropelAuth Setup
First, you’ll need a PropelAuth account. Once registered, you can proceed to construct a simple front-end client that interacts with your Zuplo API. The most straightforward way to do this is by following the initial steps of the PropelAuth Quickstart guide.
After completing the quickstart, you’ll have a functional client application for login purposes. We’ll revisit this client after setting up the API side of things.
Setup PropelAuth Policy
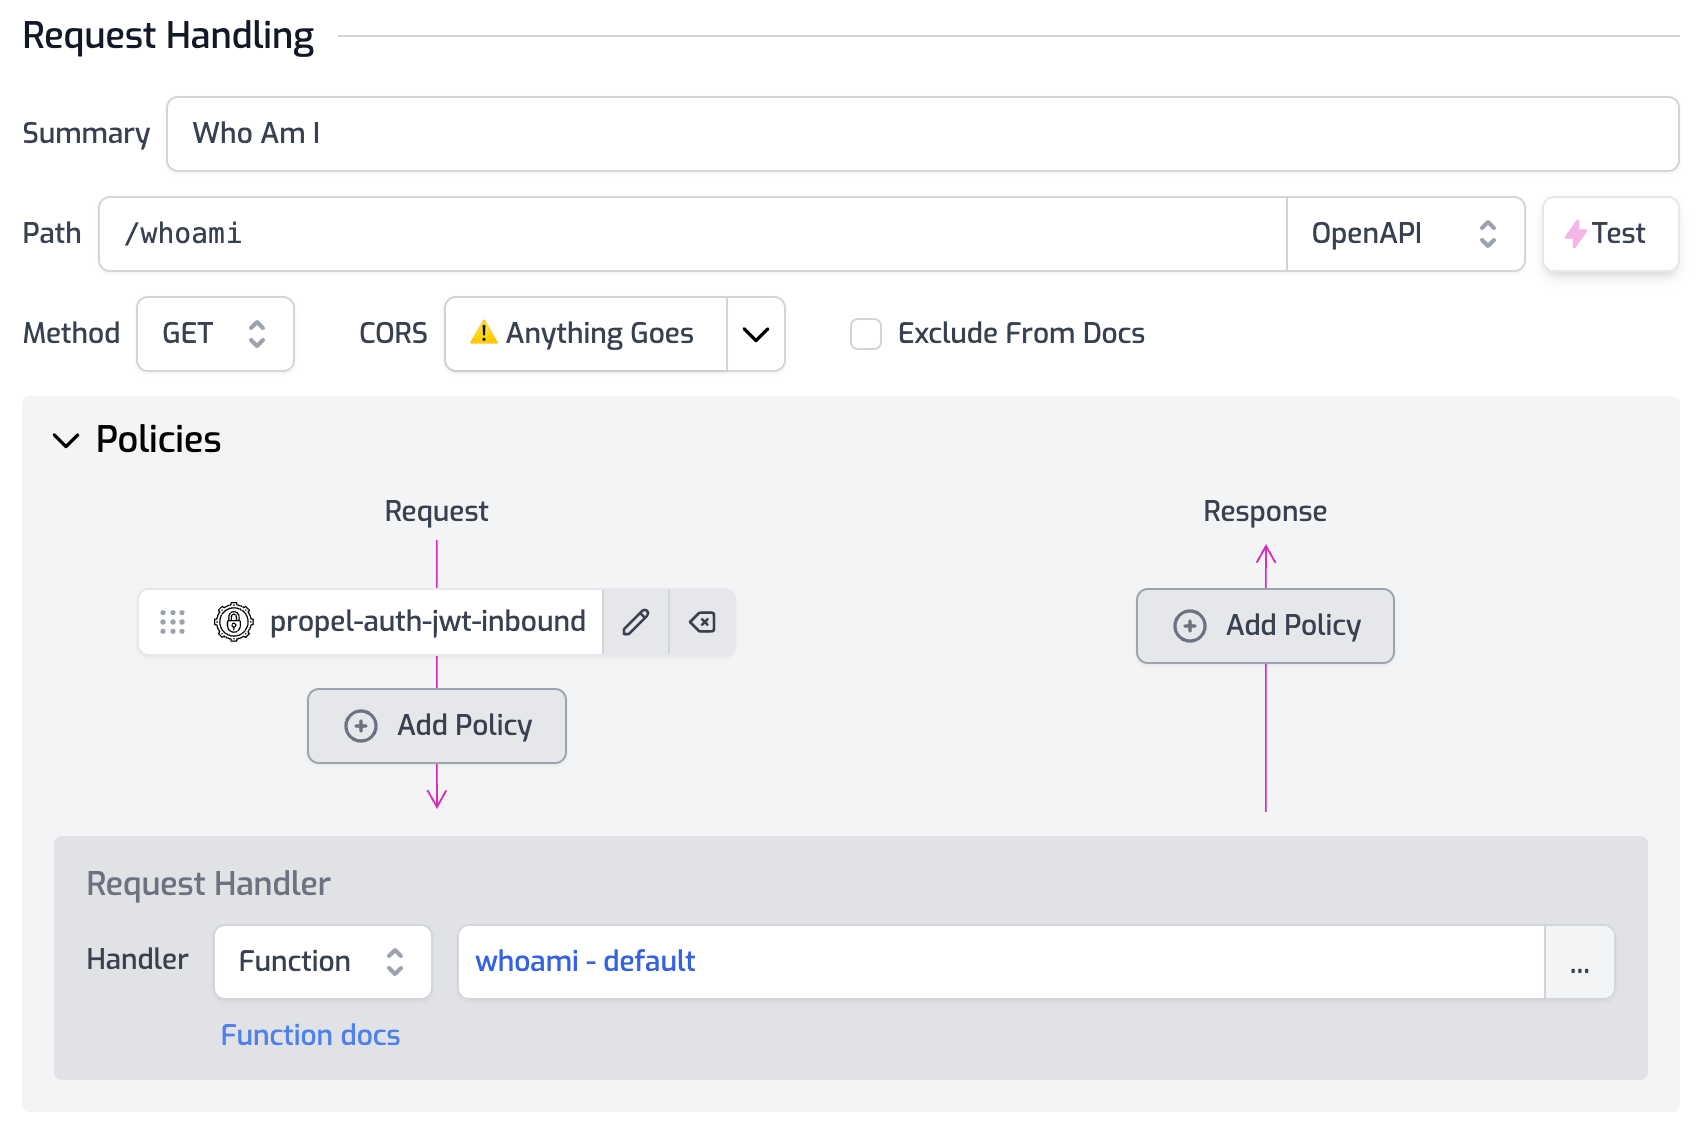
Create a route named `/whoami“ in your Zuplo project and protect it with a PropelAuth policy. For detailed guidance on implementing a PropelAuth policy, please refer to the policy documentation.
In this example, we’ll utilize a custom request handler that simply returns the user’s information:
If you haven’t set up a Zuplo project yet, you can refer to Zuplo’s quickstart guide before returning to this tutorial.
Call the API
Switch back to your client application to add a new page that employs the PropelAuth access token to invoke the `/whoami“ API endpoint on your Zuplo project. Although our example uses Next.js, you can use any client-side framework:
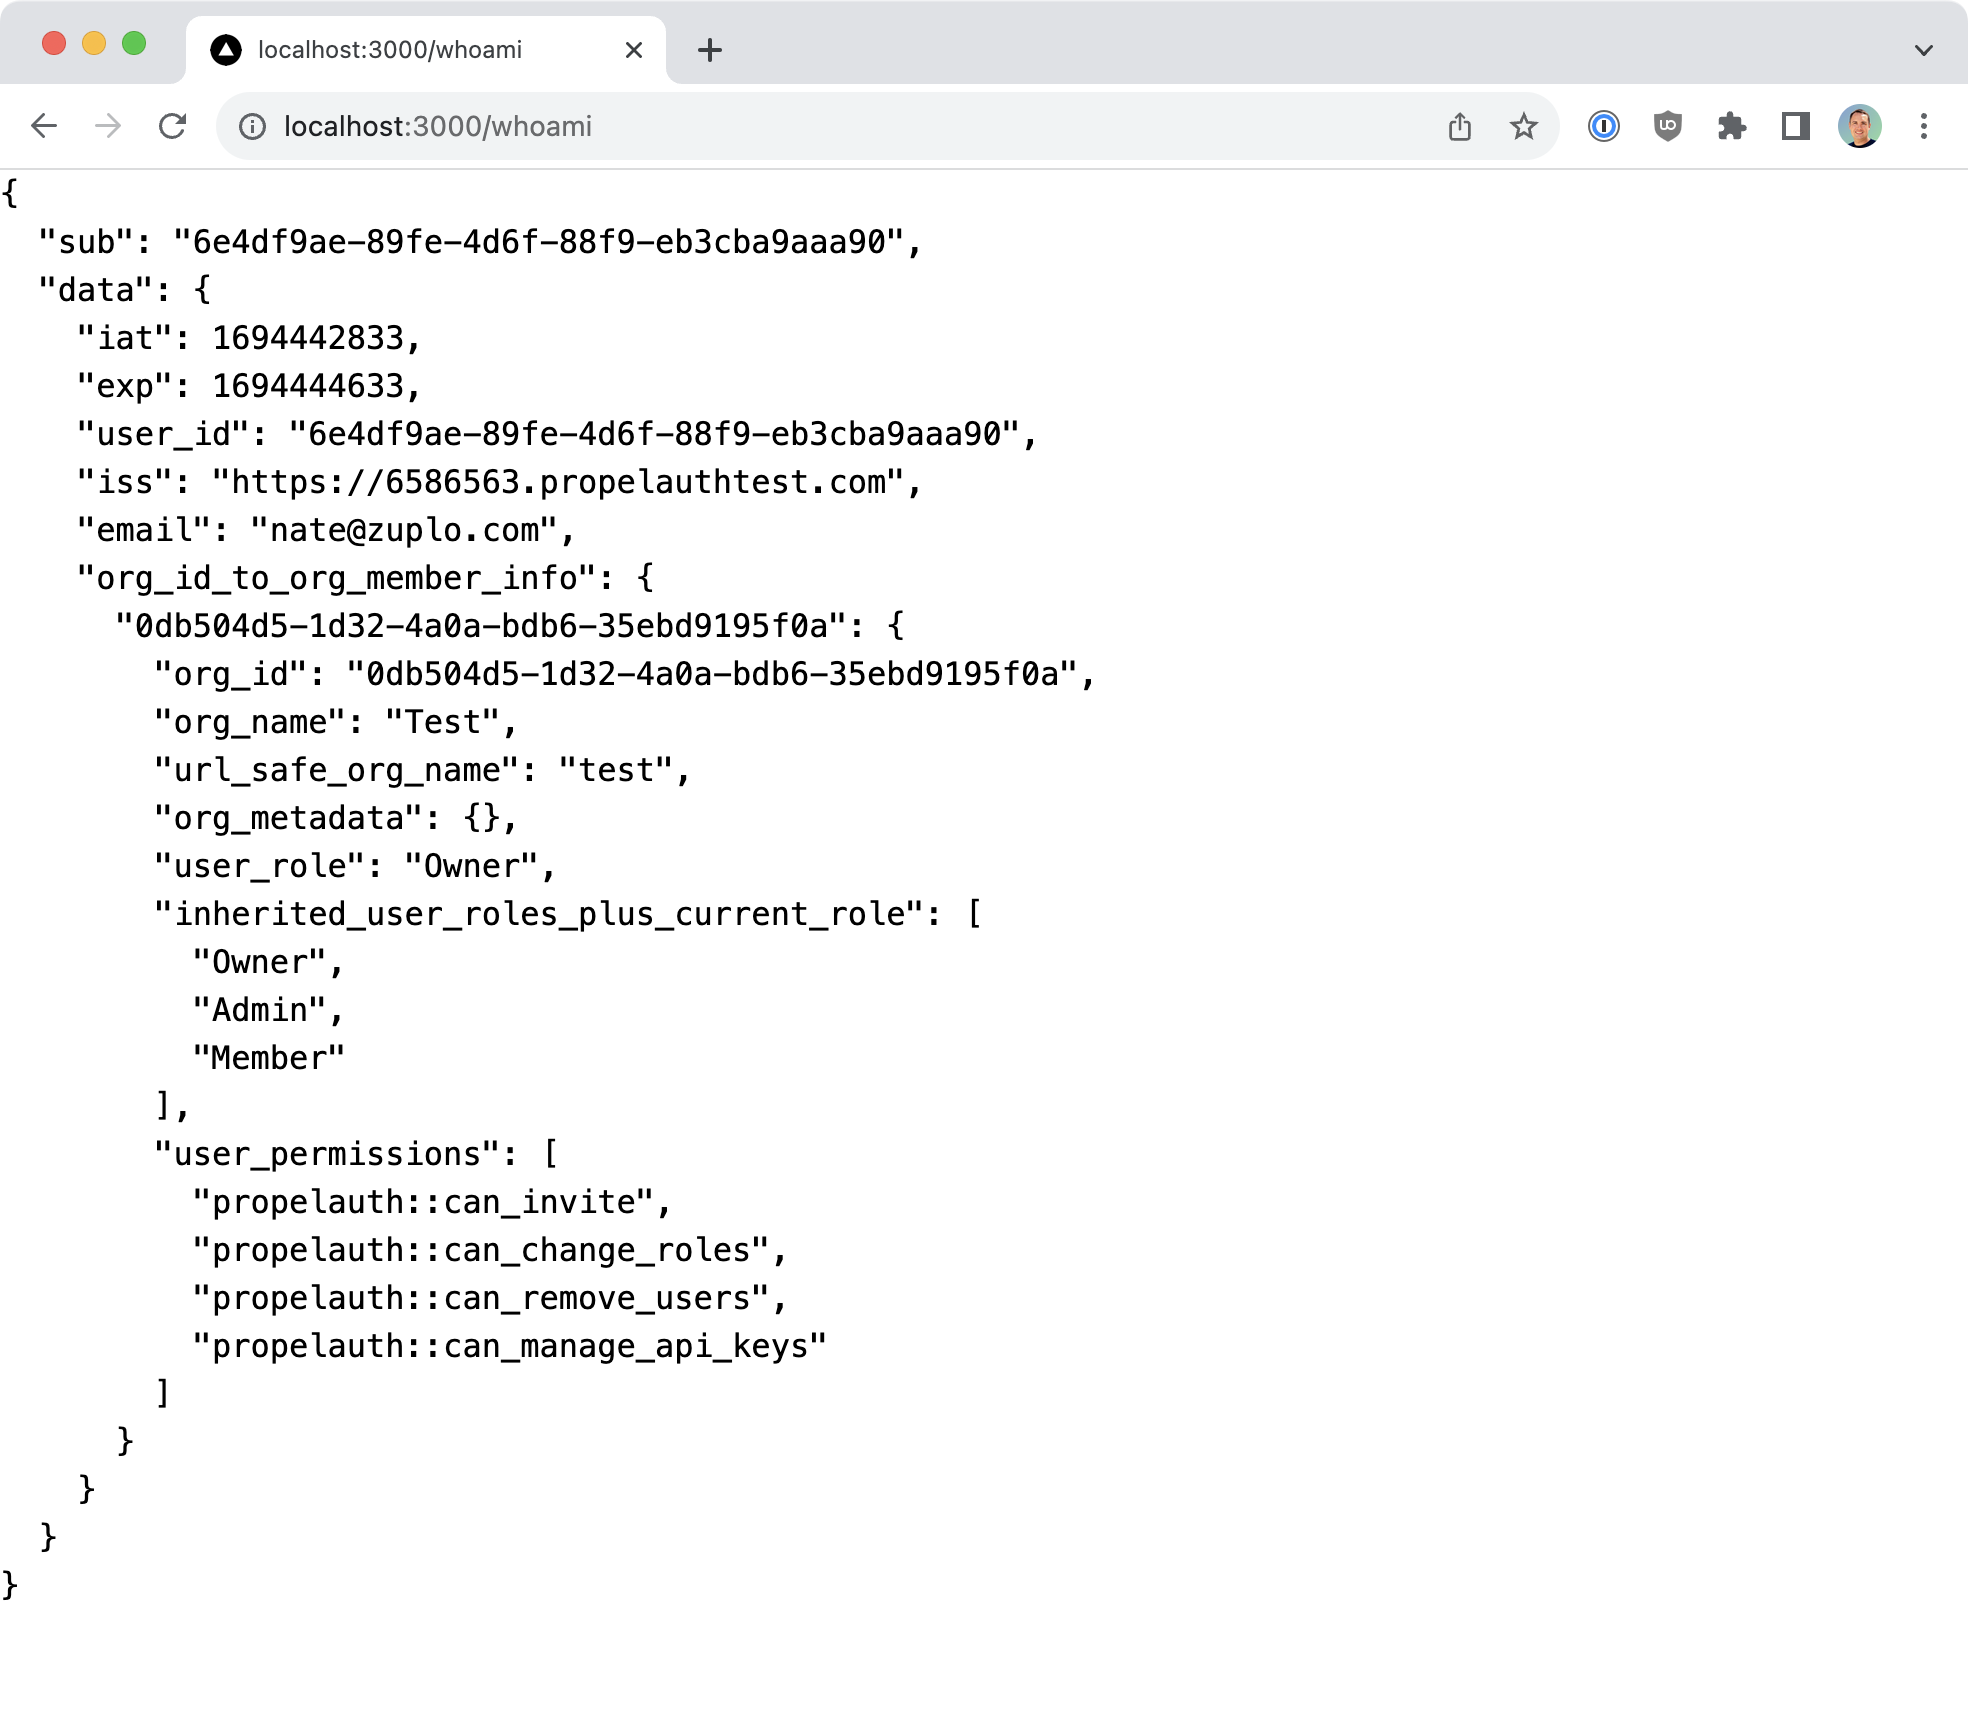
If everything is set up correctly, you’ll see the API response displayed on your WhoAmI page.
You can further test the behavior by logging out from the home page and navigating back to /whoami. If you do, the server should return an unauthorized response.
Authorization with PropelAuth Tokens
One of PropelAuth’s standout features is the capacity to assign users to specific organizations and designate roles within those organizations. These attributes are included in the authentication token sent to the Zuplo API. Therefore, you can create custom policies to enforce various types of authorization.
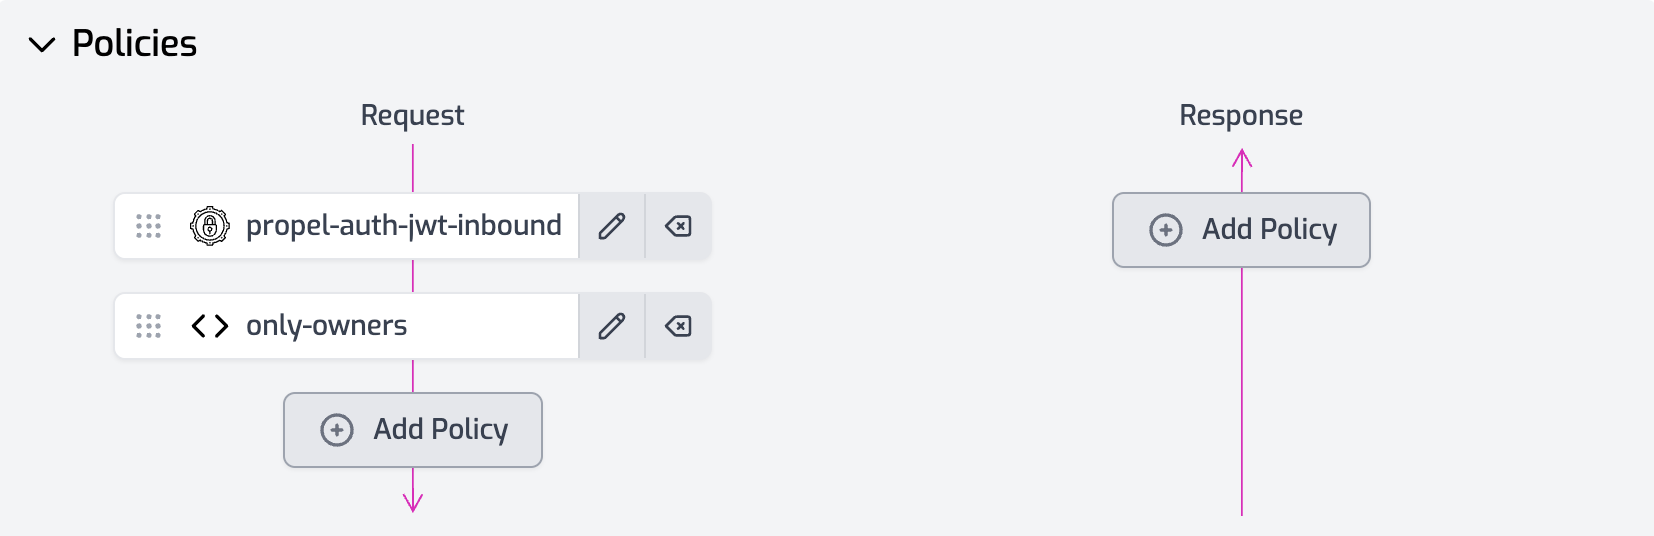
For instance, if you want to restrict access to a particular Zuplo API route to users with an “Owner” role, you could implement a simple policy as shown below:
Conclusion
We’ve seen how the integration of Zuplo and PropelAuth simplifies the process of securing your API and implementing robust authorization controls. Additional features, such as rate limiting and geo-location filtering, can be easily integrated into your API via Zuplo.
Moreover, PropelAuth offers advanced functionalities like user impersonation, empowering your internal users or support team to log in as customers for troubleshooting purposes.
This tutorial merely scratches the surface of what you can accomplish with Zuplo and PropelAuth working in tandem. The possibilities for securing and enhancing your APIs are vast, providing a scalable and flexible approach to API management.