

Add Your Zuplo API to Backstage
In this guide, we'll walk you through the steps to add your Zuplo API to Backstage.
1/ Add the OpenAPI Spec Handler
Backstage allows you to document
API entities
using an OpenAPI file. Although Zuplo is OpenAPI based, you can't directly use
your routes.oas.json file, as it's missing details about your API. Instead,
you will need to use the public-ready version of your spec, by adding an
OpenAPI Spec Handler.
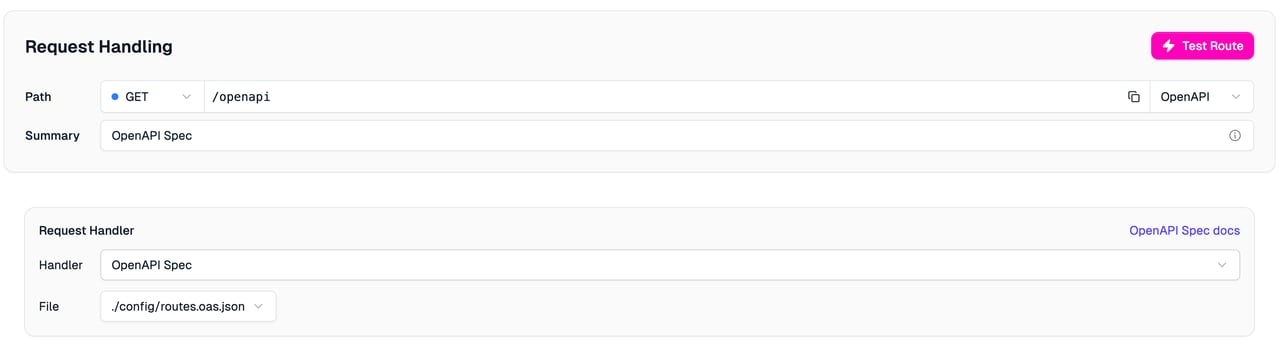
Add a new route with the path /openapi, and select the OpenAPI Spec Handler
from the Request Handler selector. Save your changes and commit them to your
production branch. If you haven't already connected your Zuplo API to a GitHub
repository, you can follow
these instructions to do so. Once your
Zuplo API is redeployed, you should now be able to retrieve your public-ready
OpenAPI file by hitting https://<your-prod-zuplo-api-domain>/openapi.
2/ Add Zuplo to your reading.allowed list
Navigate to the app-config.yaml file in your backstage repository. You will
need to allow backstage to call Zuplo's domain to fetch the OpenAPI file. Add
the following code:
Code
If you are using a custom domain on your Zuplo API - you will need to add that domain in the list above.
3/ Add your Zuplo API to your Backstage Catalog
The most direct way to add your Zuplo API to backstage is by adding an entry to
your backstage service's entities.yaml file.
Code
Once you've added the API component, you must link it to an existing component. For example, if your website provides APIs, you would add the following
Code
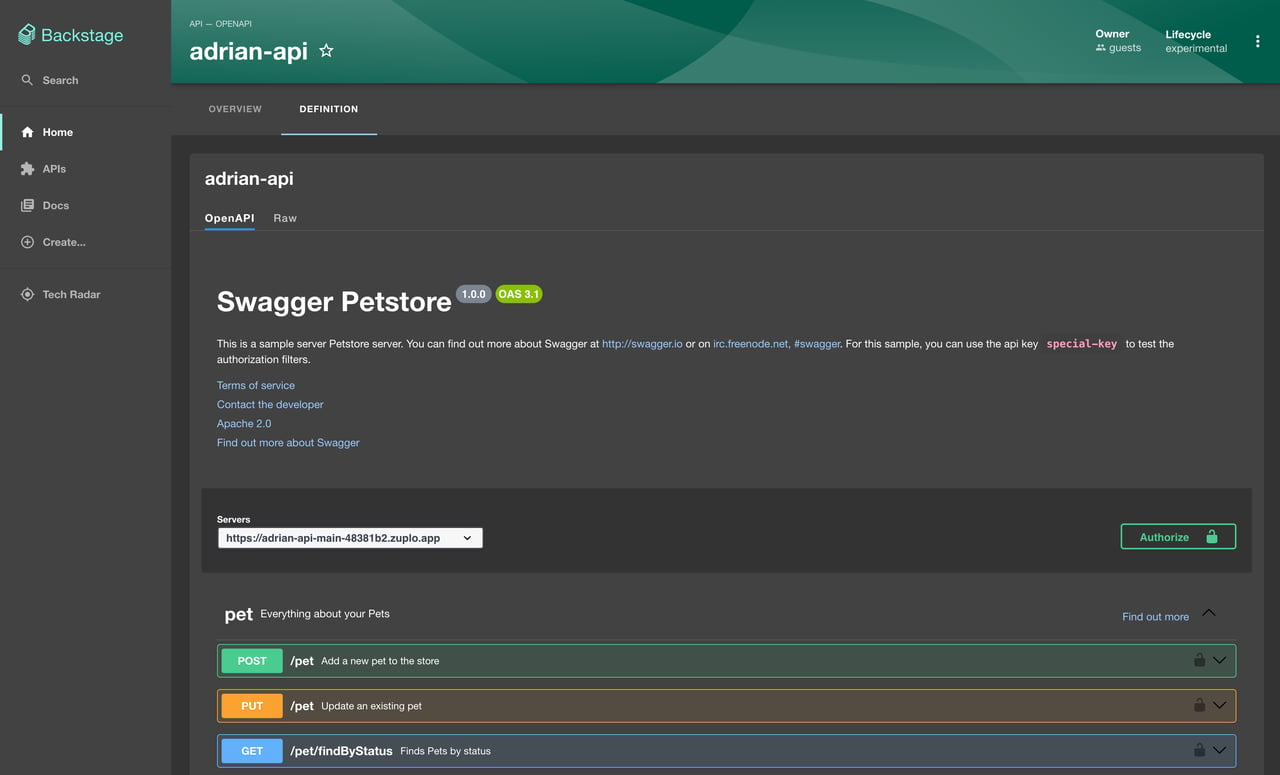
You should now be able to see your API under the APIs tab in Backstage. If you navigate to your API and click the DEFINITION tab - you can even preview your OpenAPI spec.
Congratulations! You've successfully added your Zuplo API to Backstage. You can repeat the steps above for all of your OpenAPI files.
Optional: Reusing your API across Backstage catalogs
If you don't wish to directly add your Zuplo API to your backstage
entities.yaml, you can instead add the entity definition to your Zuplo
repository directly, and sync it with backstage using their GitHub integration.
You will still need to follow steps 1 & 2 from the guide above.
1/ Add catalog-info.yaml to your Zuplo Repository
In your Zuplo repository, add a file named catalog-info.yaml and fill it with
the following
Code
Save and commit this file.
2/ Add your API Component to Backstage
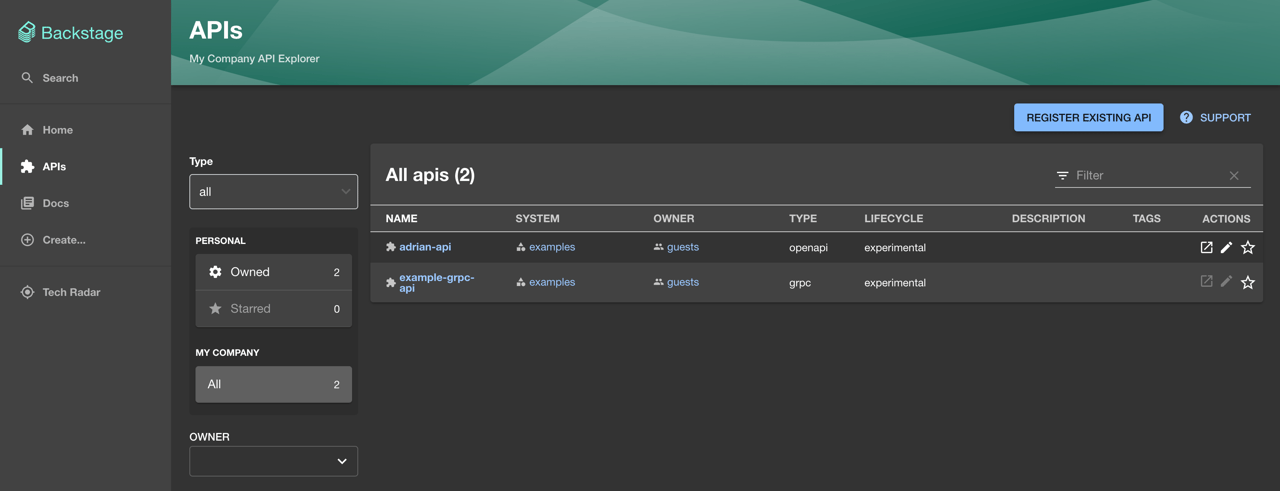
You can register existing APIs in your catalog directly from Backstage. Navigate to the APIs tab, and click REGISTER EXISTING API.
When prompted for the component URL, enter the GitHub URL of your
catalog-info.yaml file (ex.
https://github.com/AdrianMachado/adrian-api/blob/main/catalog-info.yaml).
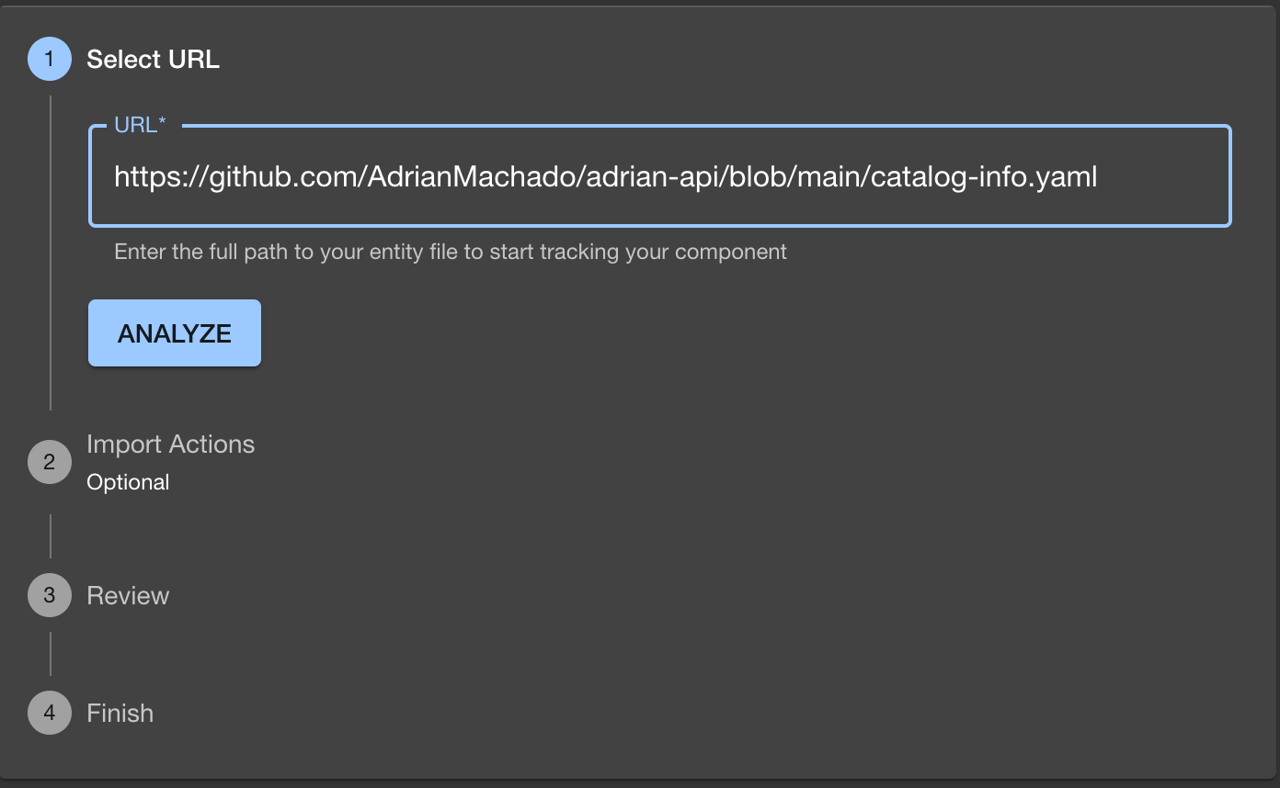
Complete registration of your API. If you run into issues connecting your repository, see the troubleshooting guide.
3/ Link the API to a component
You should now be able to see your API under the APIs tab in Backstage. If your API is associated with another entity, you will need to link to that entity as follows:
Code
Troubleshooting
Can't connect to GitHub
If your repository isn't public and you haven't already configured GitHub
authentication -
follow the GitHub auth guide.
You will likely want to add sign-in support as a part of your Backstage setup,
to authenticate your users. In your app-config.yaml add:
Code
Additionally, in your index.ts file, add the following line before calling
backend.start()
Code
This isn't well documented by Backstage - any issues should be directed to them.
Backstage hosted on Roadie.io
If you are using a managed version of Backstage from services like Roadie.io - you will need to follow their official docs for OpenAPI. We don't guarantee support for these platforms.