This is Part 1 of a four-part series on building a fully monetized API with Zuplo, from gateway to self-serve API keys, usage-based plans, MCP server, and developer portal. Before any of that works, you need the gateway set up right. That’s what we’re covering here.
 12:55
12:55Watch the video walkthrough of setting up the API gateway with origin auth, consumer isolation, and rate limiting.
What we’re building
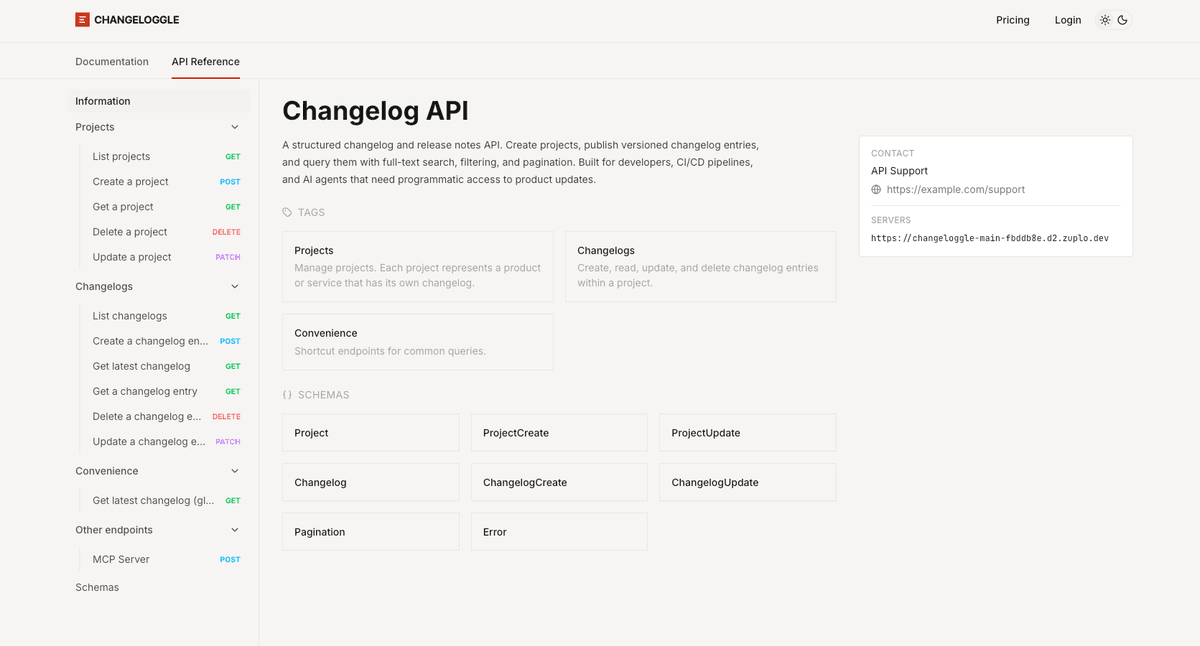
The API behind all of this is a changelog and release notes service. Teams can create projects, publish changelog entries into a database, and query them with full-text search, filtering, and pagination. Think of it as a storage layer for release notes that you can query programmatically.
It’s built with Hono and TypeScript, deployed on Vercel with a Supabase backend. Nothing exotic, but it has enough endpoints (12) and enough complexity (project scoping, search, pagination) to make the monetization and MCP parts of this series actually interesting. A to-do list API wouldn’t cut it here.
This is a four-part series. After the gateway setup in this post, we’ll cover adding monetization, meters, and plans (Part 2), how to monetize an MCP server (Part 3), and developer portal polish (Part 4).
- You have an existing API deployed somewhere (Vercel, AWS, Cloudflare, etc.) and want to put a gateway in front of it
- You're planning to monetize your API and want to set up the right foundation from the start
- You want to understand how API key subjects and consumer IDs enable customer isolation
Step 1: Importing the OpenAPI spec
Starting from a blank Zuplo project, the fastest way to get going is to import the OpenAPI specification that describes the existing API. This pulls in all 12 endpoints with their verbs, paths, and schema definitions.
After the import, every route’s request handler points at api.example.com/v1,
which is the placeholder from the spec. We need to point these at the real API.
The cleanest way to do this is with an environment variable. In Zuplo’s
settings, create a new variable called BASE_URL and set it to the actual API
URL. Apply it across all environments (working copy, staging, production).
Then update the service URL in any one route to use $env(BASE_URL). Because
Zuplo’s route designer shares the service configuration across routes, this
single change applies to all 12 endpoints.
Environment Variables
Learn more about managing configuration across environments in Zuplo.
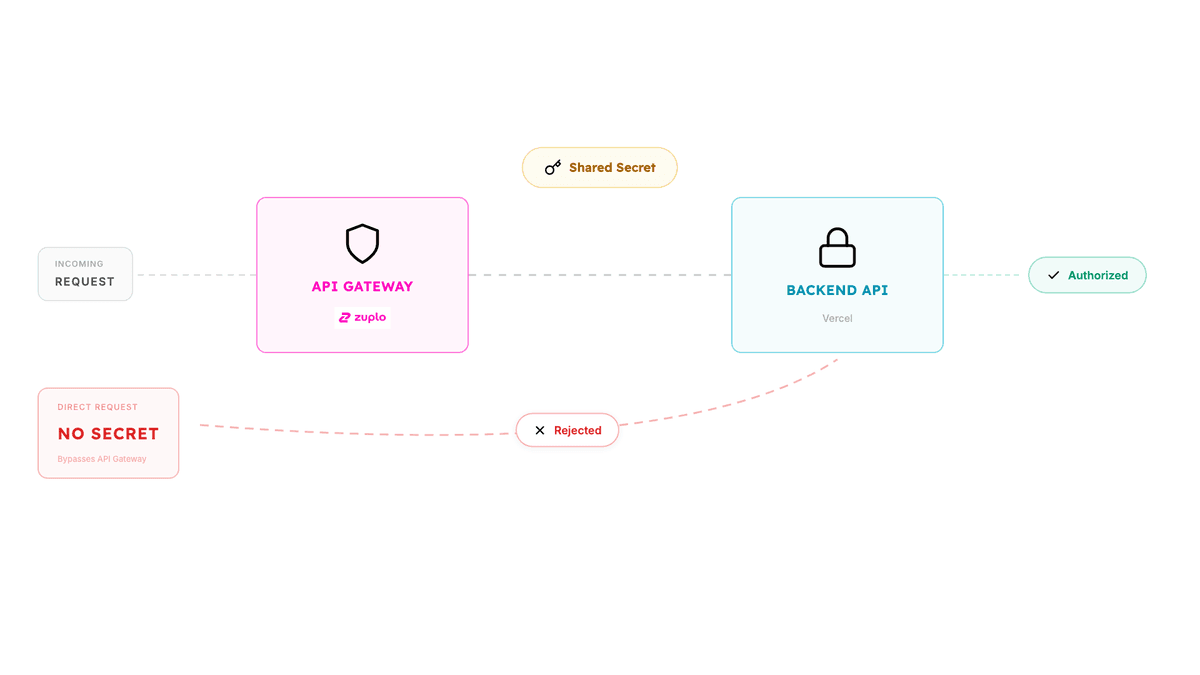
Step 2: Origin authentication with a shared secret
Here’s where the first important architectural decision comes in. The destination Changeloggle API (hosted on Vercel) is publicly accessible. Anyone who discovers the URL could bypass the gateway entirely. We need to lock that down.
The approach: a shared secret. The Changeloggle API checks for an
x-gateway-secret header on every incoming request. If it’s missing or wrong,
the request gets a 401. Only Zuplo knows the secret, so only Zuplo can talk to
the origin.
To implement this, add GATEWAY_SECRET as a secret environment variable in
Zuplo’s settings. Secrets are encrypted and not visible in the dashboard after
creation. We’ll wire this into a custom policy alongside consumer isolation in
the next step.
Step 3: Consumer isolation via API key subjects
With the origin locked down, the next step is making sure every request carries the identity of the consumer making it.
Every API key in Zuplo has a “subject”, which is a unique identifier for the
consumer. When a request comes in with a valid API key, request.user.sub
contains that subject. By forwarding it to the origin as an x-consumer-id
header, the backend can scope all data operations to that specific consumer.
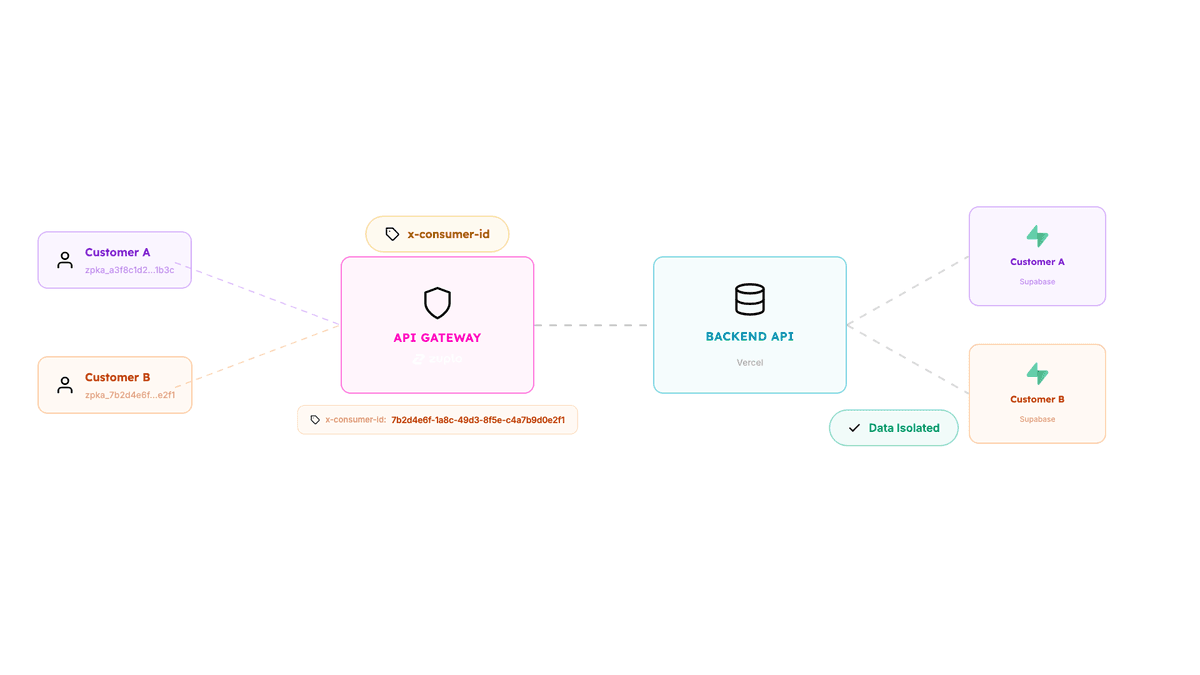
This means each API key can only create and access its own projects and changelog entries. There’s no way for one consumer to read another consumer’s data, because the origin uses that consumer ID as a partition key for all database queries.
To implement both the shared secret and consumer isolation, first add the
built-in API Key Authentication policy to
every route. This handles key validation and populates request.user with the
consumer’s identity. Then create a custom inbound policy that runs after it. In
Zuplo, create a new module called set-request-headers:
The API key policy upstream has already validated the request and populated
request.user, so this policy just sets two headers on the outgoing request to
the origin: the gateway secret for authentication, and the consumer ID for
isolation.
Why does this matter for monetization? When we add metering and plans in Part 2,
Zuplo’s monetization system will handle API key creation and consumer identity
automatically. The request.user.sub value will still be there, and it will
still flow through this same policy to the origin. We won’t need to change this
code at all.
API Key Authentication
Details on API key subjects, metadata, and key management in Zuplo.
Step 4: Rate limiting
Add a rate limiting inbound policy set to 100 requests per minute, keyed by IP address. Apply it to all routes, and make sure it executes before the header-setting policy so abusive traffic is rejected as cheaply as possible.
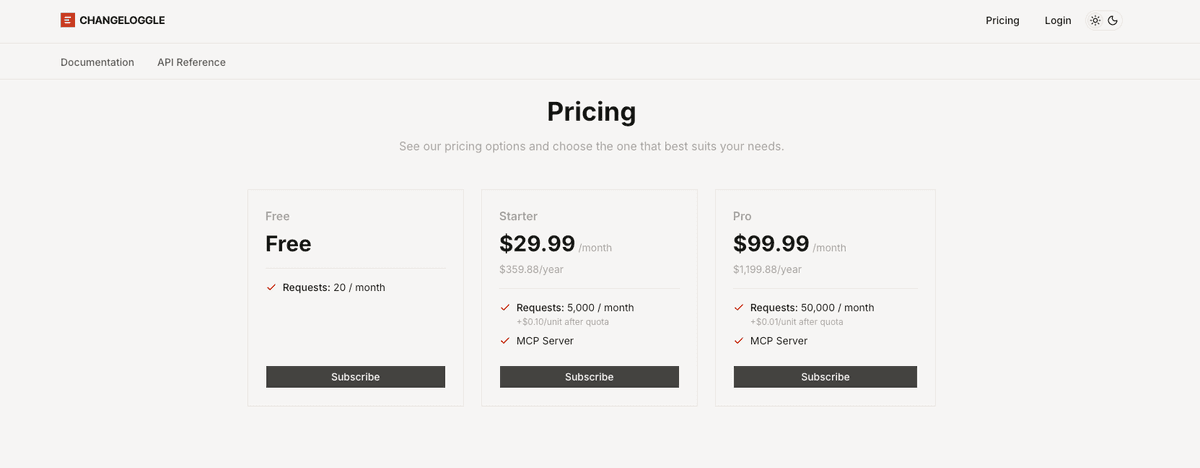
This is distinct from the request limits that monetization adds in Part 2. Request limits are business logic: a free tier gets 20 requests/month, a paid tier gets 50,000. Rate limiting is infrastructure protection: no single IP should be able to send 1,000 requests in a minute regardless of their plan. You need both.
Step 5: Testing end to end
To verify the full chain works, we need a temporary API key. In Zuplo’s API key service, create a consumer with a UUID as the subject. Generate a key for that consumer.
Then make a test request to the create project endpoint with the API key as a Bearer token:
A 201 response confirms the full chain is working: Zuplo received the request, validated the API key, set the gateway secret and consumer ID headers, forwarded it to the Changeloggle API on Vercel, and the origin accepted it.
Note: this API key setup is temporary. When we add monetization in the next post, API key creation and management moves to the self-serve developer portal. Consumers will sign up, choose a plan, and generate their own keys. The manual key service configuration goes away.
What we built in Part 1
At this point, the gateway is set up with:
- All 12 endpoints imported from the OpenAPI spec
- Environment-based upstream URL configuration
- Origin authentication via a shared secret
- Consumer isolation via API key subjects forwarded as headers
- IP-based rate limiting as an abuse backstop
Every one of these decisions was made with monetization in mind. The shared secret locks down the origin. The consumer ID enables per-customer data isolation. The rate limiting sits in a position where it can coexist with per-plan metering. And none of this needs to be rewritten when we add billing.
Next up: monetization
In Part 2, we’ll add metering, create subscription plans (free, starter, and pro), configure the developer portal’s pricing page, and test the full flow of a user signing up, choosing a plan, and making authenticated requests with usage tracking.
- Configure metering on API requests
- Create subscription plans (free, starter, pro)
- Connect Stripe for checkout and billing
- Set up the developer portal pricing page
- Test the full sign-up and usage tracking flow
If you want to skip ahead and see the full monetization product in action, check out the launch post: Monetize Your API with Zuplo.