Every API hits this at some point. One customer’s job runs hot, starts firing thousands of requests a minute, and the rest of your users feel it as slow responses or errors. Nobody did anything malicious. The API just couldn’t tell “one customer ran a loop” apart from “all customers need help”.
That’s the gap rate limiting closes. It tells the gateway how many requests a single caller can make in a window of time, and what to do when they go over. Most APIs need it. Plenty of teams put it off because the literature makes it sound complicated, when the first version is short.
This post is the execution companion to The subtle art of API Rate-Limiting, which covers the design decisions. Here we go from an OpenAPI spec to a working rate limit on a Zuplo gateway, using a todo list API as the running example. Swap the spec for your own and the steps line up exactly.
- You have an existing API and an OpenAPI spec for it
- You don't yet have rate limiting in front of it, or what you have is per-server in-memory
- You want a working setup in under an hour, not a project
Why APIs need rate limiting
Three things go wrong without one, in roughly this order of frequency:
- A noisy customer takes everyone down. A retry loop or an over-eager batch job is enough to saturate a shared backend, and the rest of your users feel it as latency or 5xxs.
- Your API gets scraped or probed. Public endpoints get crawled, brute forced, and tested for vulnerabilities. Without a per-caller cap, an attacker doesn’t have to be clever, just patient.
- Your bill grows in directions you didn’t plan for. Compute, egress, and any downstream LLM or third-party API charge per request. Rate limits put a ceiling on how much any one caller can spend on your behalf.
The fix in all three cases is the same: cap how many requests a caller can make
in a given window, and reject the rest with a 429 Too Many Requests.
How Zuplo’s rate-limit-inbound policy works
Zuplo handles this with the rate-limit-inbound policy. You attach it to a route and configure three things:
rateLimitBy: who shares a counter.user(per API key or JWT subject),ip(per source IP),all(one global counter), orfunction(a custom TypeScript function decides per request).requestsAllowed: how many requests fit in the window. Default1000.timeWindowMinutes: how long the window is. Default60.
The policy uses a sliding window. Zuplo runs in
300+ edge locations and synchronises counts between them,
so a caller who exhausts their limit in London can’t pick up a fresh window by
routing through Tokyo. When a caller crosses the line they get a 429 with a
Retry-After header.
No code, no Redis, no Lua script. The subtle art post covers the strict-vs-async trade-off if you want to dig into the synchronisation.
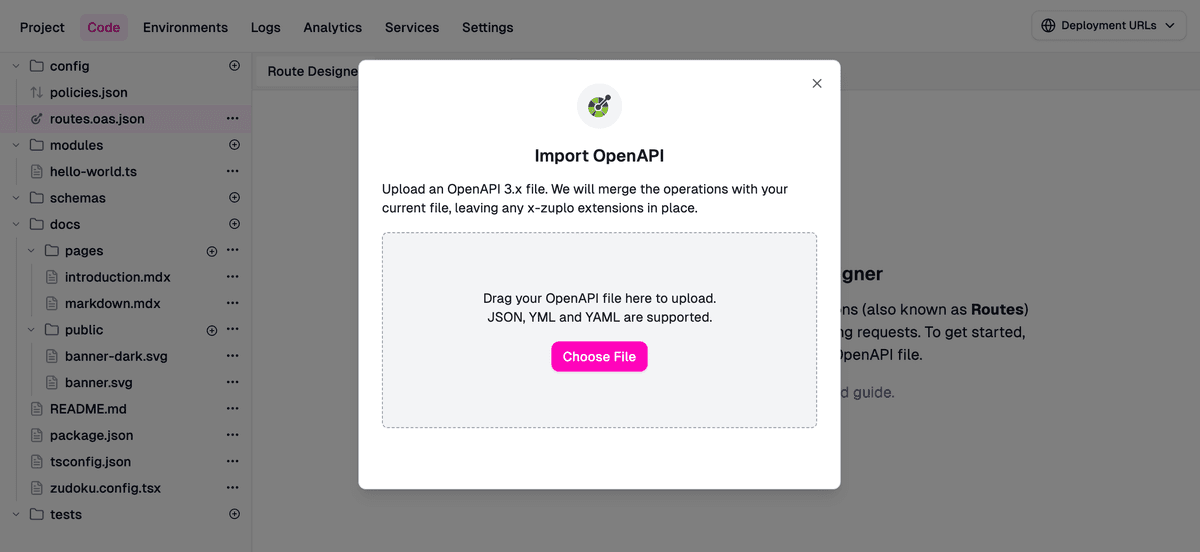
Import an OpenAPI spec into Zuplo
The fastest way to get a Zuplo gateway in front of an existing API is to import its OpenAPI document. Zuplo turns each operation in the spec into a route on the gateway, ready for policies.
For this walkthrough, assume a small todos API:
Sign in at portal.zuplo.com and create a new empty
project. Open config/routes.oas.json and use the Import OpenAPI option to
upload the spec.
Zuplo merges the operations into config/routes.oas.json and keeps any
Zuplo-specific settings on existing routes intact. Each operation becomes a
route with a default URL Forward handler (Zuplo’s term for a passthrough proxy)
pointing at the spec’s servers URL, so the gateway is already proxying
requests to your backend.

Two notes before we add policies. The portal is the source of truth for the JSON config files: edit them in the portal’s code view, hand-edit them, or wire the project to a Git repo so changes flow through pull requests. Either way the portal redeploys on save.
Second, the rate limit policy can sit in policies.json once and be referenced
by name from every route that needs it. No need to define it per route.
OpenAPI Support in Zuplo
How import works, including merge strategies, multi-file specs, and what Zuplo preserves on re-import.
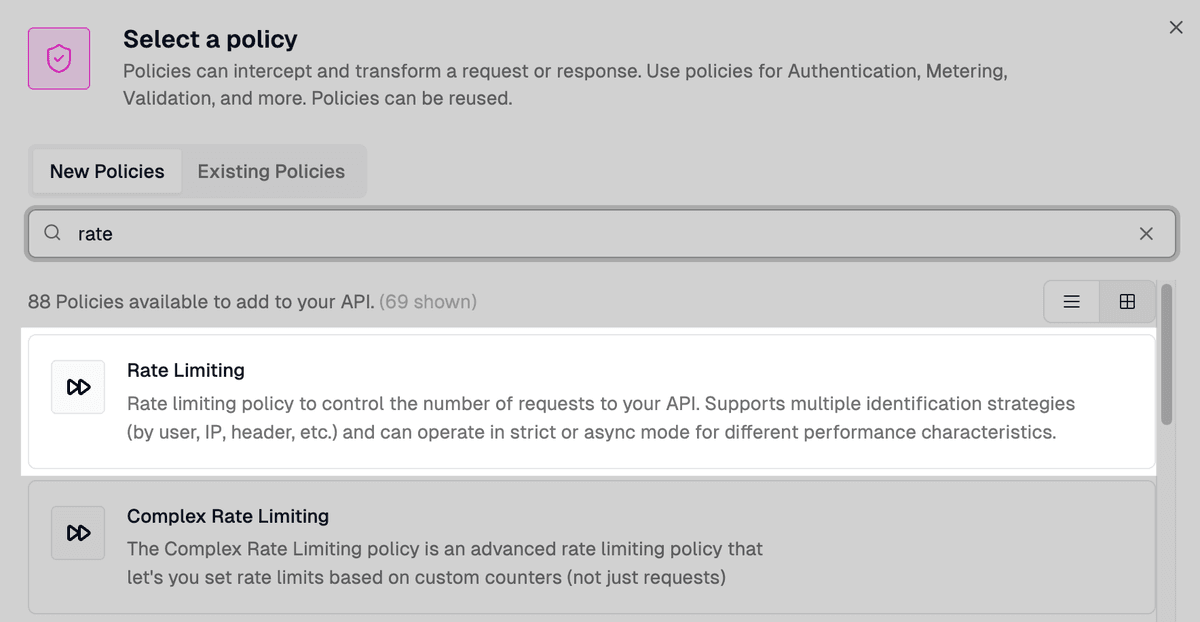
Add the rate-limit-inbound policy
In the route designer (Code > routes.oas.json), pick the route you want to
protect and click Add Policy on the Request side of the pipeline. Search for
“rate” in the picker and you’ll see two variants: Rate Limiting is the one
you want. Complex Rate Limiting is for multi-counter setups, skip it for
now.
When you apply it, the portal opens a configuration dialog with sensible defaults already filled in:
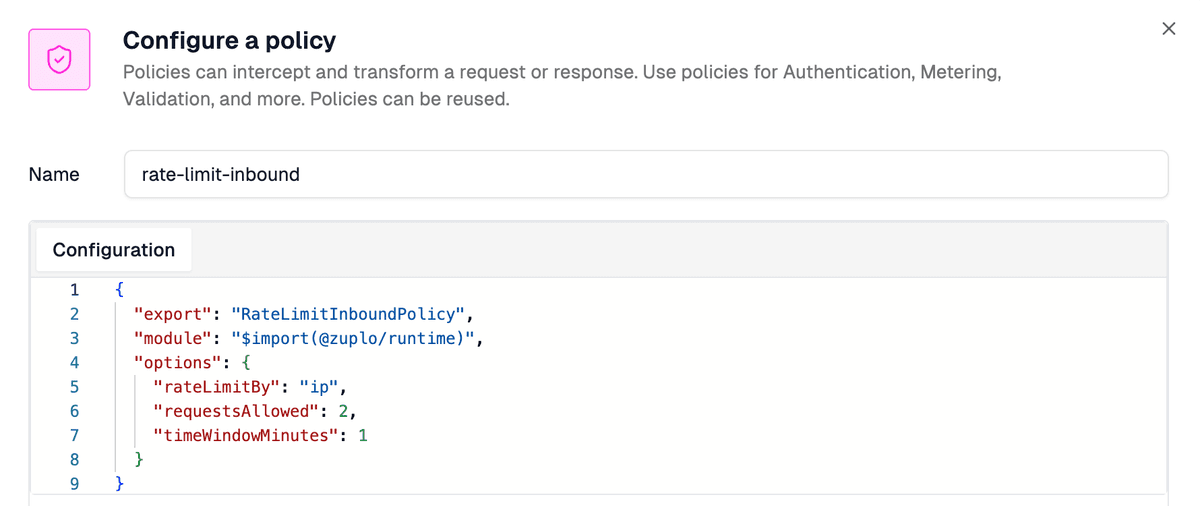
That dialog is what gets written to config/policies.json:
Two requests per IP per minute is deliberately tight so the testing step trips quickly. Loosen it before you point real traffic at the gateway.
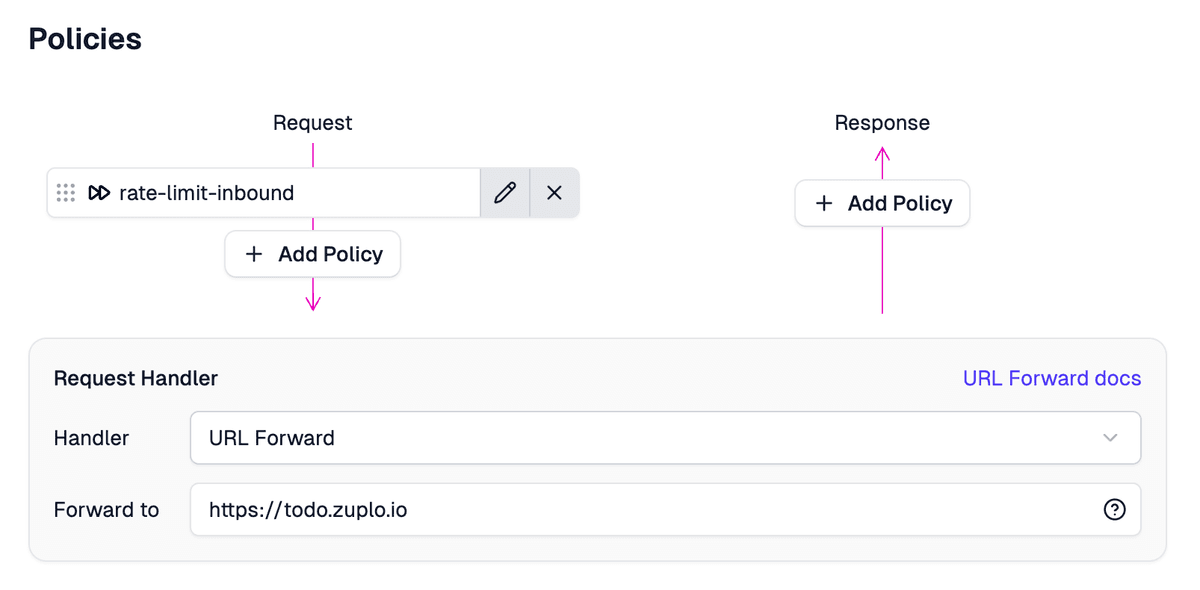
The route in config/routes.oas.json references the policy by name in its
inbound chain:
The portal wires this for you, but it’s worth seeing once so the moving parts are obvious. Reuse the same policy name on any other route that needs the same limit.
Rate Limiting Policy Reference
Full reference for rate-limit-inbound: every option, the function mode, headers, and the strict vs async modes.
Common mistake:
Forgetting to bump requestsAllowed before going to production. The default
of 2 trips quickly during testing, but most APIs want hundreds or thousands.
Test the rate limit
Save and let the gateway redeploy.
The default mode is strict: the gateway waits for a confirmed count before letting each request through, so three rapid curls trip the limit deterministically rather than racing the synchronisation.
Hammer the endpoint from your terminal:
The first two return 200 OK from your backend. The third returns:
The body uses Problem Details, the right
shape for machine-readable API errors. The Retry-After header tells
well-behaved clients when to try again.
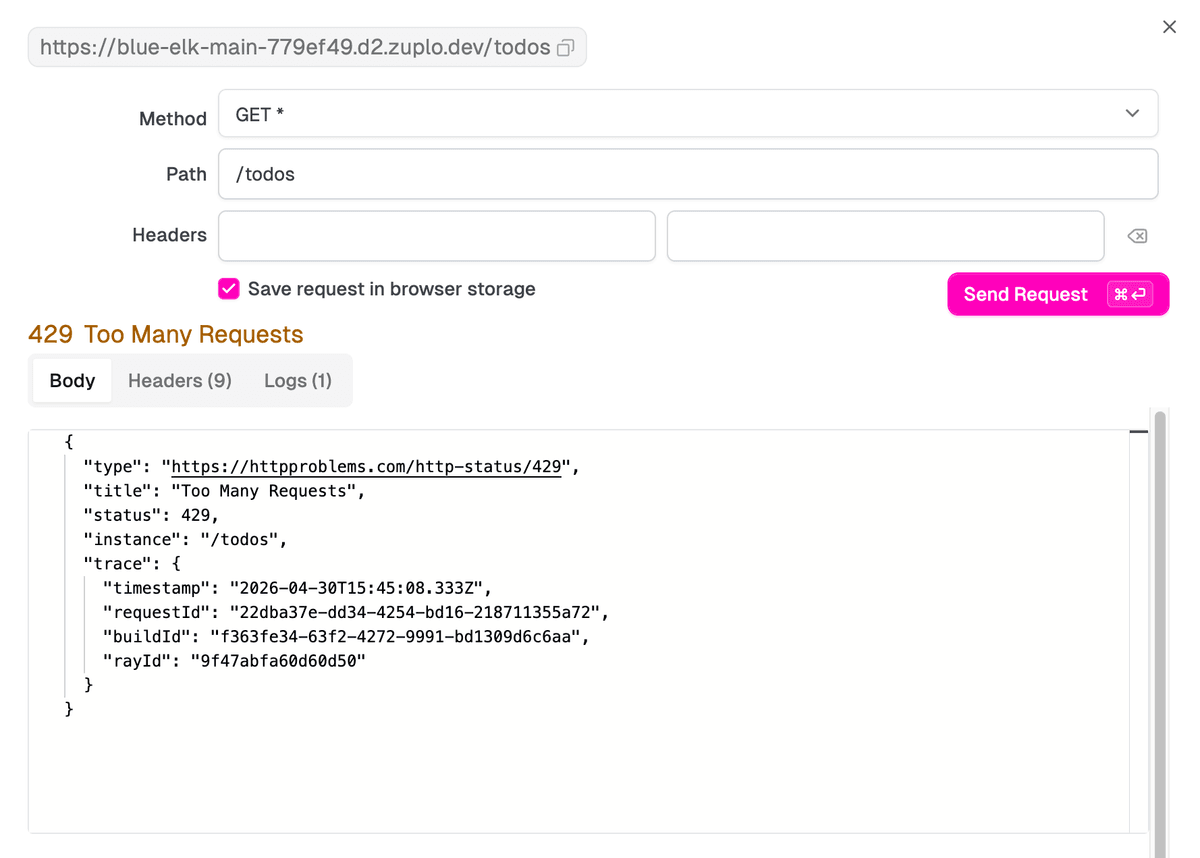
If you’d rather not leave the portal, click Test Route at the top of any route’s configuration panel. The portal opens a request builder, fires the request against your live gateway, and renders the response inline. After three quick clicks of Send Request, you’ll see the same 429 you’d get from curl:
Pick the right rateLimitBy mode
The default ip is the easiest one to test with, but it’s almost never the
right choice for production. Two consumers behind the same NAT or cloud egress
range share an IP, so one customer’s spike rate-limits the other.
In practice, the most common reason teams switch from ip to user after
launch isn’t abuse: it’s a single B2B customer behind a corporate proxy whose
entire team gets rate-limited as one caller.
Better defaults, in order of how often they apply:
user: the right answer for any authenticated API. Zuplo’s auth policies (API key, JWT, OAuth) all populaterequest.user.subwith a stable caller identifier, and the rate limit policy reads that field to give each caller their own counter. Two API keys on the same customer account share a bucket.usermode needs an authentication policy ahead of it on the route, otherwise there’s nosubto group by.function: a TypeScript function returns a grouping key and optional per-request limit overrides, so enterprise customers get higher limits without a redeploy. Covered in Per-User Rate Limiting on Supabase and How to Rate Limit AI Agents Beyond Request Counts.all: one global counter across every caller. Useful for protecting a downstream with a hard total ceiling, like a paid third-party API. Less useful as a customer-facing limit.ip: keep it for genuinely unauthenticated endpoints (signup, password reset, public search). Avoid for anything with a key.
Switching modes is a one-line change. Most production gateways end up with two
policies on the same route: an ip one with a generous ceiling for blunt abuse
protection, and a user one with the real per-customer limit underneath.
Where to go from here
You have a gateway in front of your API with a working rate limit, which covers the basic noisy-neighbor and abuse cases. Natural next steps, in order of how much they shift the design:
- Authenticate first. A
user-grouped rate limit only works if Zuplo knows who the user is. The API Key Authentication policy sits ahead of this one. - Move to dynamic limits. When the limit needs to vary per customer (free vs
pro vs enterprise), switch
rateLimitBytofunctionand read metadata off the API key. - Pair with monetization. Rate limits cap how fast a caller can hit you. To cap how much they consume in a billing period and charge for overage, the Monetization policy layers on top.
If you want the design thinking behind why rate limits look the way they do, The subtle art of API Rate-Limiting covers the trade-offs in depth.