This is Part 4 of the “Building a Monetized API” series, and the final installment. In Part 1, we set up the API gateway. In Part 2, we added monetization with meters, plans, and Stripe. In Part 3, we monetized an MCP server with plan-gated access. Now we’re taking the developer portal from functional to polished: real documentation, a custom theme, and a production-ready layout.
 18:36
18:36Watch the video walkthrough of connecting to GitHub, generating documentation with Claude Code, applying a custom theme, and deploying the finished developer portal.
Where we left off
After three parts, we have a fully functional monetized API. The gateway handles authentication, consumer isolation, and rate limiting. The monetization layer manages meters, plans, Stripe checkout, and self-serve subscriptions. The MCP server is gated to paid plans only.
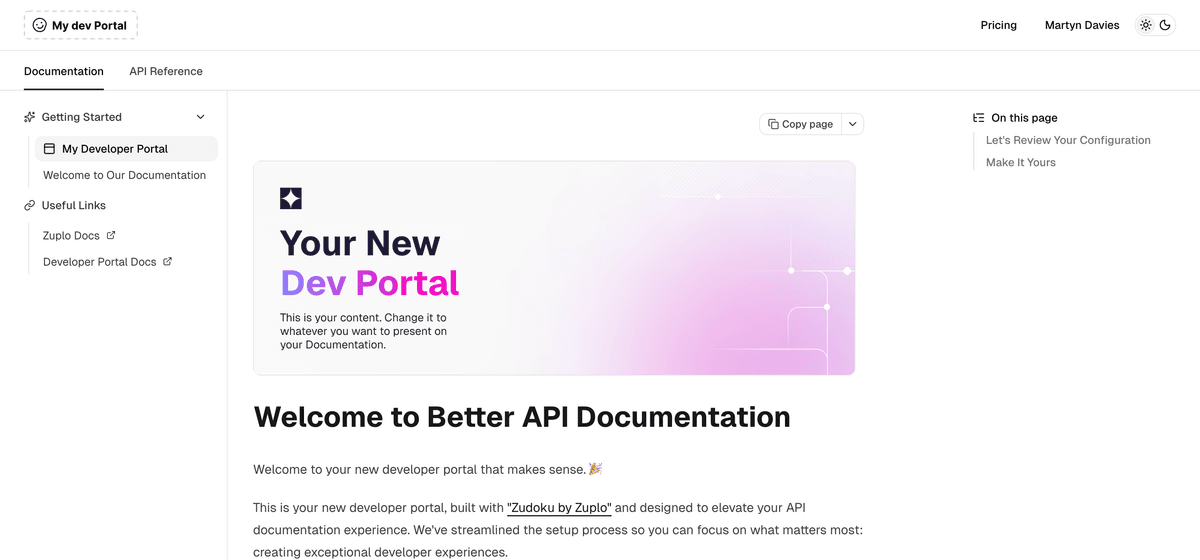
The developer portal already works out of the box. The API reference is interactive, API keys are pre-populated in the playground, and the pricing table shows all three plans. But the documentation section is still the default placeholder content that Zuplo generates when the portal is first created. If we’re asking developers to pay for this API, they deserve proper documentation.
Step 1: Connecting the project to GitHub
Up to this point in the series, all the work has been done directly in Zuplo’s UI. That’s fine for gateway configuration and monetization setup, but for writing documentation we want a proper local development workflow.
In your Zuplo project, go to Code and click GitHub to connect to a repository. You can create a new repository or connect to an existing one. Zuplo will push the entire project codebase as the initial commit.
Once connected, clone the repository locally:
Working on a branch is important here. The main branch maps to your production
environment in Zuplo, and we don’t want documentation drafts going live before
they’re ready.
Source Control
How to connect your Zuplo project to GitHub, GitLab, or other providers for source-controlled deployments.
Step 2: Generating documentation with Claude Code
The Zuplo project contains a docs folder that controls the developer portal
via a Zudoku configuration file. It also has a routes.oas.json file: the
OpenAPI specification for the API. This is the source of truth for every
endpoint the gateway serves.
Rather than writing documentation from scratch, we can use Claude Code to generate it from the OpenAPI spec. This is the first time AI has been used in this series. Everything up to this point has been manual configuration and code.
Open the project in your terminal and run Claude Code with a prompt like:
Use the
routes.oas.jsonas the basis for developer documentation. Create new docs in thedocsfolder using Zudoku best practices. Use the Zudoku documentation at https://zudoku.dev/docs/llms.txt as a reference.
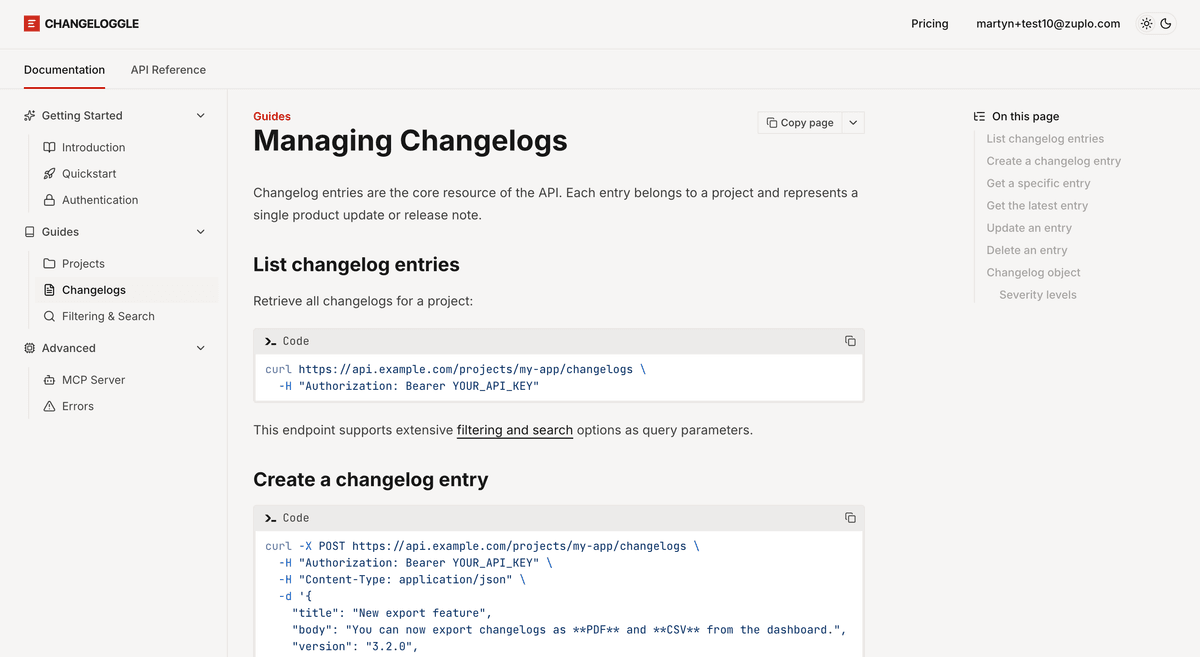
Claude Code reads the OpenAPI spec, understands the API’s endpoints, request and response schemas, and generates documentation pages covering:
- An introduction and quickstart guide
- Authentication details
- Guides for each major resource (projects, changelogs)
- Filtering and search documentation
- Advanced topics like the MCP server and error handling
This took about four minutes and produced seven documentation pages. Claude also updated the Zudoku config to set the correct title, metadata, and navigation structure, and changed the default landing page from the API reference to the documentation section.
Dev Portal Configuration
Reference for the Zudoku configuration file that controls your developer portal's structure, metadata, and navigation.
Step 3: Applying a custom theme
The default developer portal looks clean, but if you’re shipping a product, you want it to match your brand. Zudoku supports shadcn/ui themes, which means you can apply any compatible theme with just a URL.
For this project, we used a theme from tweakcn with bold colors. In the same Claude Code prompt (or a follow-up), you can ask it to apply the theme by providing the URL. Claude adds the CSS variables to the Zudoku config, and the entire portal picks up the new color scheme.
You can also generate a logo. We had Claude create a simple SVG with the service name to replace the default “My Dev Portal” text in the header.
Theme Customization
Customize your developer portal's colors, typography, and styling with shadcn themes and custom CSS.
Step 4: Previewing locally
Before pushing anything, preview the changes locally. Install the project dependencies and start the Zudoku dev server:
The portal runs on localhost:9200. Check each documentation page, verify the
navigation structure, and make sure the API reference still looks correct
alongside the new content.
One thing to watch for: Claude may duplicate page titles in the sidebar navigation (the page title appearing both as the nav label and as a heading inside the page). If that happens, a quick follow-up prompt fixes it.
Local Development
Set up local development for your developer portal with live reloading.
Step 5: Pushing to GitHub and preview environments
Once the documentation looks right locally, commit and push the branch:
Back in the Zuplo UI, go to the Environments tab. A new preview environment
has automatically been created for the docs branch. This is one of the
powerful aspects of connecting to source control: every branch gets its own
deployed environment with a unique URL.
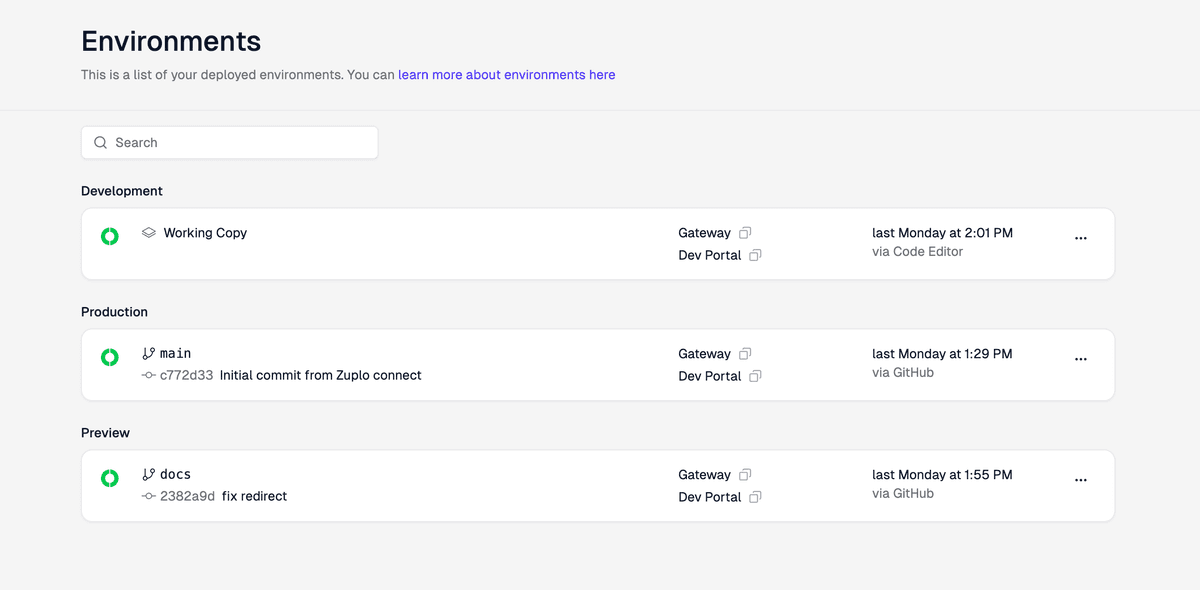
The preview environment builds and deploys the portal with the new documentation. You can share this URL with teammates for review before anything touches production.
Note that the preview environment has its own monetization configuration. The meters, plans, and Stripe integration you set up on the working copy don’t automatically carry over to preview environments. This is by design: you can experiment with different monetization setups across environments without affecting production.
Environments
How Zuplo's development, preview, and production environments work with branch-based deployments.
Step 6: Syncing back to the working copy
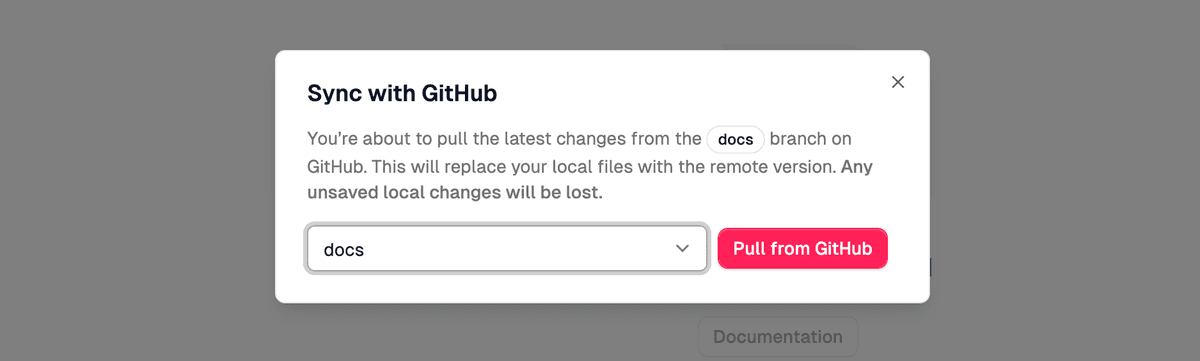
The preview environment confirms the documentation looks great. Now we need to get those changes back into the working copy, which is where all the monetization configuration lives.
In the Zuplo UI, go to the Code tab and switch to the working copy. Open the
Sync with GitHub dialog by clicking the GitHub button at the bottom of the
editor, or with the keyboard shortcut Cmd+Shift+P. Select the docs branch
and click Pull from GitHub. This merges the documentation and theme changes
into the working copy without disturbing any of the monetization, metering, or
environment variable configuration.
Once the working copy rebuilds and redeploys, everything is unified: the API gateway, the monetization layer, the MCP server, and now a fully documented, custom-themed developer portal.
The finished developer portal
With all four parts complete, the developer portal now includes:
- Documentation: seven pages of generated content covering quickstart, authentication, resource guides, and advanced topics. The MCP server page even notes that access is restricted to paid plans, pulled directly from the project configuration.
- API reference: the interactive reference that was already there, with the API playground and pre-populated API keys.
- Pricing table: the three plans (Free, Starter, Pro) with self-serve subscription management.
- Custom theme: branded colors and a logo that make it look like a real product, not a template.
What we built across the series
Across four parts, we built a complete monetized API product:
- Part 1: API gateway with origin auth, consumer isolation, and rate limiting
- Part 2: Monetization with meters, plans, Stripe integration, and self-serve subscriptions
- Part 3: MCP server with plan-gated access for paid subscribers only
- Part 4: Source control, generated documentation, custom theme, and a production-ready developer portal
This is everything you need to take an API from “deployed somewhere” to “something developers can discover, evaluate, subscribe to, and pay for.” The gateway handles the infrastructure. The monetization layer handles the business logic. The developer portal handles the experience.
Where to go from here
There’s a lot more you can do with monetization and developer portal customization beyond what this series covered. A few ideas:
- Custom pages: add a landing page, changelog, or migration guide to the developer portal using Zudoku’s MDX support.
- Webhooks: notify your backend when a subscriber upgrades or cancels, so you can trigger provisioning workflows.
- Analytics: use the metering data to understand which endpoints get the most traffic and optimize your pricing accordingly.
- Feature flags: gate additional API capabilities beyond the MCP server by adding more boolean features to your plans.
Check out the monetization documentation for the full range of what’s possible. And if you have questions or need help getting this set up for your own API, get in touch. We’d love to hear what you’re building.