The MCP Gateway runs a wizard to build the virtual server; after that you add environment variables, connect a client, and watch the calls land. Get one thing straight first: there are two auth layers. Inbound auth controls who connects to the gateway, upstream auth controls how the gateway reaches Linear.

- Platform and IT teams governing the MCP servers employees already use
- Anyone who wants the Gateway without touching a config file
- Teams that need to strip risky tools out of a third-party MCP server
1. Add a virtual MCP server route
Start in a Zuplo project and open the Code tab. Click Add Route and pick MCP Gateway Virtual Server. That route type fronts one upstream MCP server, putting it behind your own auth and tool policy, and hands you back a governed Gateway URL. Every other MCP server you want to govern gets its own route the same way.
MCP Gateway Quickstart
The same flow written out, with the local-dev path and every field documented if you want to follow along in text.
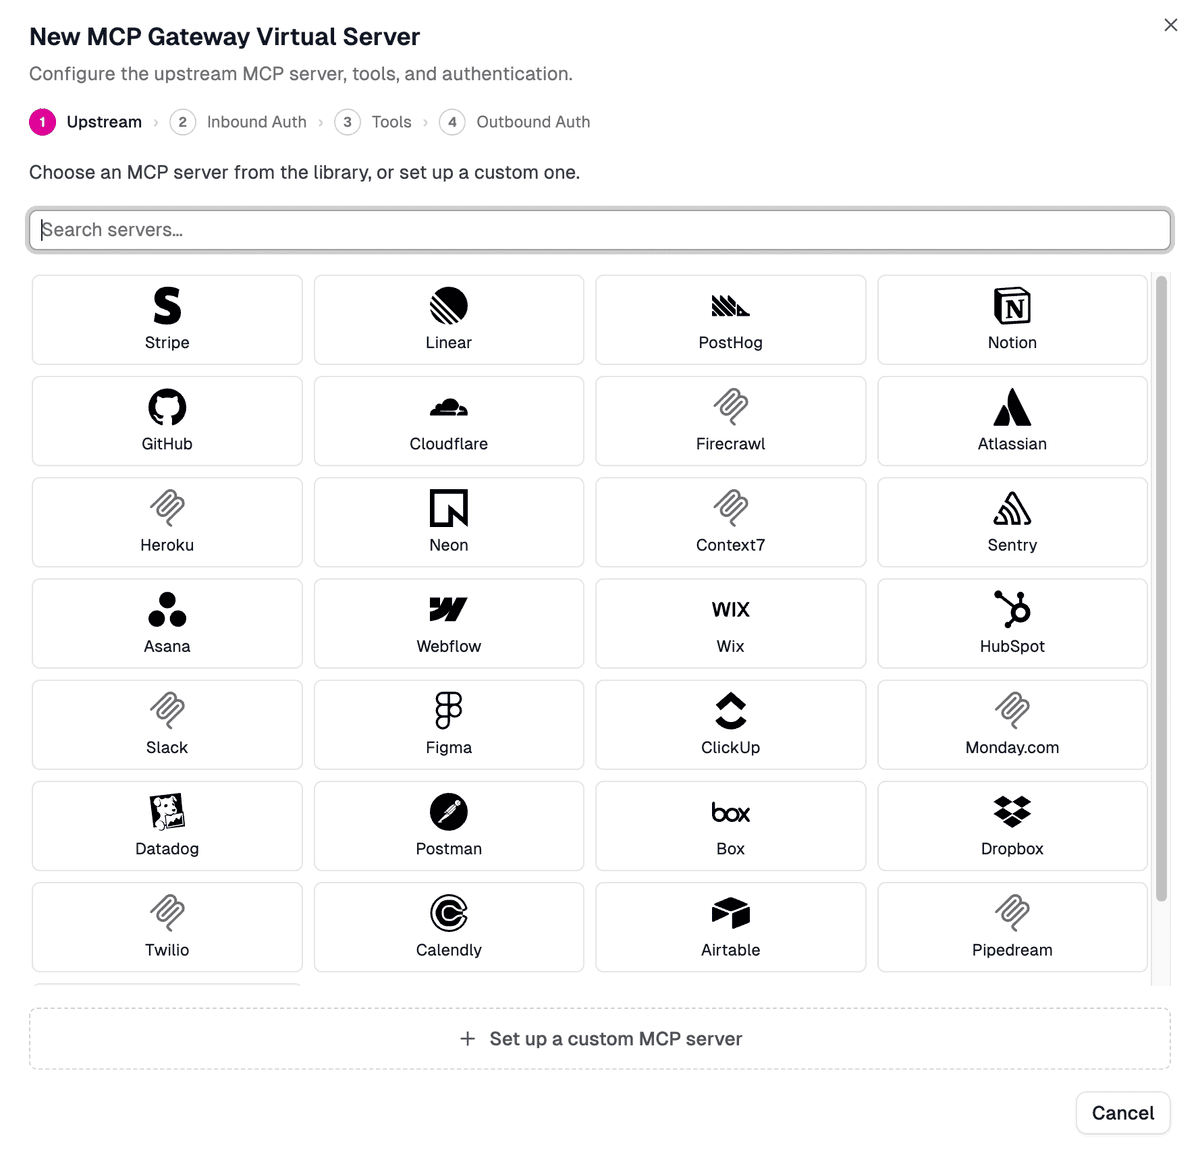
2. Pick an upstream from the library
The wizard opens on a grid of predefined MCP servers Zuplo already knows about: Stripe, Linear, GitHub, Notion, PostHog, and more. Select Linear (or whichever server you want to work with).
Picking from the library prefills the name, the upstream MCP URL, and the path
the server will live at (/mcp/linear-v1 by default). Change the path to
whatever you want.
3. Set inbound authentication with your identity provider
Click Next and choose how end users prove who they are before they reach the server. If your organization runs single sign-on, this is where it plugs in: Auth0, Okta, WorkOS, Entra, Google, and the rest of the OIDC presets each have a setup guide. The same login your team already uses now gates the MCP server too.
Select Auth0. The wizard names the inbound policy and tells you which environment variables it needs. Note the names down; you’ll add the values once you’ve finished the wizard.
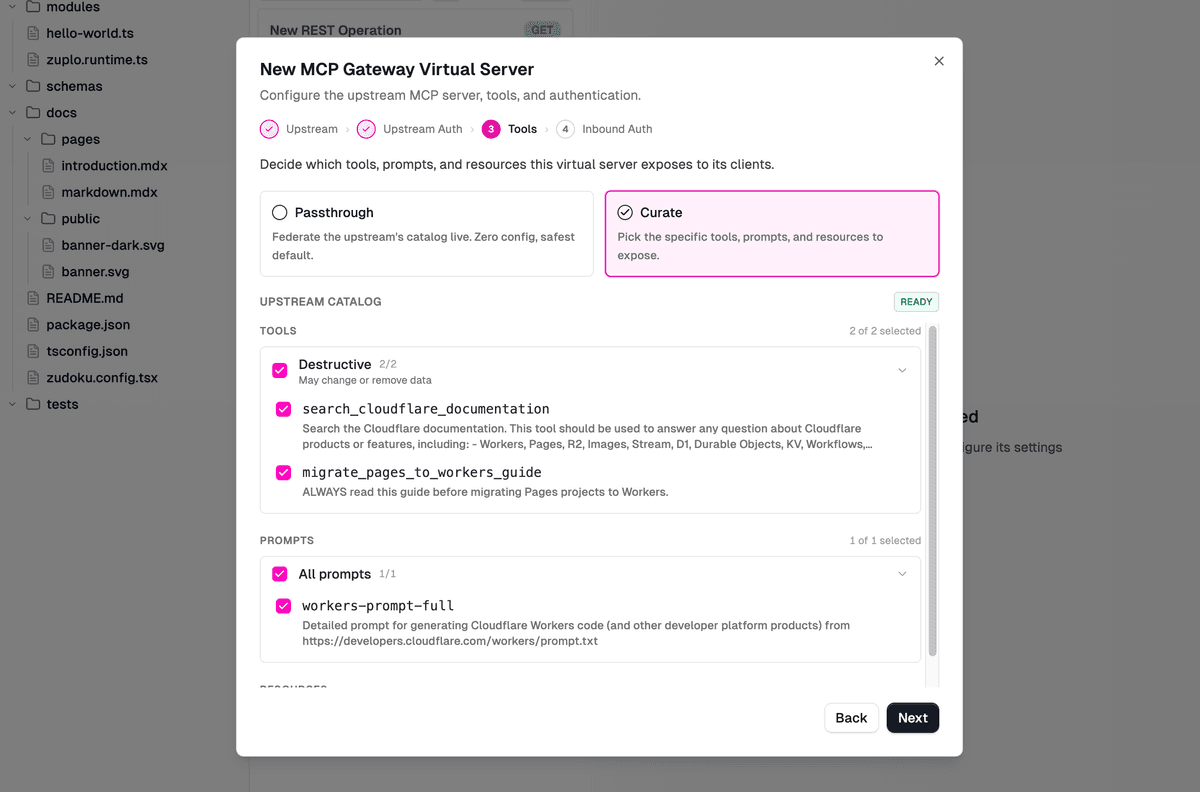
4. Curate the tools you expose
Click Next to decide what the upstream exposes downstream. Two options:
| Option | What it does |
|---|---|
| Passthrough | Every tool, prompt, and resource the upstream exposes flows straight through, untouched. |
| Curate | The Gateway lists everything the upstream offers and you tick exactly what to expose. |
Passthrough is fine when you trust the upstream completely. Choose Curate for control. The Gateway groups the tools by what they can do, so Linear’s catalog splits into read-only tools, safe write tools, and destructive tools. Switch the destructive ones off and they never reach the client.
We front Linear, Stripe, and Notion this way internally, and stripping the destructive tools is the first thing I do on every new upstream.
Pro tip:
Curating out destructive tools is the cheapest guardrail you’ll set up all week. The LLM physically cannot call a tool the virtual server doesn’t expose, so there’s no prompt-injection path to a tool you’ve filtered.
5. Choose how the Gateway authenticates upstream
Click Next for the last step: how the Gateway talks to Linear on the user’s behalf. Pick the model that matches the upstream.
| Upstream auth | When to pick it |
|---|---|
| OAuth | The upstream speaks OAuth, like Linear. Leave registration on Dynamic and the Gateway registers itself. |
| API key | Custom or partner servers that hand out keys instead of running an OAuth flow. |
Linear is OAuth, so leave it selected, keep Dynamic registration, and click Finish. Nothing here is manual.
You’ll see the request chain Zuplo built: authenticate with Auth0, call the Linear upstream, filter out the tools you dropped. Click Save to deploy.
6. Add your identity provider’s environment variables
Before anyone connects, Auth0 needs its credentials. This assumes you already have an Auth0 application; if you don’t, create one (a standard web app is fine). Open the inbound policy to see the three variables it expects: the Auth0 domain, client ID, and client secret. Grab those from your Auth0 application’s settings.
In Zuplo, go to Settings, then Environment Variables, and add the three. Saving redeploys the environment so they’re live. If you don’t have access to the Auth0 project, this is the step to hand to whoever does.
Common mistake:
The wizard shows the variable names, not the values. Skip this step and the connect flow fails at the Auth0 screen with nothing obviously wrong in the config. Add the values, let the redeploy finish, then connect a client.
7. Connect the Gateway from your MCP client
Back in the Code tab, copy your project’s Gateway URL (shown at the top of
the route view) and append the route path (/mcp/linear-v1) to get the full URL
clients connect to. Then, in Claude:
- Open Settings, then Connectors, and choose Add custom connector.
- Name it, paste the URL, and click Add. Claude reports you’re not connected yet.
- Run the connect flow. It walks you through Auth0, you authenticate, and Zuplo asks you to authorize access to the Linear upstream.
- Approve it.
The connector now lists exactly the tools you curated: read-only and safe write, with the destructive ones absent. Ask Claude “what is my latest ticket?” and the call routes through the Gateway.

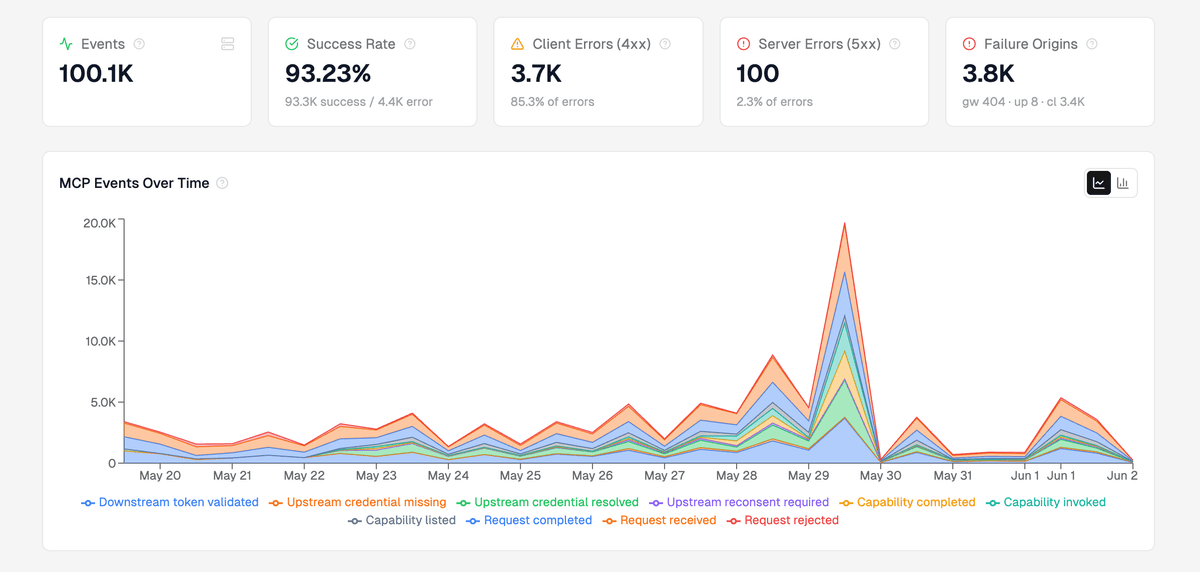
8. Watch every tool call in MCP analytics
Back in the portal, open the Observability tab and select Analytics → MCP. Every call you just made shows up: total events, the top capabilities (list issues, in this case), the top users, success rates, and any upstream errors. With a team connected, this is where you see which tools get used, by whom, and how often: the visibility that was missing when everyone wired up their own MCP servers in the shadows. It sits next to the Agents analytics we shipped in May.
Going from Development to Production
The wizard doesn’t say so, but everything you just built lives in your Working Copy, Zuplo’s development environment. Saves deploy instantly, which is exactly what you want while you’re testing the gateway and running the connect flow. It’s not where production agents should point.
For production we recommend two changes. Connect source control so deployments come from a git branch instead of portal edits, which gives you review, rollback, and the preview environments that sit between Working Copy and production. Then put the gateway on a custom domain, so the URL you hand to clients is one of yours rather than a generated dev hostname.
Zuplo Environments
How Working Copy, preview, and production environments differ, and how source control drives deploys to each.
That’s one server. Add a route for every other MCP server your team touches, custom and partner servers included, and each gets the same auth, curation, and audit trail.
The MCP Gateway is in public beta on every plan, the free tier included, so there’s nothing to wait for. Spin up a free Zuplo project and front your first MCP server today.